Sometimes in design and home decor, you don’t need to do a complete overhaul in a room to get a new look. Sometimes just changing one or two things will give you the fresh new look you’re craving. I have just the spot in our kitchen that I’ve been contemplating changing up for a while now. And, this last week, I finally did it. Here’s the before.
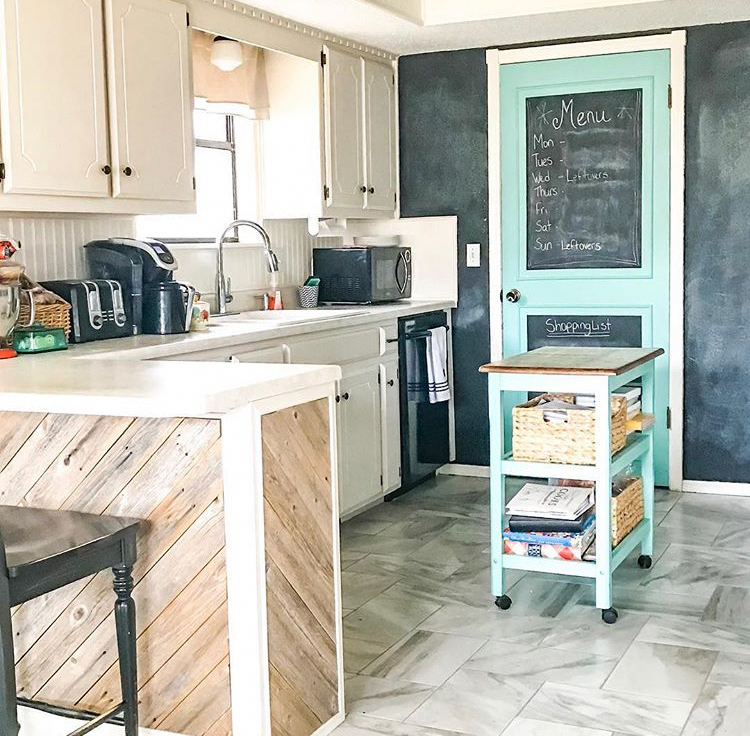
I have loved this look for a long time. And every time I share this pic or a similar one on Instagram I get so many compliments on the door color and the chalkboard wall. But, I have to say, I was growing a little tired of it.
There are times when we get tired of decor am I right? Sometimes it’s out of our budget to change it, but sometimes it just requires a little bit of time and a little bit of paint.
I started by painting and re-staining the little kitchen “island” cart. Hubby found this piece at a garage sale several years ago for $10 and I never knew how much I needed it until I had it! Our kitchen is pretty good size, and this is a perfect little in between spot.
When he brought it home it was your basic yellow pine butcher block cart. You can see the before by checking out this post.
I painted it this pretty turquoise color from my paint stash, and stained the top with a stain I had on hand. I loved the color (which was already on the door by the way), but I never really cared for the stain. It didn’t really match any of the other wood in the room, but like I said, it was what I had on hand so I lived with it.
For whatever reason I was just over the turquoise and I really just wanted to neutralize the room a little more. So, I went with basic black.
Some affiliate links used for your convenience. See disclosures for more details.
I actually used Sherwin Williams Tricorn Black and I love it. Because it was a smaller piece, I only purchased a sample pot and it was plenty to cover the piece with two coats. And I stripped, sanded, and re-stained the top with Weathered Oak – one of my favorites – to make it blend better with the reclaimed wood on the ceiling and the peninsula.
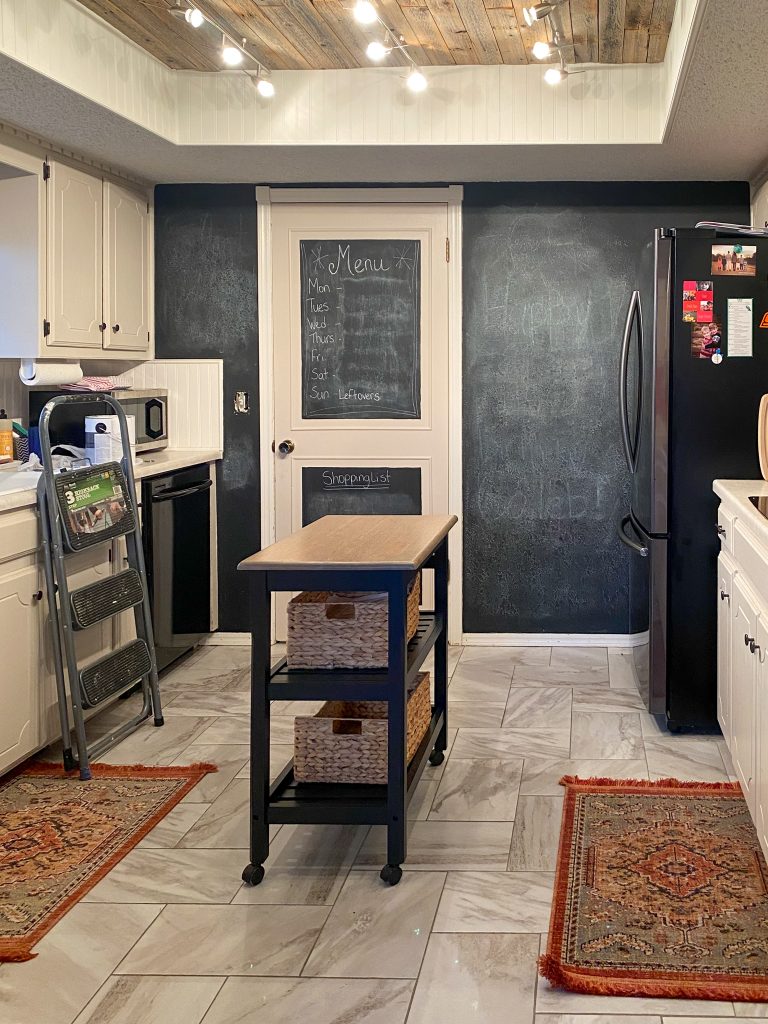
I knew I also wanted to get rid of the turquoise on the door, but I just couldn’t settle on a color. I also was considering painting over the chalkboard wall, but I was having trouble letting it go. Not sure why because I hardly ever use it! I decided first to try the cabinet paint color on the door and man was that a mistake.
For some reason it read really peachy on that door. I think a combination of the lighting and the black chalkboard around it. But, that was a hard no.
So, then I was back to trying to pick a different color. Did you know design can be this way?? Yep, sometimes it’s just simple trial and error. I got a brilliant idea to also get rid of the chalkboard wall, and replace it with the wallpaper I used in my laundry room. But, of course I didn’t have quite enough left over, it’s discontinued, and I couldn’t find any more anywhere. So, again, back to square one.
Finally I settled on another plan, and got to work. I painted over the chalkboard wall with the same white I have all over the rest of the house. I painted the door black (the same Tricorn Black that I used on the cart – another sample pot). I even painted over the chalkboard on the bottom of the door.
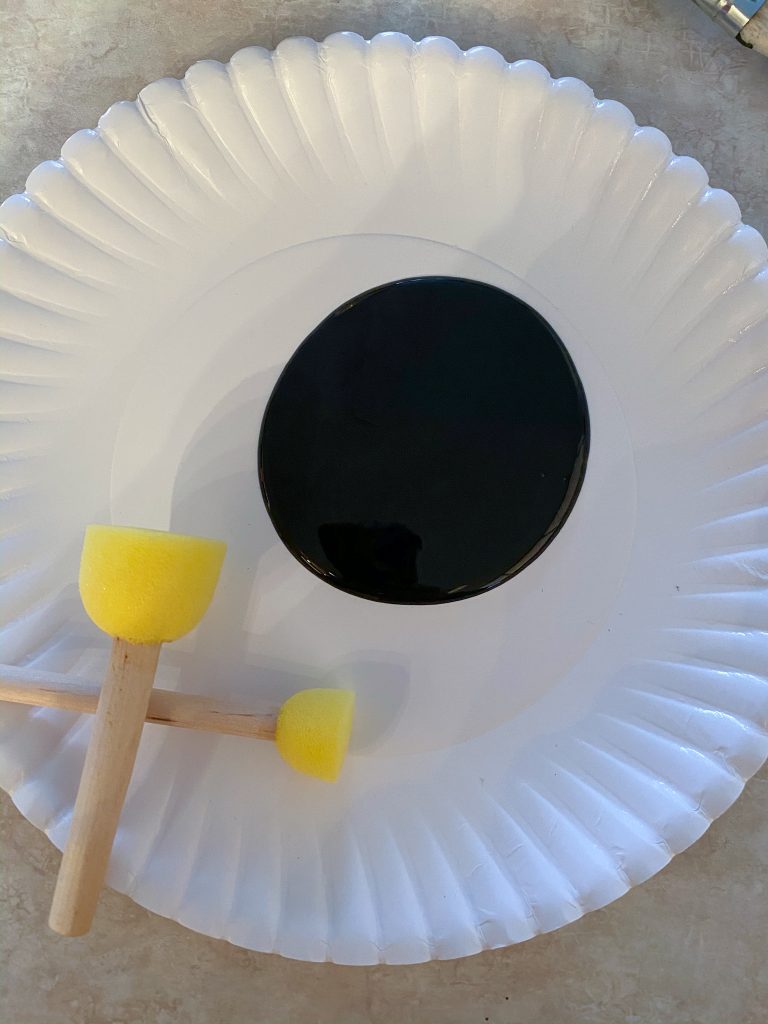
And, then I decided to add some random polka dots. Polka dots really are my favorite. 🙂 I used more of the Tricorn Black and these foam dobbers.
I wisely started behind the fridge, knowing that if I didn’t like it I could paint over it, and if it wasn’t quite right no one would see it – just an overall great place to practice haha.
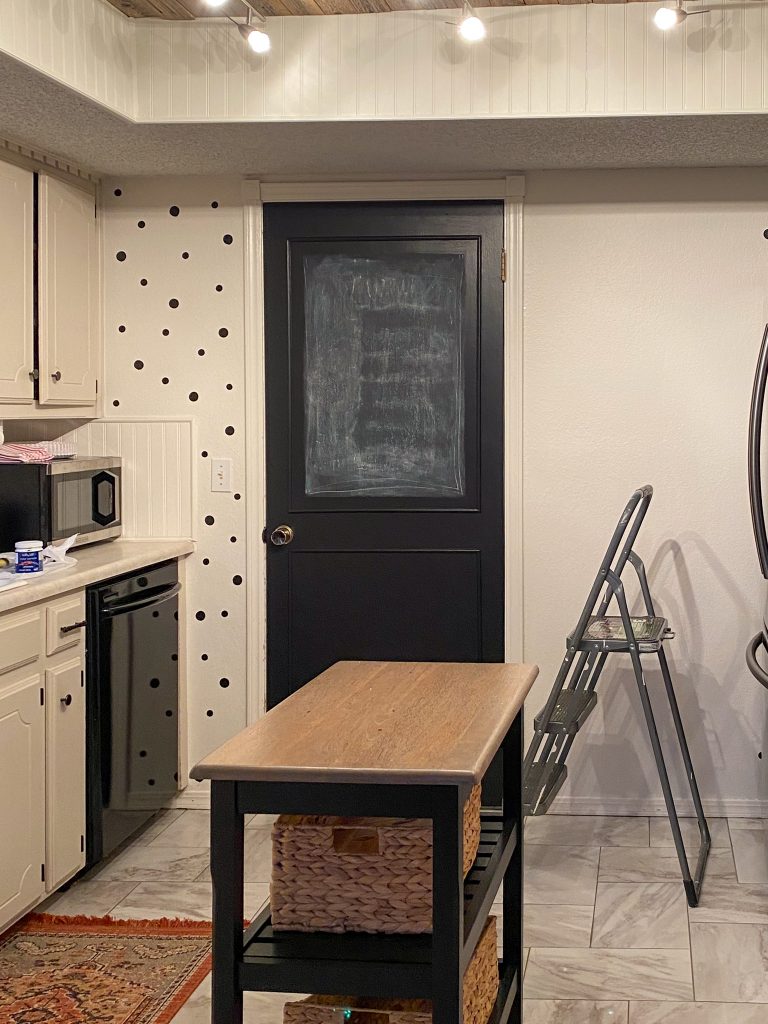
When I finished my practice spot, I stepped back and I was in love!! So, I pushed the fridge back in place and finished the rest of the wall.
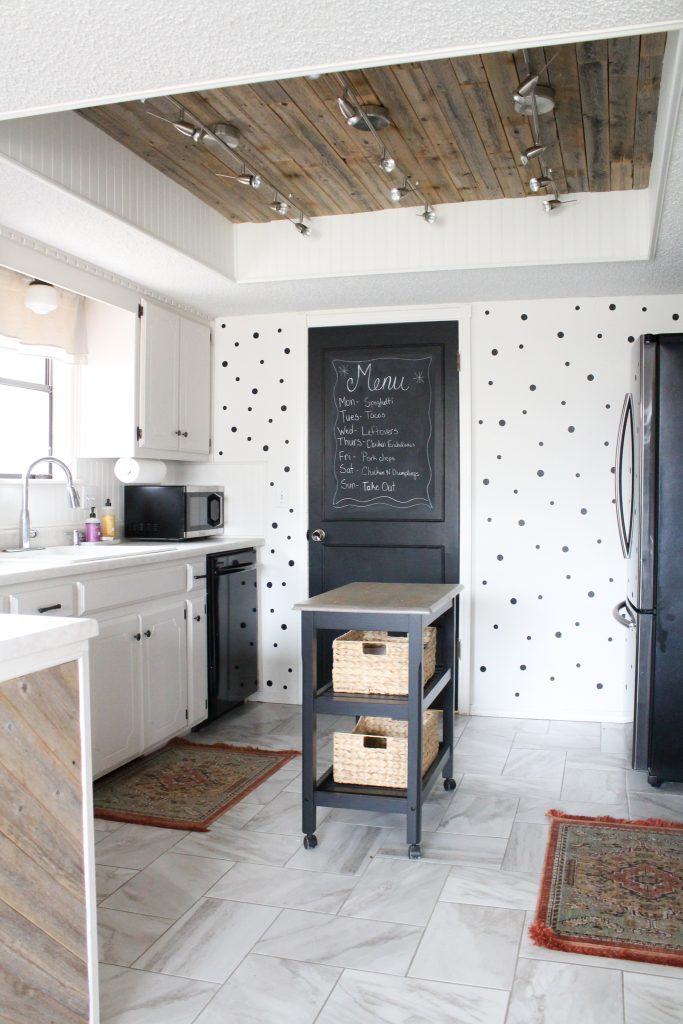
Now, all I was left with was what to do with the one little chalkboard square that was left on the door. I knew I wanted to keep it. I like having the menu up (when I meal plan that is). My dilemma was, my original idea was to paint the chalkboard green – like the original old chalkboards. I even ordered the paint from Amazon. However, when I opened the can…it was very bright….and I chickened out.
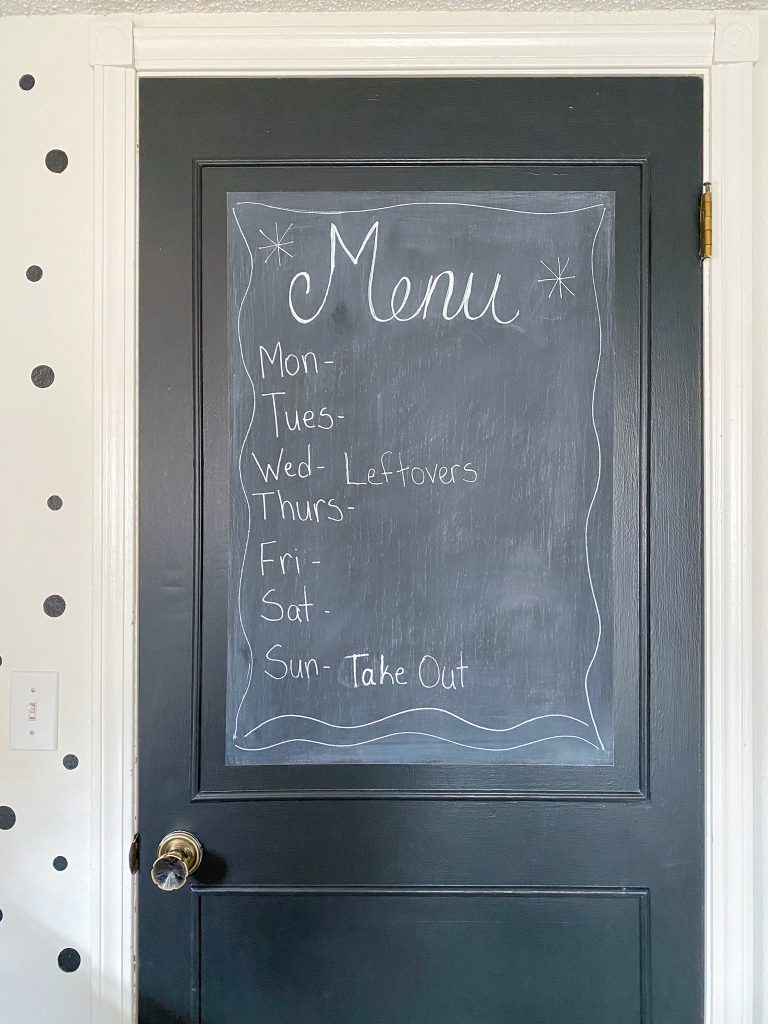
To be honest I talked myself out of it. Like I said earlier, one of the reasons I decided to change things up was to neutralize the space of color a bit. So, painting a bright green chalkboard square on the door just didn’t make sense. So, I’ll save that paint for another project on another day. (black chalkboard paint)
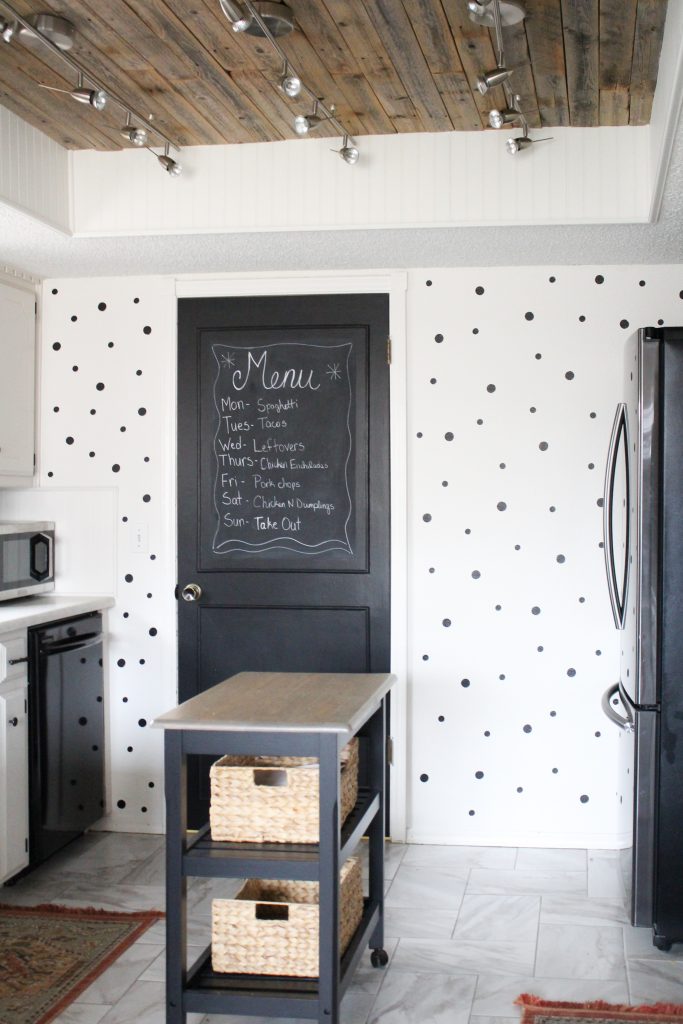
I’m super happy with the outcome! It really brightens up the space, and I get to keep a little whimsy and character also!
Is there a spot in your home that you could change up with less than $50 and a day?? I challenge you to give it a try!


What a beautiful little kitchen, Denise! First of all, I absolutely love the island cart and think that is such a clever idea! Do you have any posts or suggestions about how to paint cabinets? I would love to see a cabinet painting tutorial from you. I had my kitchen cabinets redone by a local cabinet refinishing company and they did a good job, but I want to go the DIY painting route for my bathroom cabinets this year and would love your advice! 🙂
Thank you Sarah! You are too sweet! Here are a couple of posts about the kitchen cabinet painting process. https://frazzledjoy.com/painting-tips-and-kitchen-progress/
https://frazzledjoy.com/kitchen-cabinet-update/
I’m not a professional by any means, and I skip a lot of steps that other people usually do, and I use some cheaper products. But, I painted these cabinets 6 years ago and they have held up great! Please feel free to email me with any specific questions you might have at denisegwood72@gmail.com
I really like the black door! Would have never thought of dots – fun!
Thanks so much Sharon!!