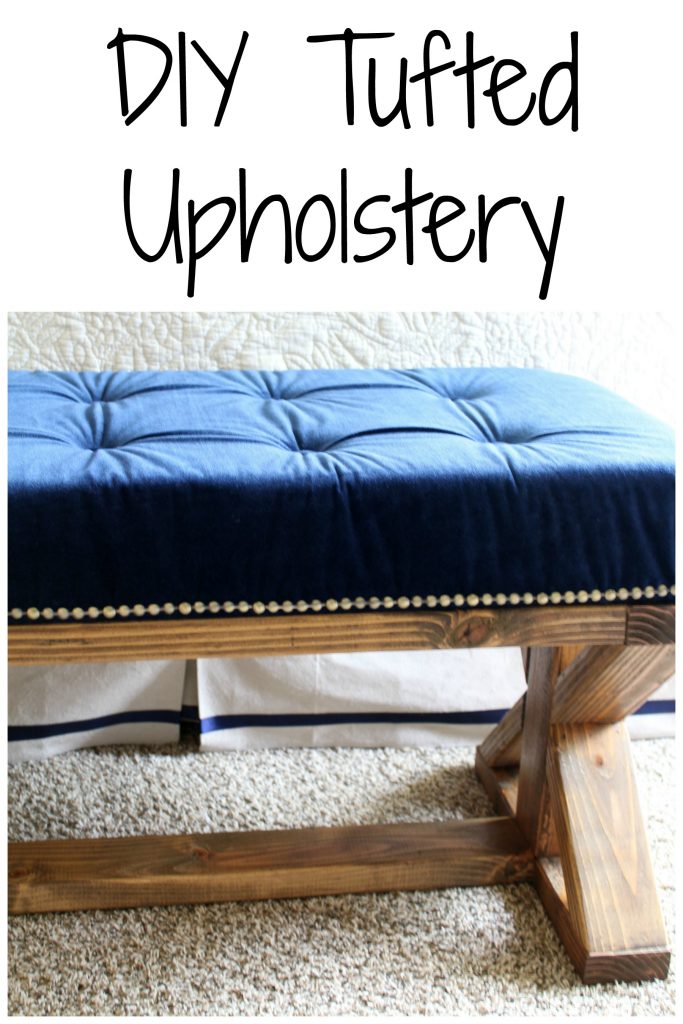
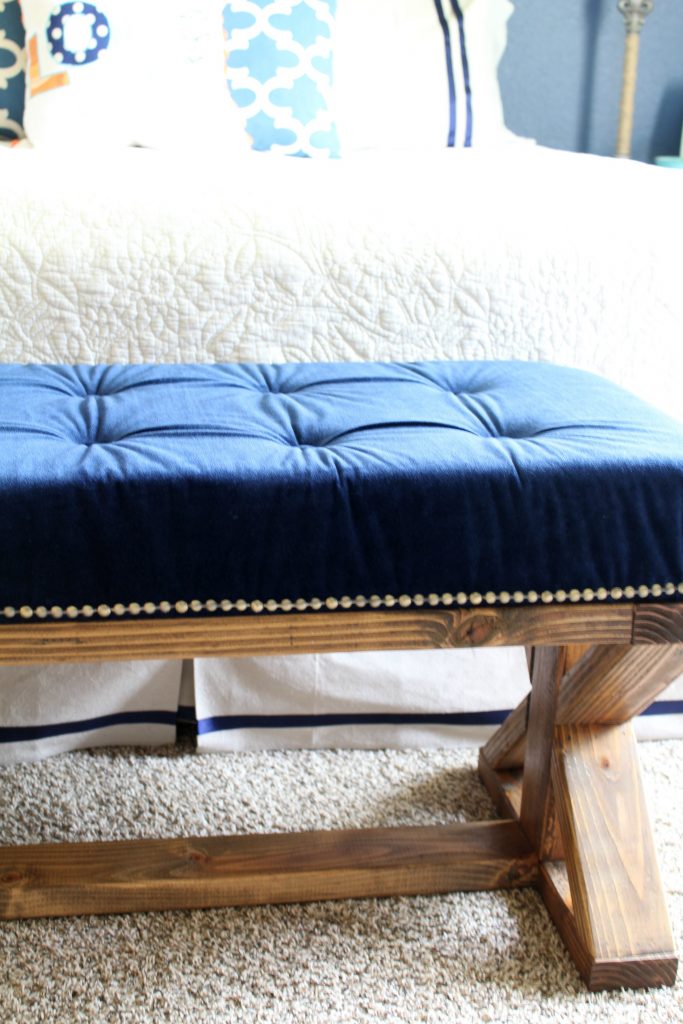
I’m back today to share with you how I upholstered the top of our 2×4 farmhouse style bench! I have always wanted to try tufted upholstery, but was a little intimidated by the look. I decided to give it a go on something small – our new bench. It was definitely a two-person project (at least the actual upholster part), but it wasn’t as hard as I thought it might be.
I didn’t take a ton of pictures. That’s what I do sometimes when I’m unsure how something is going to turn out…I get to doing and I forget about the blogger side of taking pics. For shame I know. But…I followed these details instructions here, which should fill in any of the gaps my photos might leave.
First step is to decide where you want you buttons to be. If you are working on a larger space then you will want to offset your button placement, but since my surface was so small, I decided to keep them lined-up. Once you have decided spacing and placement, mark your wood, and drill your holes.
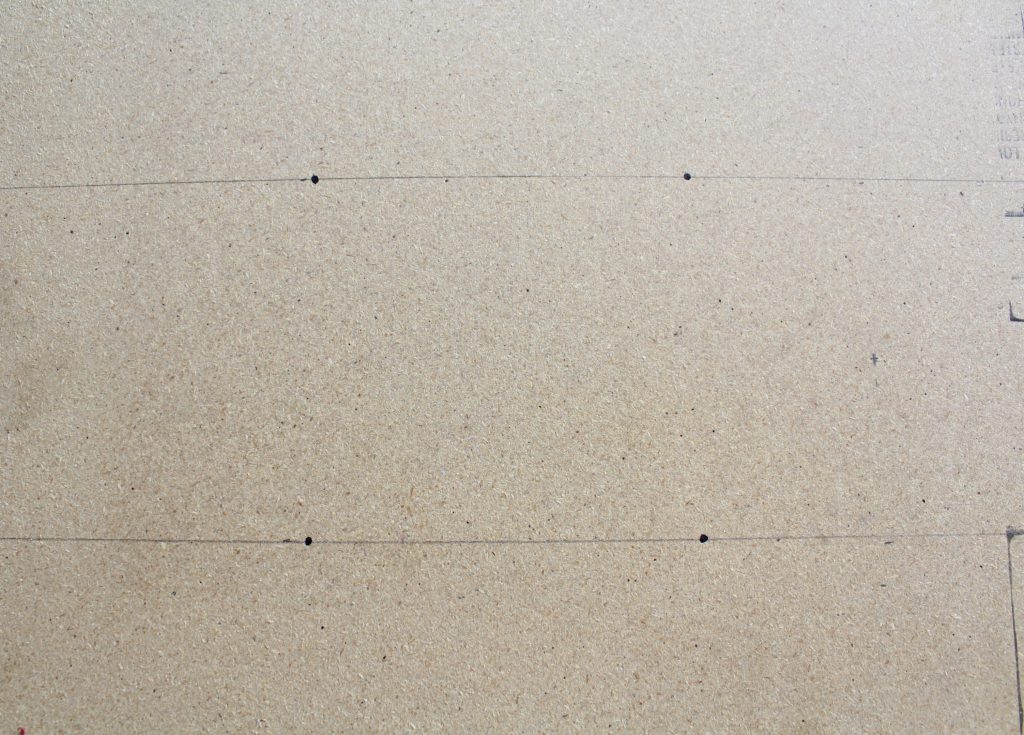
Your holes need to be big enough for your upholstery needle and cord to get through, big enough for you to find on the other side of the fabric and foam, but not too big. (I believe I used a 1/4″ bit.)
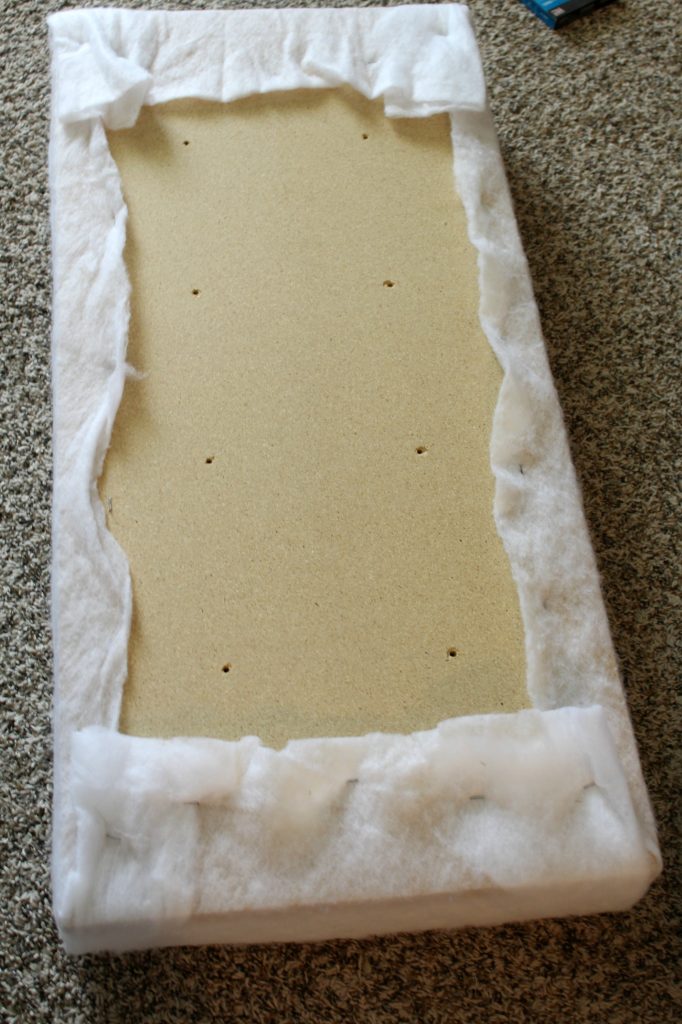
Next step is to attach your foam. I used 4″ thick foam for the top of this bench. The thickness of your foam will depend on the project of course. Simply use spray adhesive for this job. Spray a light coat on the wood, and a light coat on the foam and squish together. (like my technical terms??)
Let that set up for 30 minutes or so (depending on how impatient you are haha), and then it’s time to add the batting. This is just to help smooth the edges of the foam and soften the edges of the wood. Use a heavy duty staple gun for this.
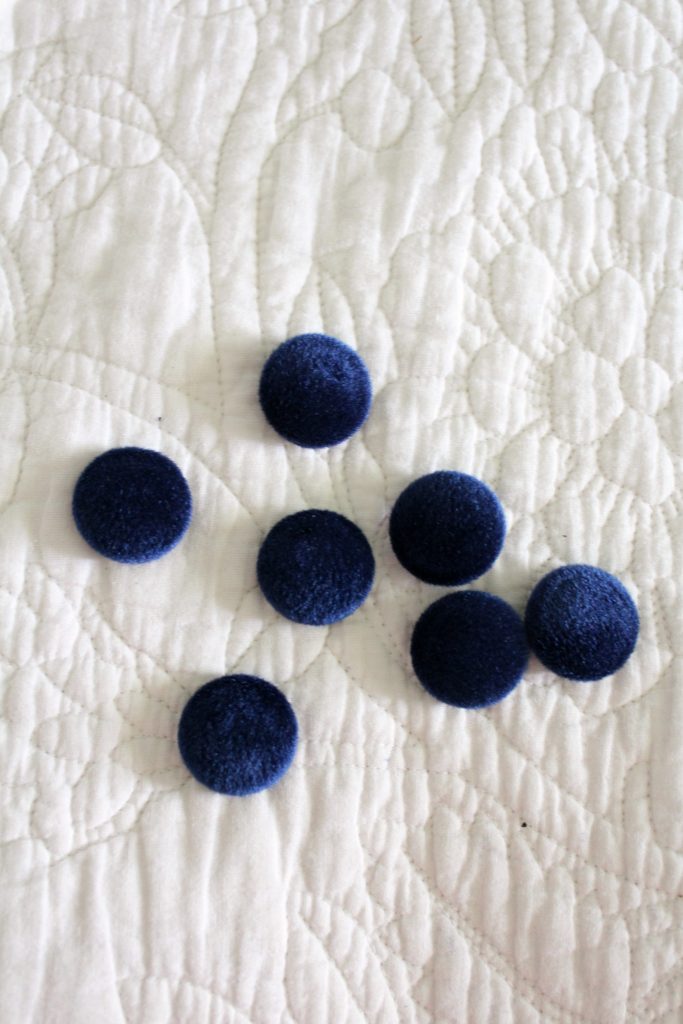
Now, your piece is prepared. Time to move on to the fabric part. First step is to cover your buttons. Follow manufacturers directions for this.
After that, cut your fabric to size. Make sure your cut your piece of fabric large enough to allow for the bunching that will occur with the tufting and to wrap around the batting and the wood.
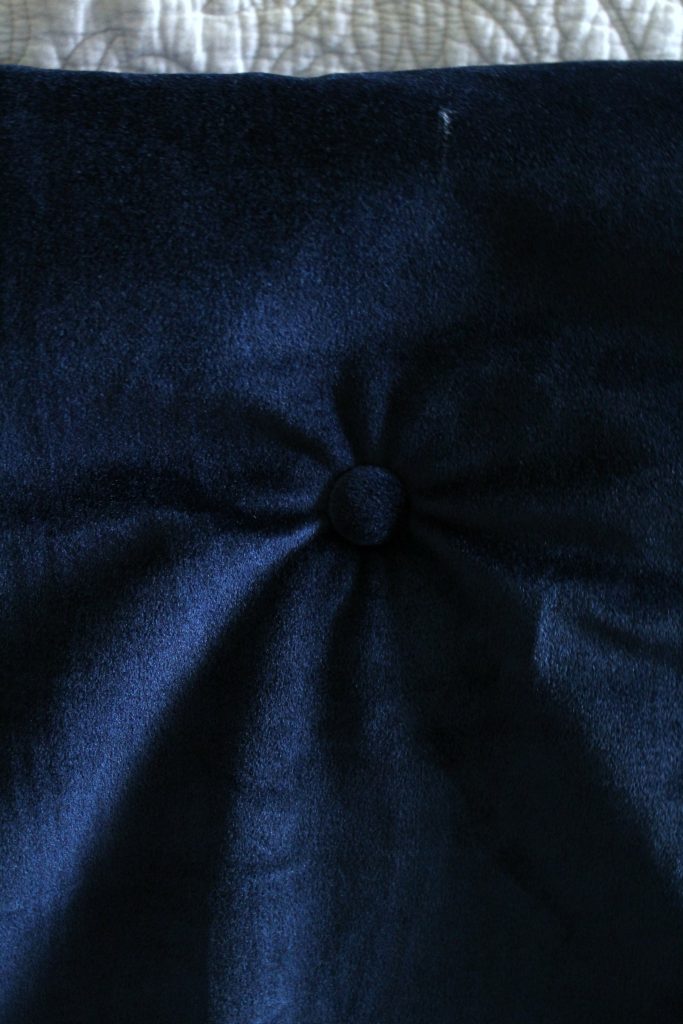
Pick a starting point – somewhere in the middle – and get to tufting! This is the part where you will need two hands. One person to hold your piece up, and one person to thread the needle through all the layers, add the button, and pull back through. It’s kind of hard to see on this navy velvet but here is what your first tuft might look like.
There are various methods for securing the back. I chose to tie a knot in the end of the cord, and staples down the cords above the knot. It’s secure, and if I need to make adjustments the bottom of the bench is accessible enough to do so. If I were doing a headboard I might pick a more secure method like this.
Work around your piece adding buttons, making sure the tufting is as even as possible. To finish up, pull fabric around edges and attach to the bottom using a heavy duty staple gun, then trim the excess fabric.
To complete the piece I attached it to the base of the bench with a few screws and then I added the nailhead trim. Honestly, the nailhead trim just brought it all together. I love the mix of rustic and glam don’t you??
Some affiliate links used for your convenience. See disclosures for more details.
Here are a list of supplies that you will need to complete this project
-
wood cut to desired size (I used scrap from my stash – the kind doesn’t really matter – plywood, particle board, mdf, I would suggest 1/2″ thick)
-
drill
-
foam (this is similar to what I used)
-
batting
-
fabric of your choice (I recommend a thicker fabric – I used velvet, but any upholstery weight fabric would work)
-
covered buttons kit
-
upholstery needle (needs to be long enough to go through all layers)
-
upholstery cord
-
spray adhesive
-
heavy duty staple gun
-
staples
-
nailhead trim (optional)
Thanks for all your sweet comments about the bench! I am truly in love with it, and I hope we have a chance to try another furniture piece soon!!


Linking up with The Inspiration Gallery / The Creative Circle

How much Yards in velvet fabric did you use?
I’m so sorry it took me so long to get back to you! Somehow I missed seeing your comment! If you followed my measurements exactly to make your bench I think a yard would do it, but I would get 1 1/2 yards just to be safe. I don’t know the exact amount because I bought extra to make pillows with as well. 🙂 It also will vary depending on the thickness of your foam. Hope that’s helpful!