• ALL ABOUT ME
  • OUR HOME
  • ABOUT FAITH
  • CONTACT ME
  • DISCLOSURES
  • Nav Social Menu

    • Bloglovin
    • Facebook
    • Instagram
    • Pinterest
    • Twitter

  • DIY
  • Family
  • Home Decor
  • Encouragement
  • Organizing
  • Shop My Favorites

May 23, 2017 · Leave a Comment

DIY Faux Roman Shade

DIY

Hey there friends! Are you surviving May and all that comes with the school year ending?? Today is our kiddos last. day. of. school!! Surprised that I’m excited?? Allow me to explain – I get to sleep in. Yep, one of the benefits of having teenagers is that they appreciate sleep as much as I do! WooHOO! I’m still gonna try to get some projects done through the summer. They may be a little more spread out, but I’d like to be a little productive! 😆  Today, I’m sharing a project I have been wanting to do for a looonnnnggg time. Not sure why I put it off. But, it’s done now!
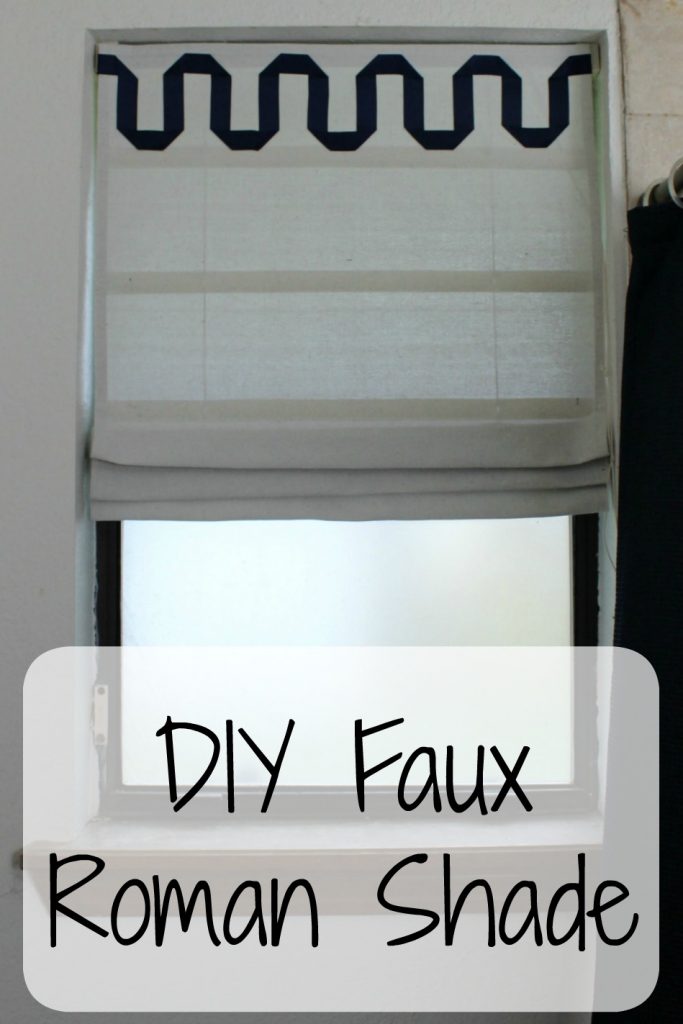
DIY Faux Roman Shade

I’ve been sewing for many, many years, but for some reason the process of making my own roman shade looks way too daunting. Although I love the look of them! So, when I saw this method years ago, I knew I wanted to try it. Maybe you’ve seen it, and if you have, scroll through the pics. 😉

Before we get to the how-to, let me show you what we started with.
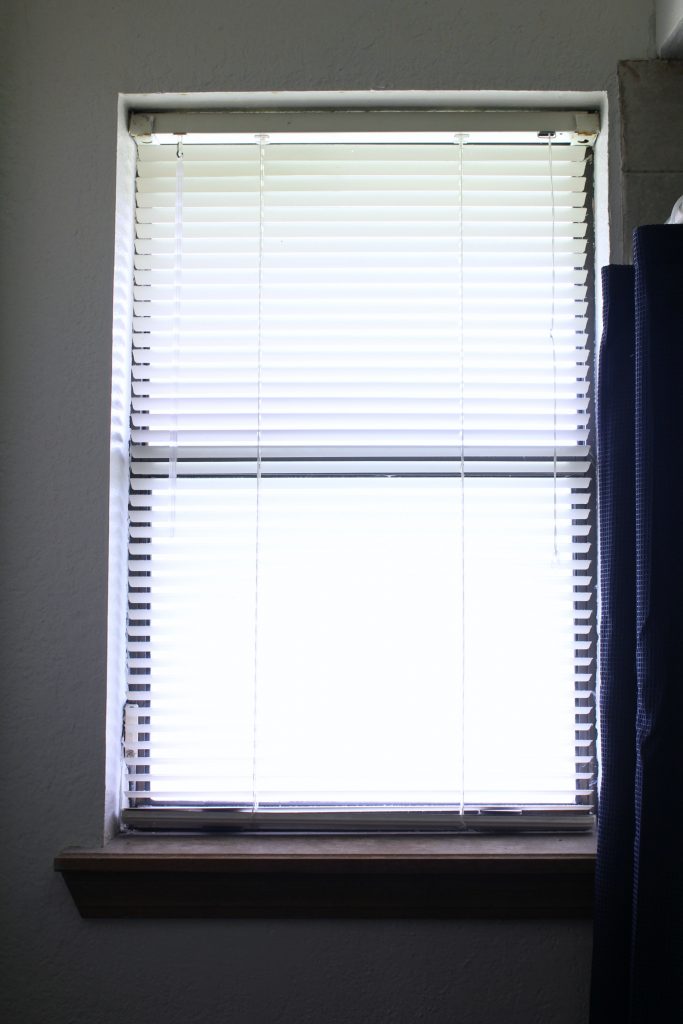
basic blind

Nothing but a boring shade. But, lucky for me, that boring shade is just what I needed to make my faux roman shade!

Some affiliate links used for your convenience. See disclosures for more details.

Materials Needed for a DIY Faux Roman Shade

  • basic mini blind the size of your window (I got the least expensive one at Walmart)
  • fabric the size of your window + 1″ on every side for hem
  • FABRIC glue (do not try to do this with hot glue)

Start by preparing your fabric. You can use your sewing skills to add a 1″ hem on all sides of the fabric, or you can use the fabric glue to create a hem. I recommend mitering the corners for a cleaner look. Here’s a picture tutorial on how I do that by sewing, but like I said you could easily glue just make sure to double fold your sides to hide the raw edge.
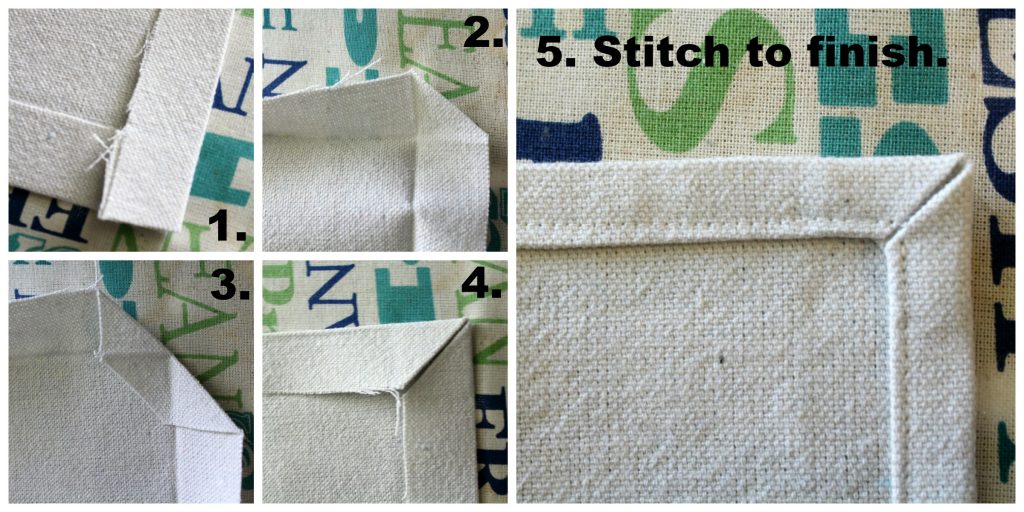
how to miter fabric corners

I wanted the shade to match our master bedroom drapes. (more info on those here)
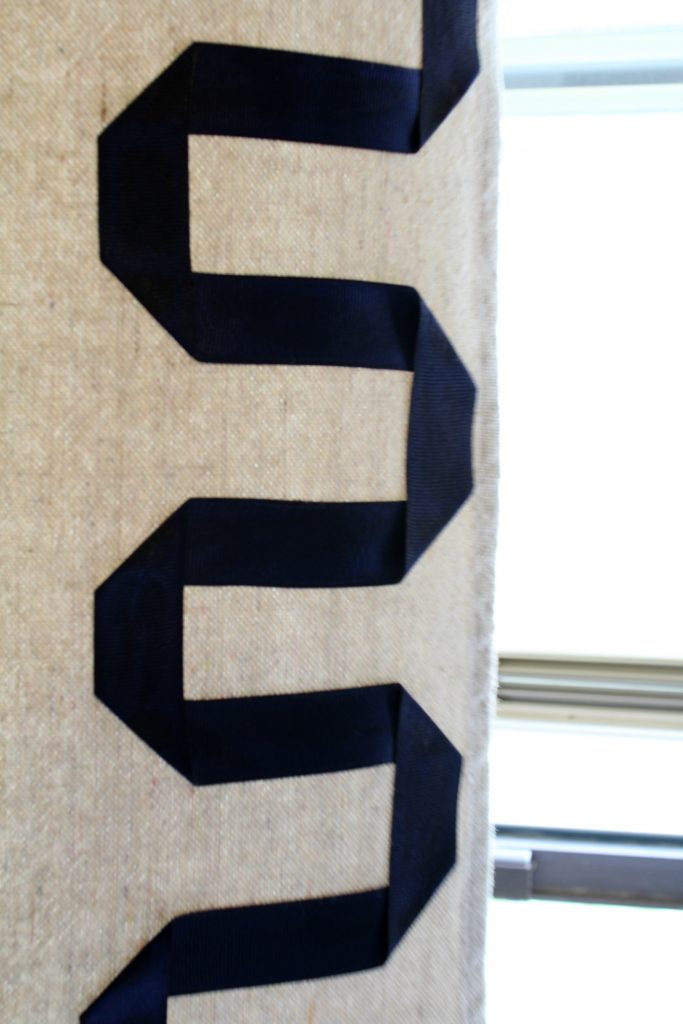
ribbon detail on drapes

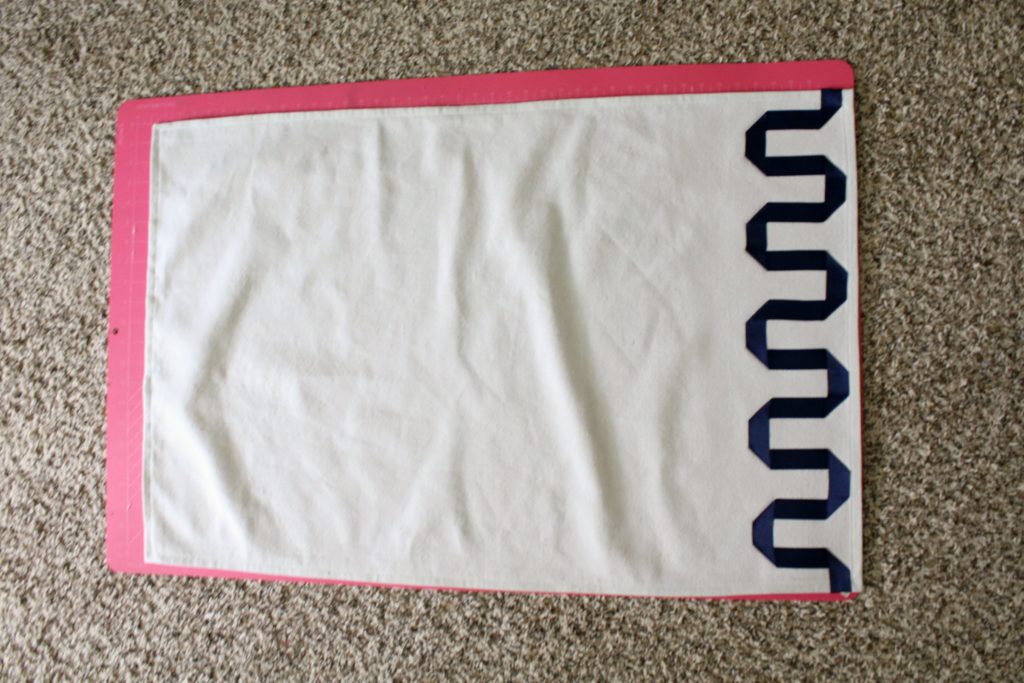
So, I added the ribbon detail at this point, using fabric glue and navy grosgrain ribbon.
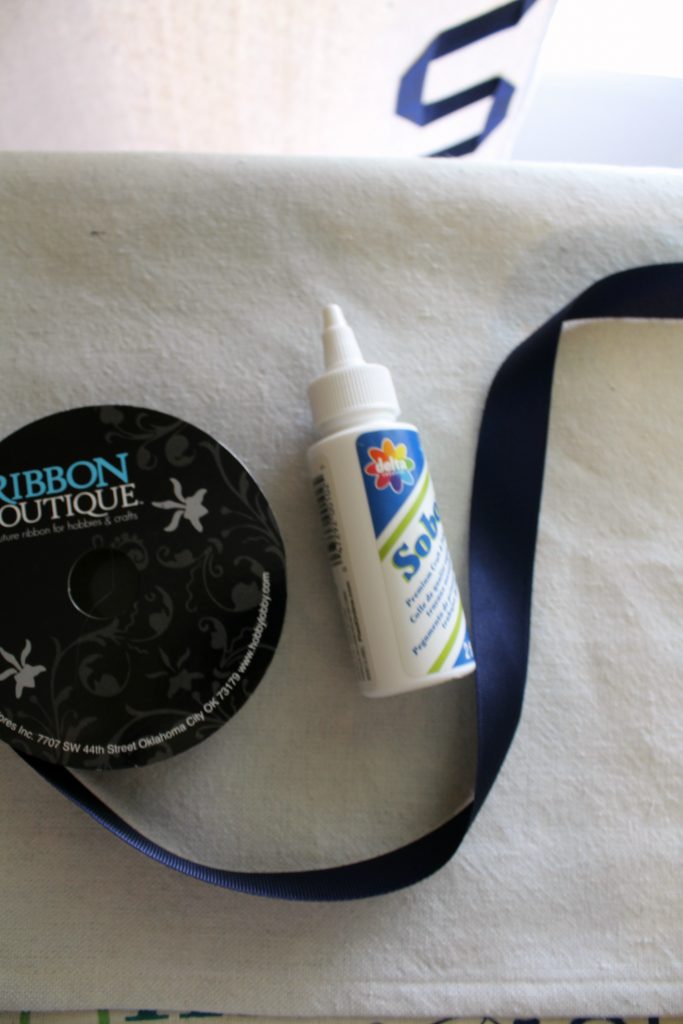
materials for ribbon detail

prepare fabric for faux roman shade

Now, it’s time to prepare your shade by ‘gutting’ it.
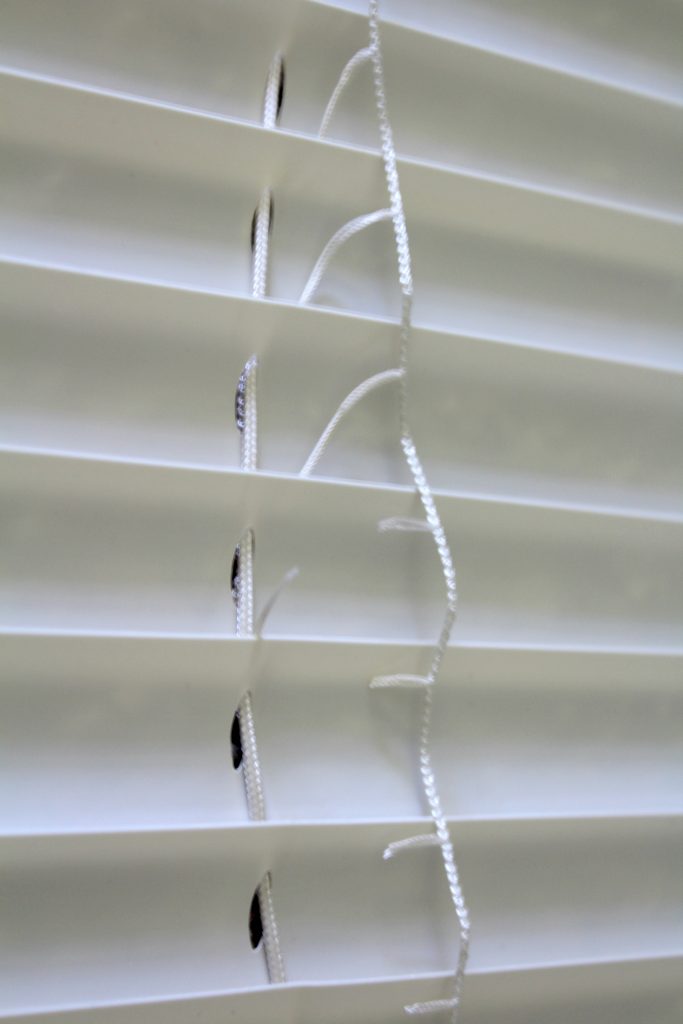
cut ladder strings for faux roman shade

Cut only the ‘ladder’ string as you will need the middle string to operate the shade.
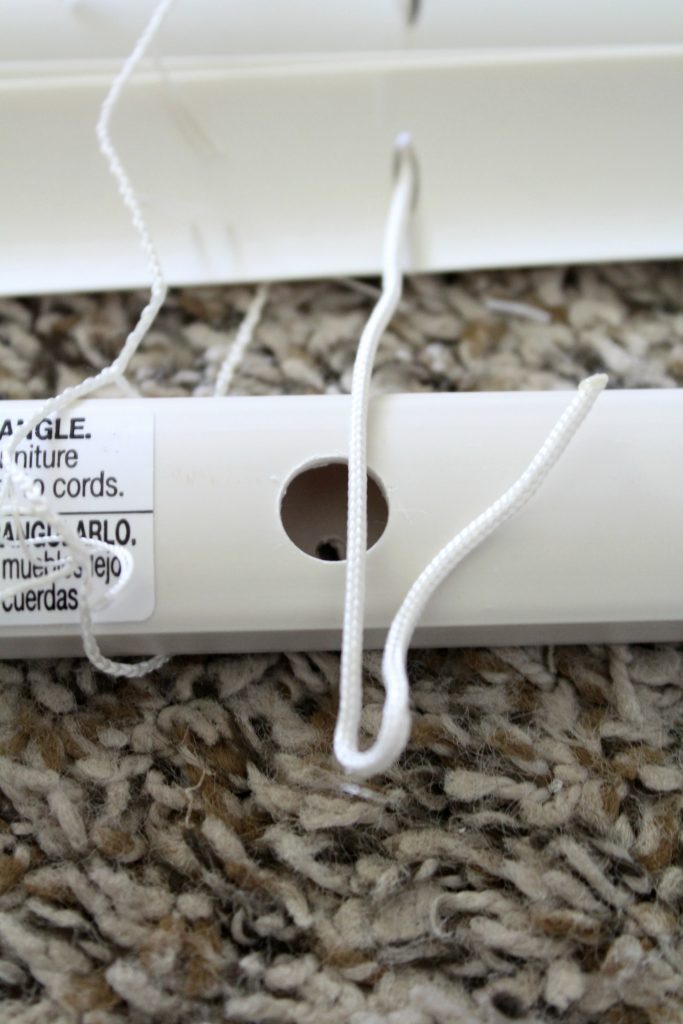
Remove bottom plate and slats for faux roman shade

Pop off plastic circles on bottom plate, pull out strings, and untie knot so you can remove the bottom plate, and all the slats.

Once you have finished removing all the slats, lay the skeleton on top of the prepared fabric.
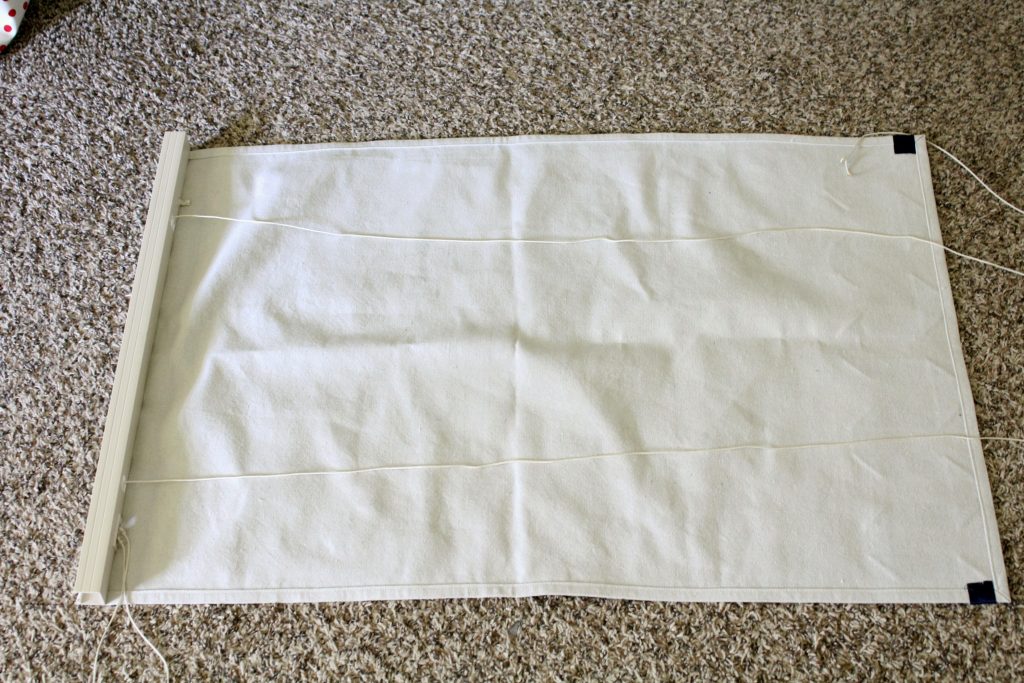
skeleton of shade for faux roman shade

Decide where you want to place your slats (this will determine how many folds and how big the folds are).
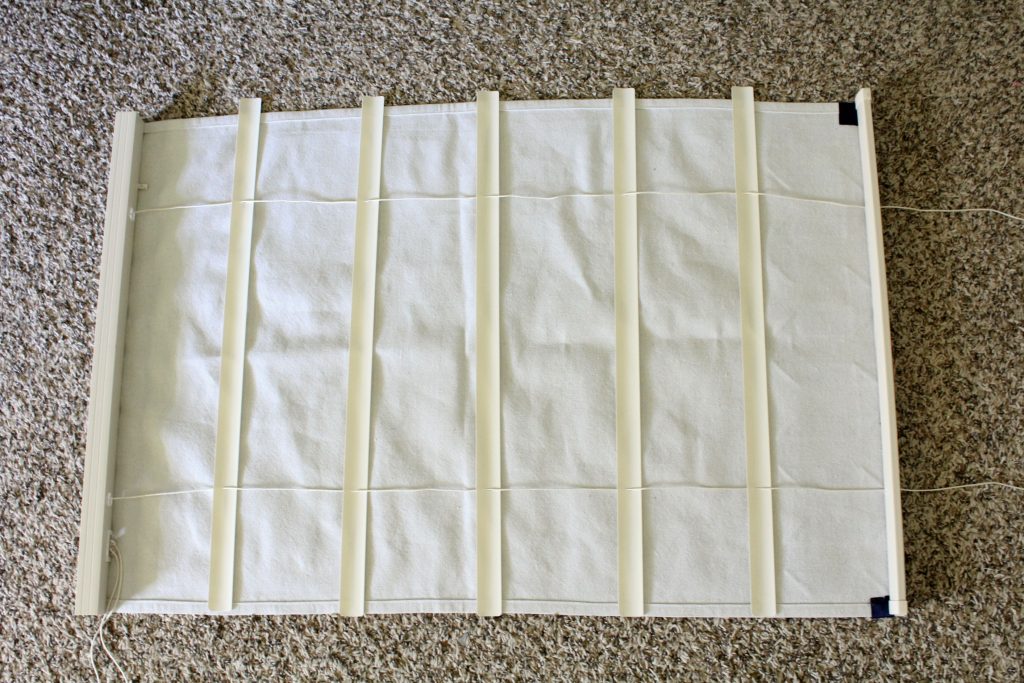
Space slats for faux roman shade

Then glue the slats to the fabric, curved side down, with the fabric glue. Be sure not to glue the strings down! I used a brush to apply the glue to be sure to cover the most surface, and to keep it smooth.
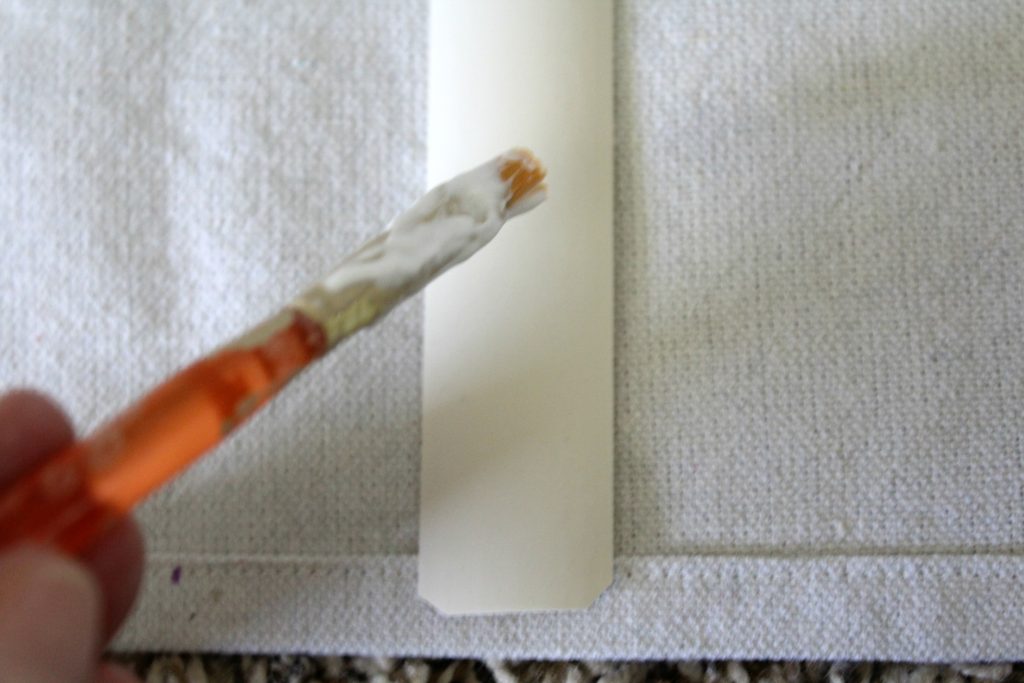
Attach shade slats with fabric glue and a brush

Reattach the bottom piece, by reversing the steps you took to remove it. Glue fabric to this piece also.

Confession time. When I made this originally, it looked like this when I hung it.
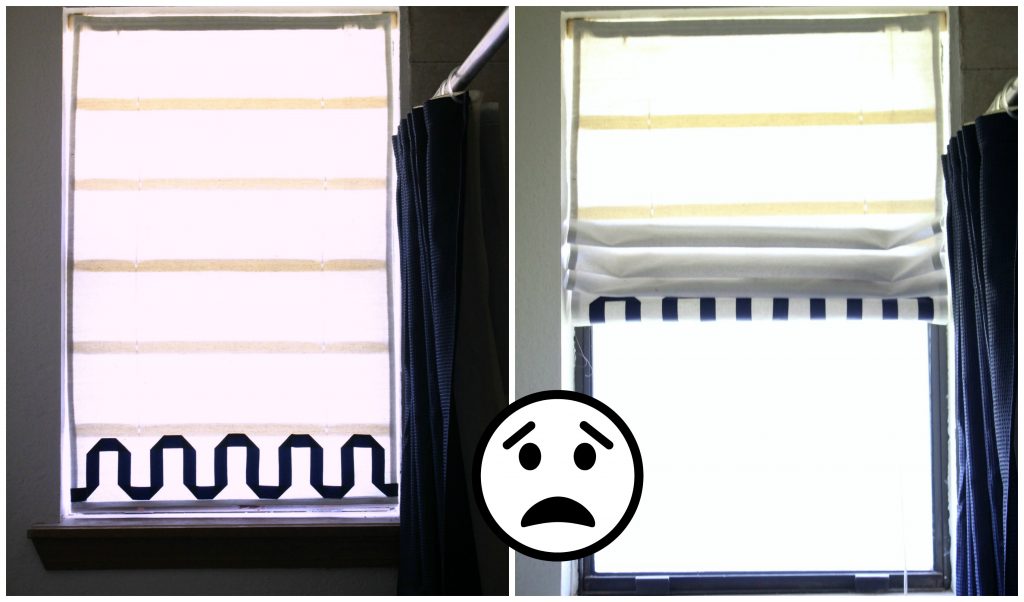
DIY Faux roman shade mistake

When the shade was down, no big deal, but up – the ribbon detail can’t be seen! 🙁

So, I took to Instagram stories and asked for thoughts….was it a big deal? or should I flip it around? or what? Thankfully my friends came through and confirmed what I thinking – flip it around and put the ribbon at the top. (and I also remembered to use my external flash to get rid of the window light blow-out :roll:, wish I would’ve remembered that sooner)
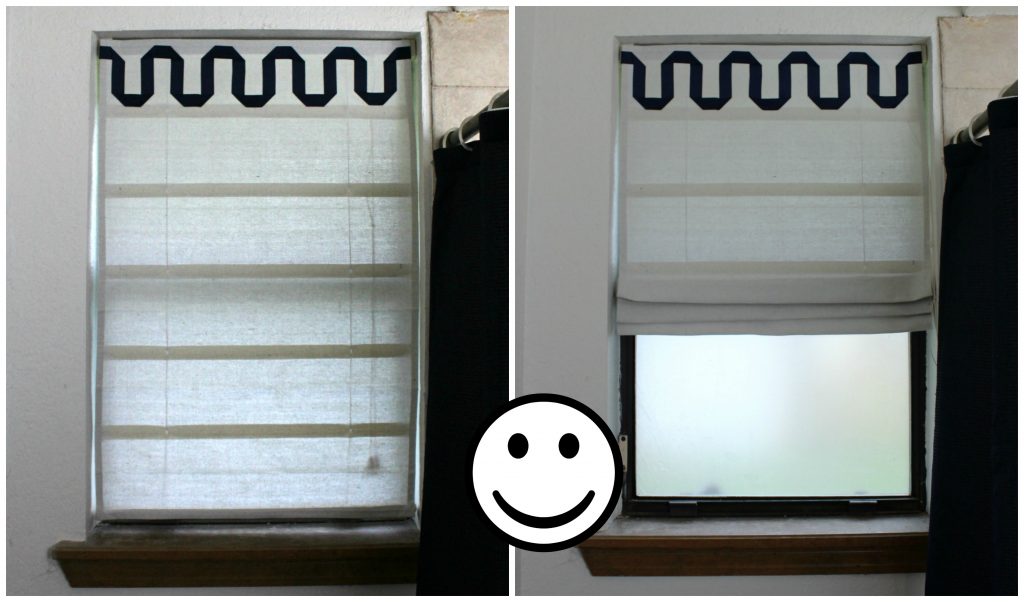
DIY Faux Roman Shade

Much better!! I tell you this to let you know that even us bloggers make mistakes! Don’t not try because you’re afraid of making mistakes!!

DIY Faux Roman Shade

I have a few other updates planned for this tiny space in our master! Look for progress updates coming soon!

Linking up with Inspire Me Monday / Inspire Me Tuesday / Tutorials & Tips Link Party / The Inspiration Gallery / The Creative Circle / Best Friday Features

Previous Post: « High Five on Friday #7
Next Post: Summers Are Fleeting »

Reader Interactions

Leave a Reply Cancel reply

Your email address will not be published. Required fields are marked *

Recipe Rating


This site uses Akismet to reduce spam. Learn how your comment data is processed.

Primary Sidebar

Welcome

Hey friend!! I'm so glad you stopped by today!! I am married to the love of my life and I have been blessed with four amazing kids. My life is kinda crazy some days and I feel frazzled often. But, Jesus brings me JOY each and everyday in the little things. I love everything home decor, DIY, and crafts!!
Read More…

Categories

Archives

Copyright

I share to inspire!! Please feel free to use and share my ideas!! I simply ask that you give credit back to my site and add a link back to my blog if you reference one of my projects, or photos. Thank you so much!!

Recent Posts

  • Empty Nesting, My Thoughts
  • Kitchen Cabinet Facelift
  • Just Popping In To Say “HI”
  • Knock, Knock….Anyone There?
  • Easter Tablescape 2022
  • CONTACT ME
  • DISCLOSURES

Footer

Hubby and I took a little trip to Colorado Springs Hubby and I took a little trip to Colorado Springs and had the best time! ❤️ We took off as the sun was rising in OKC and landed in the mountains! 🥰 It was so good to get away together! We hit all the high points (pun intended haha) - Royal Gorge, Pikes Peak, Garden of the Gods, and Seven Bridges. We hiked everyday! Can’t wait for our next adventure!! 🥰
.
#emptynestingrocks #travel #marriage #emptynesterlife❤️
31 years with my favorite! So thankful for you! ❤️❤️ #marriage #anniversary #growingoldtogether
Our baby graduated from college last night!! From Our baby graduated from college last night!! From our alma mater! 🧡🖤 We are feeling beyond blessed and are so loving this stage of parenting! Watching our adult kids live life well is truly remarkable! God has big plans for you Gavin and we can’t wait to watch him work in and through you! Love you!
Happy Resurrection Day!! He is risen!! Happy Resurrection Day!! He is risen!!
Haven’t shared something from my house in months Haven’t shared something from my house in months! Just refreshed our mantle for spring and I love it! So happy that Oklahoma’s weather has finally chilled out and become more springy! ☀️🌸🌺
.
#homedecor #ourhome #spring #springismyfavorite #springdecor
One month of being Gigi and Pops to this precious One month of being Gigi and Pops to this precious little blessing!! 💕 We love you so much Blair!!
Five more sleeps! ❤️🎄 Nothing better than t Five more sleeps! ❤️🎄 Nothing better than twinkle lights on a Christmas tree ✨☺️ Looking forward to all the family festivities over the next few days. Merry Christmas to you all!! 
.
#christmas #christmastree #christmasdecor #christmaslights #merrychristmas
32 years ago today I made one of the best decision 32 years ago today I made one of the best decisions of my life when I said “yes” to marrying this guy. We celebrated our 30th anniversary back in May! We’ve experienced a lot over the years but there’s no one I would rather be doing life with! @vangreenwood you’re my favorite!! ❤️❤️
.
#marriage #proposalanniversary #youremyfavorite
I really enjoyed decorating my new kitchen shelves I really enjoyed decorating my new kitchen shelves for Christmas! What’s your favorite spot to decorate? I really like to spread out Christmas décor throughout the house! 🎄❤️
.
#homedecor #christmasdecor #christmas #itsbeginningtolookalotlikechristmas #favoritetimeofyear
Follow on Instagram

Copyright © 2025 · Captivating Theme on Genesis Framework · WordPress · Log in