• ALL ABOUT ME
  • OUR HOME
  • ABOUT FAITH
  • CONTACT ME
  • DISCLOSURES
  • Nav Social Menu

    • Bloglovin
    • Facebook
    • Instagram
    • Pinterest
    • Twitter

  • DIY
  • Family
  • Home Decor
  • Encouragement
  • Organizing
  • Shop My Favorites

November 19, 2014 · 2 Comments

Kitchen Ceiling and Lighting Details

DIY

It all started about a year ago when I decided to finally update our kitchen. {click on over and check out the before pics of the kitchen – even I didn’t remember how dark and dated it looked} Not too long after we started, hubby and I took a day trip to Dallas, and of course stopped in at IKEA. New kitchen lighting was on my list, because I knew they had less expensive options. I was leaning towards some sort of track lighting to replace our hideous fluorescent lighting in the kitchen.  And then we spotted these.  
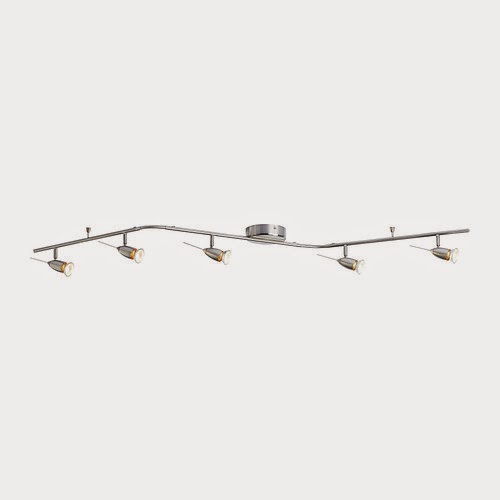
source – IKEA
They were the perfect length, had lots of lights, and a big enough cover in the center to cover the existing holes that I knew would be left behind by the current fixtures. And…the price was fantastic! – $29.99
I wasn’t sure about the silver finish, or the super-modern look, but the price and size just couldn’t be beat.  The bad news–they only had one in stock that day!!  And, I needed three.  I left very defeated.  I looked into ordering them online, and really the shipping wasn’t bad – about the same as gas to drive down there and back, but I just never got around to it.

Fast forward to last month, when one of my precious friends mentioned she was heading to Dallas, and making a trip to IKEA.  IKEA, I said, I love that store, and I told her my lighting story. And then, bless her, she offered to pick up whatever I wanted!!  (Thanks Angela!!) So, that my friends is how I scored my modern-inexpensive-way better than fluorescent- kitchen lighting!!

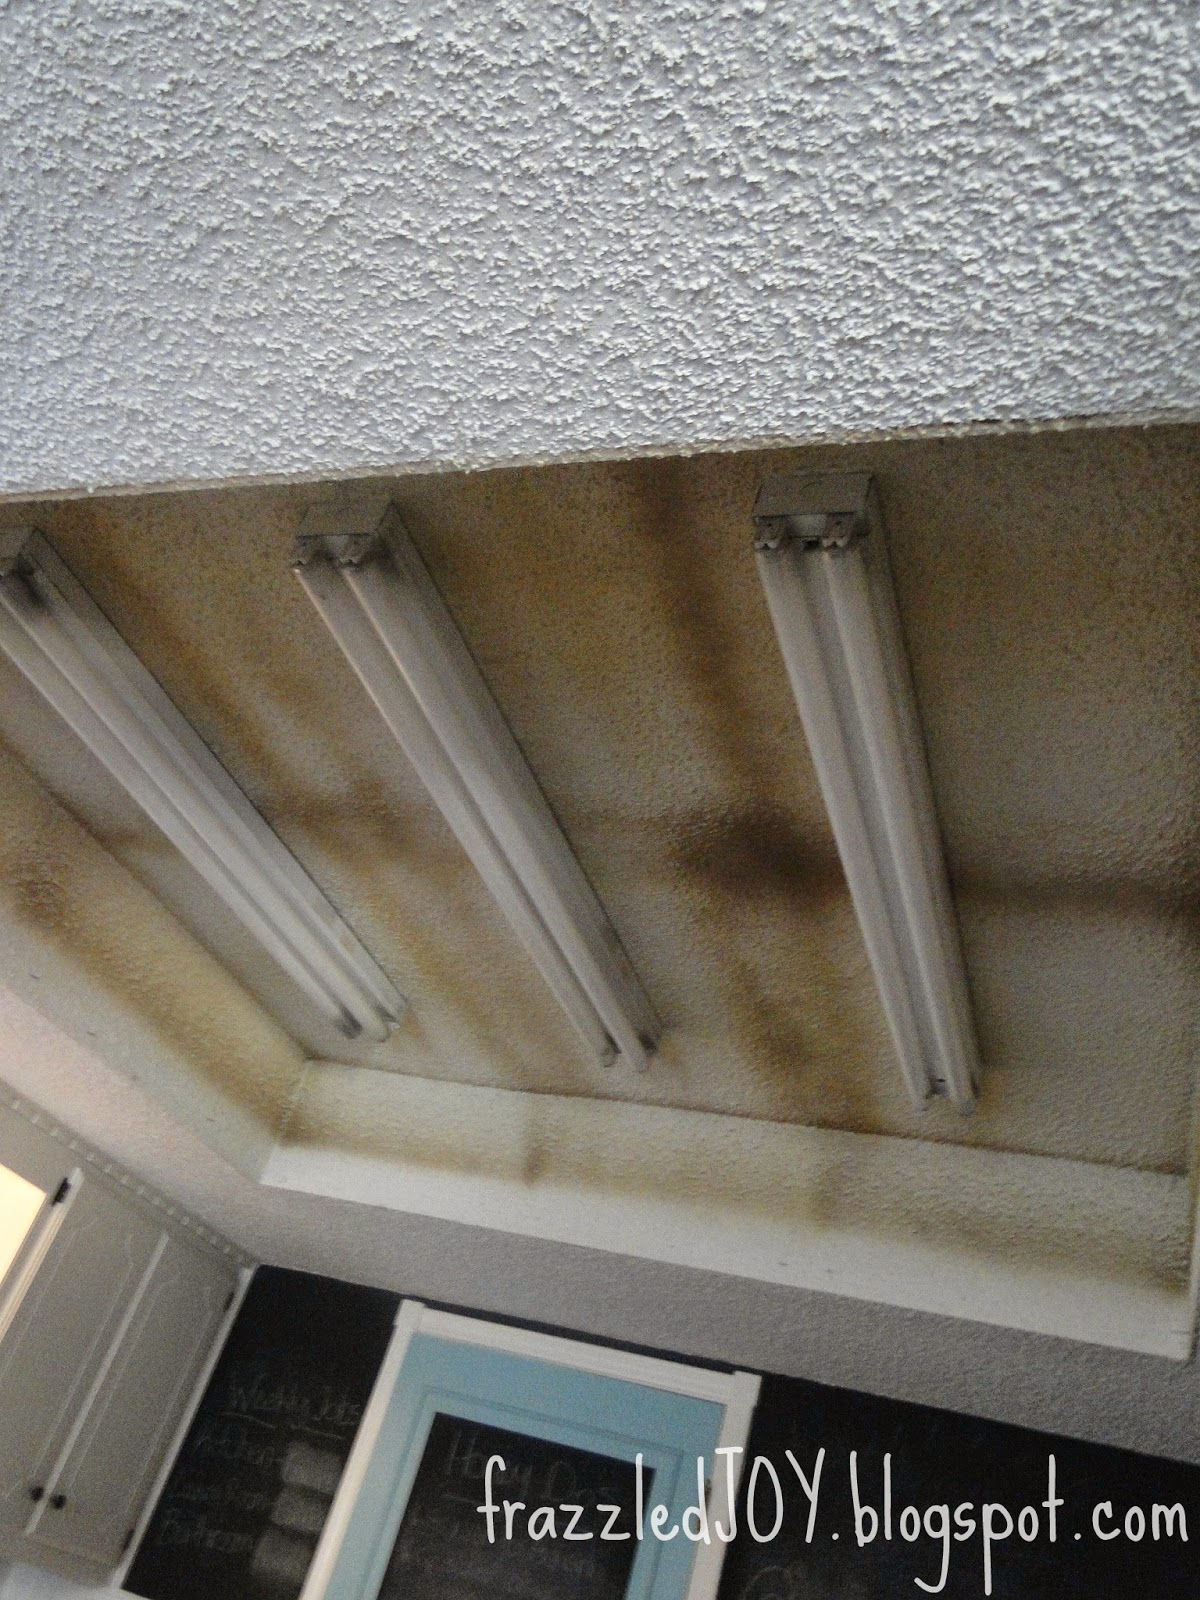
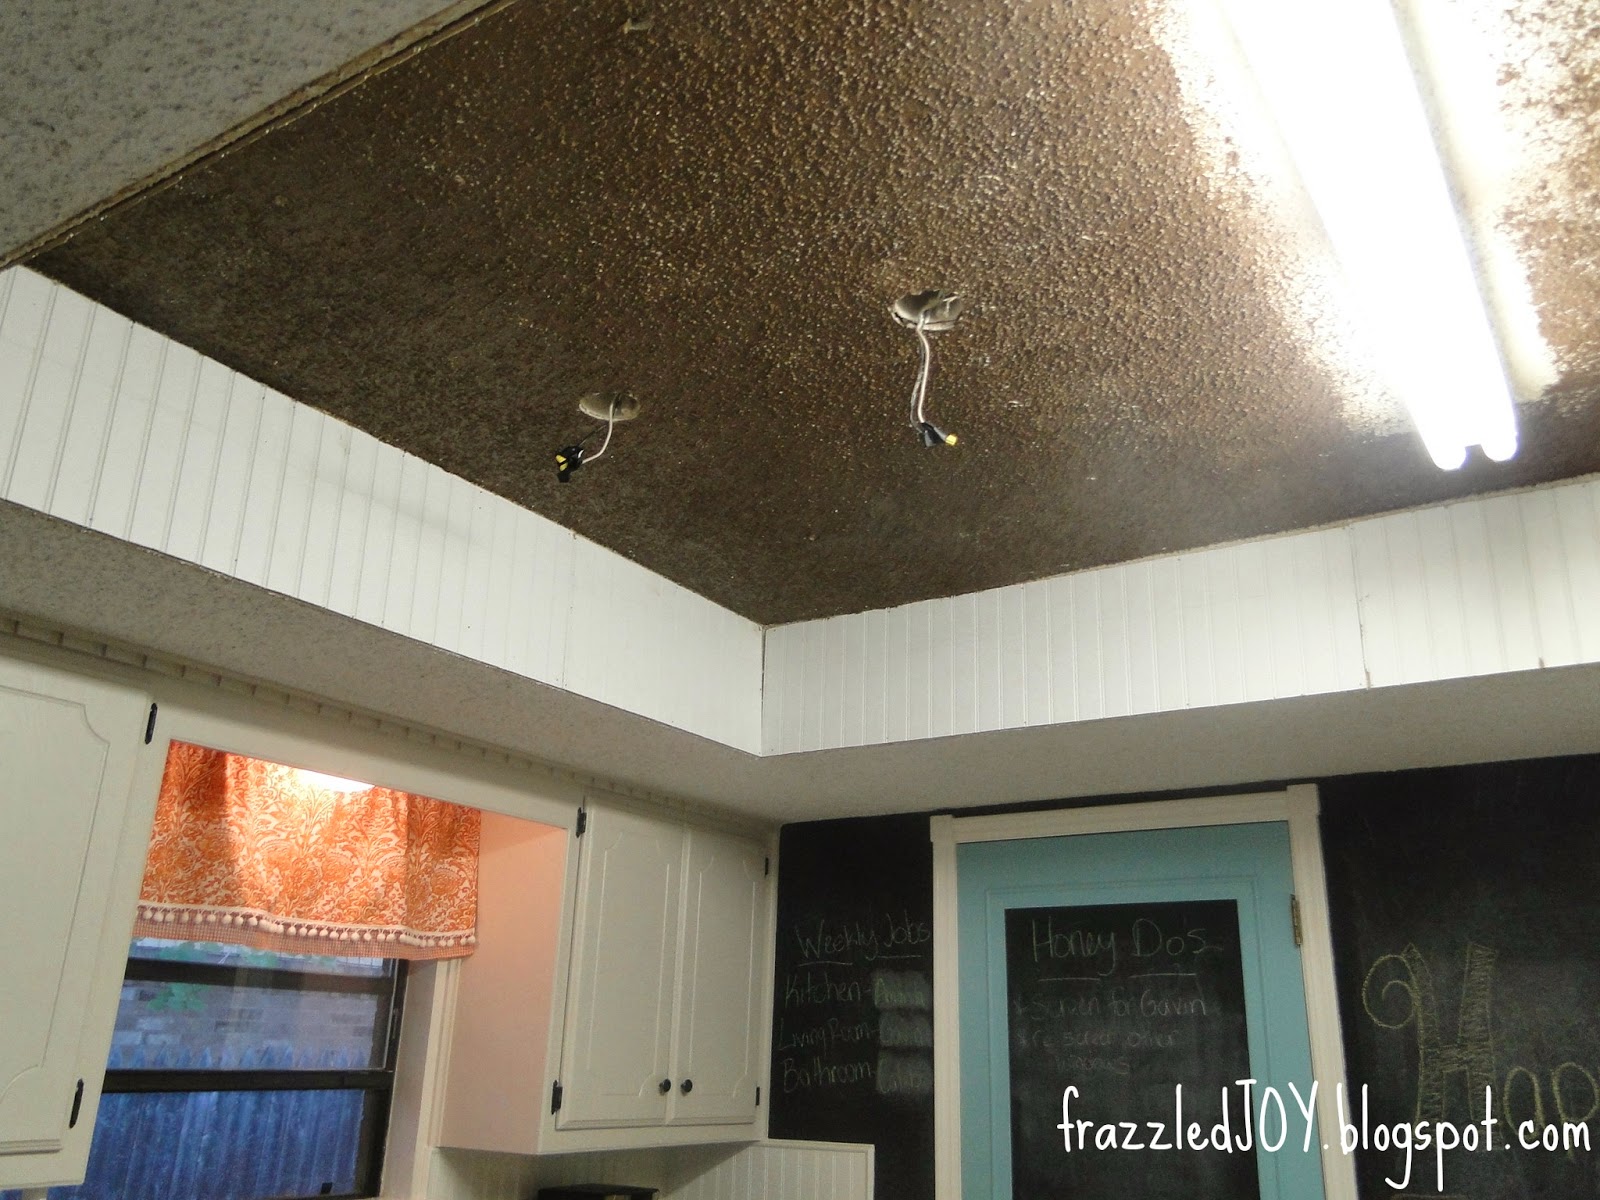
We first started by ripping out the old.  And we were left with this ugliness.


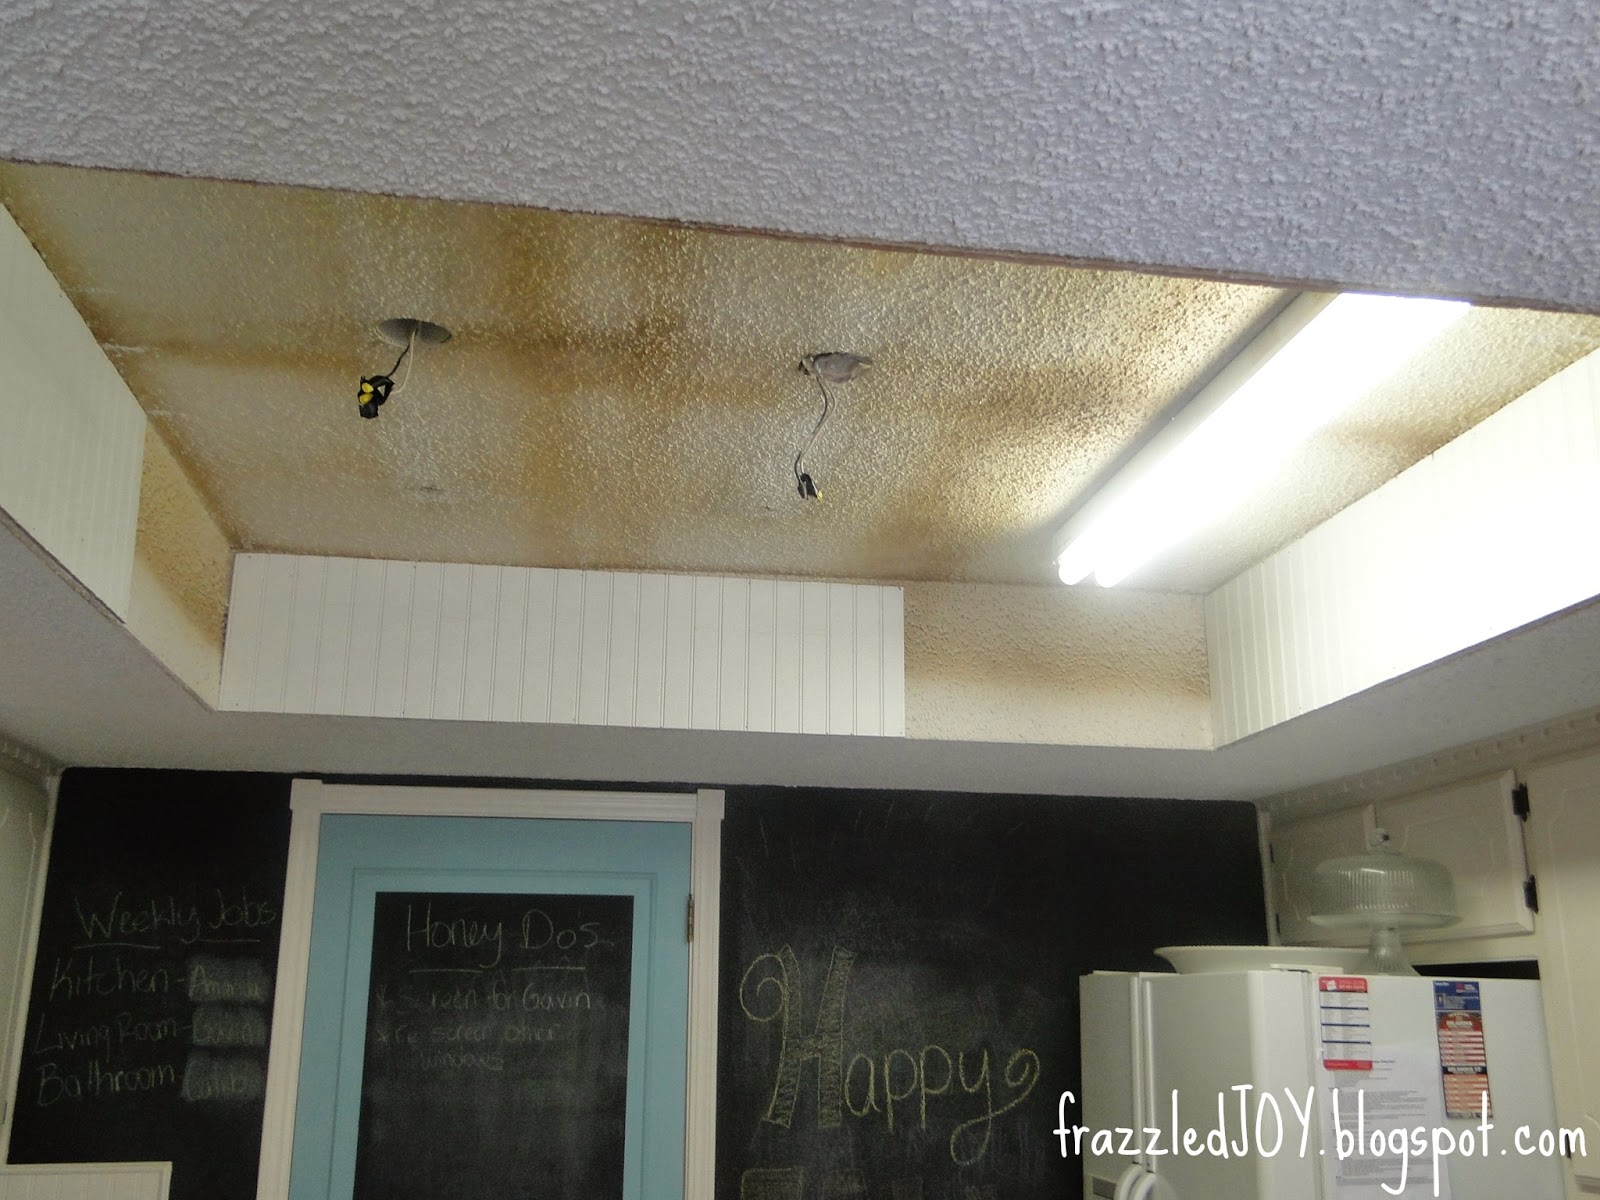
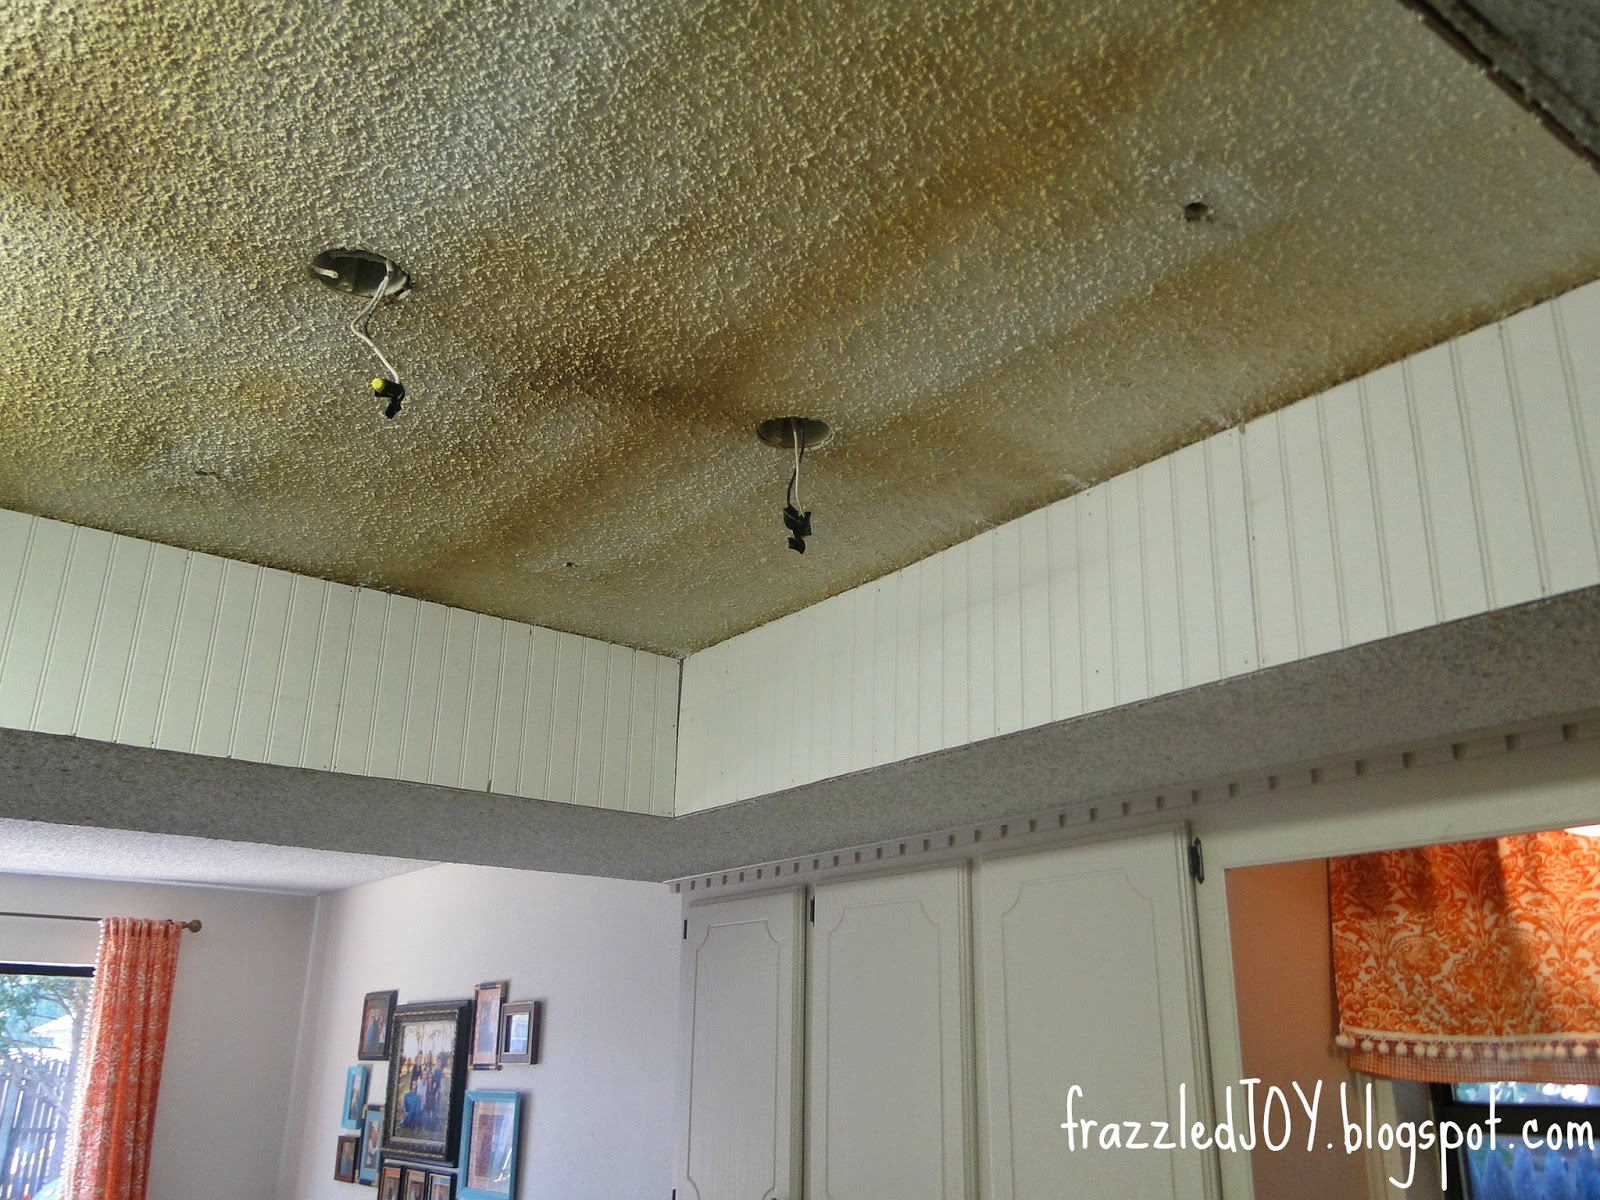
My hubby decided to remove two of the three lights (which btw weren’t working anyway???). And we had this.


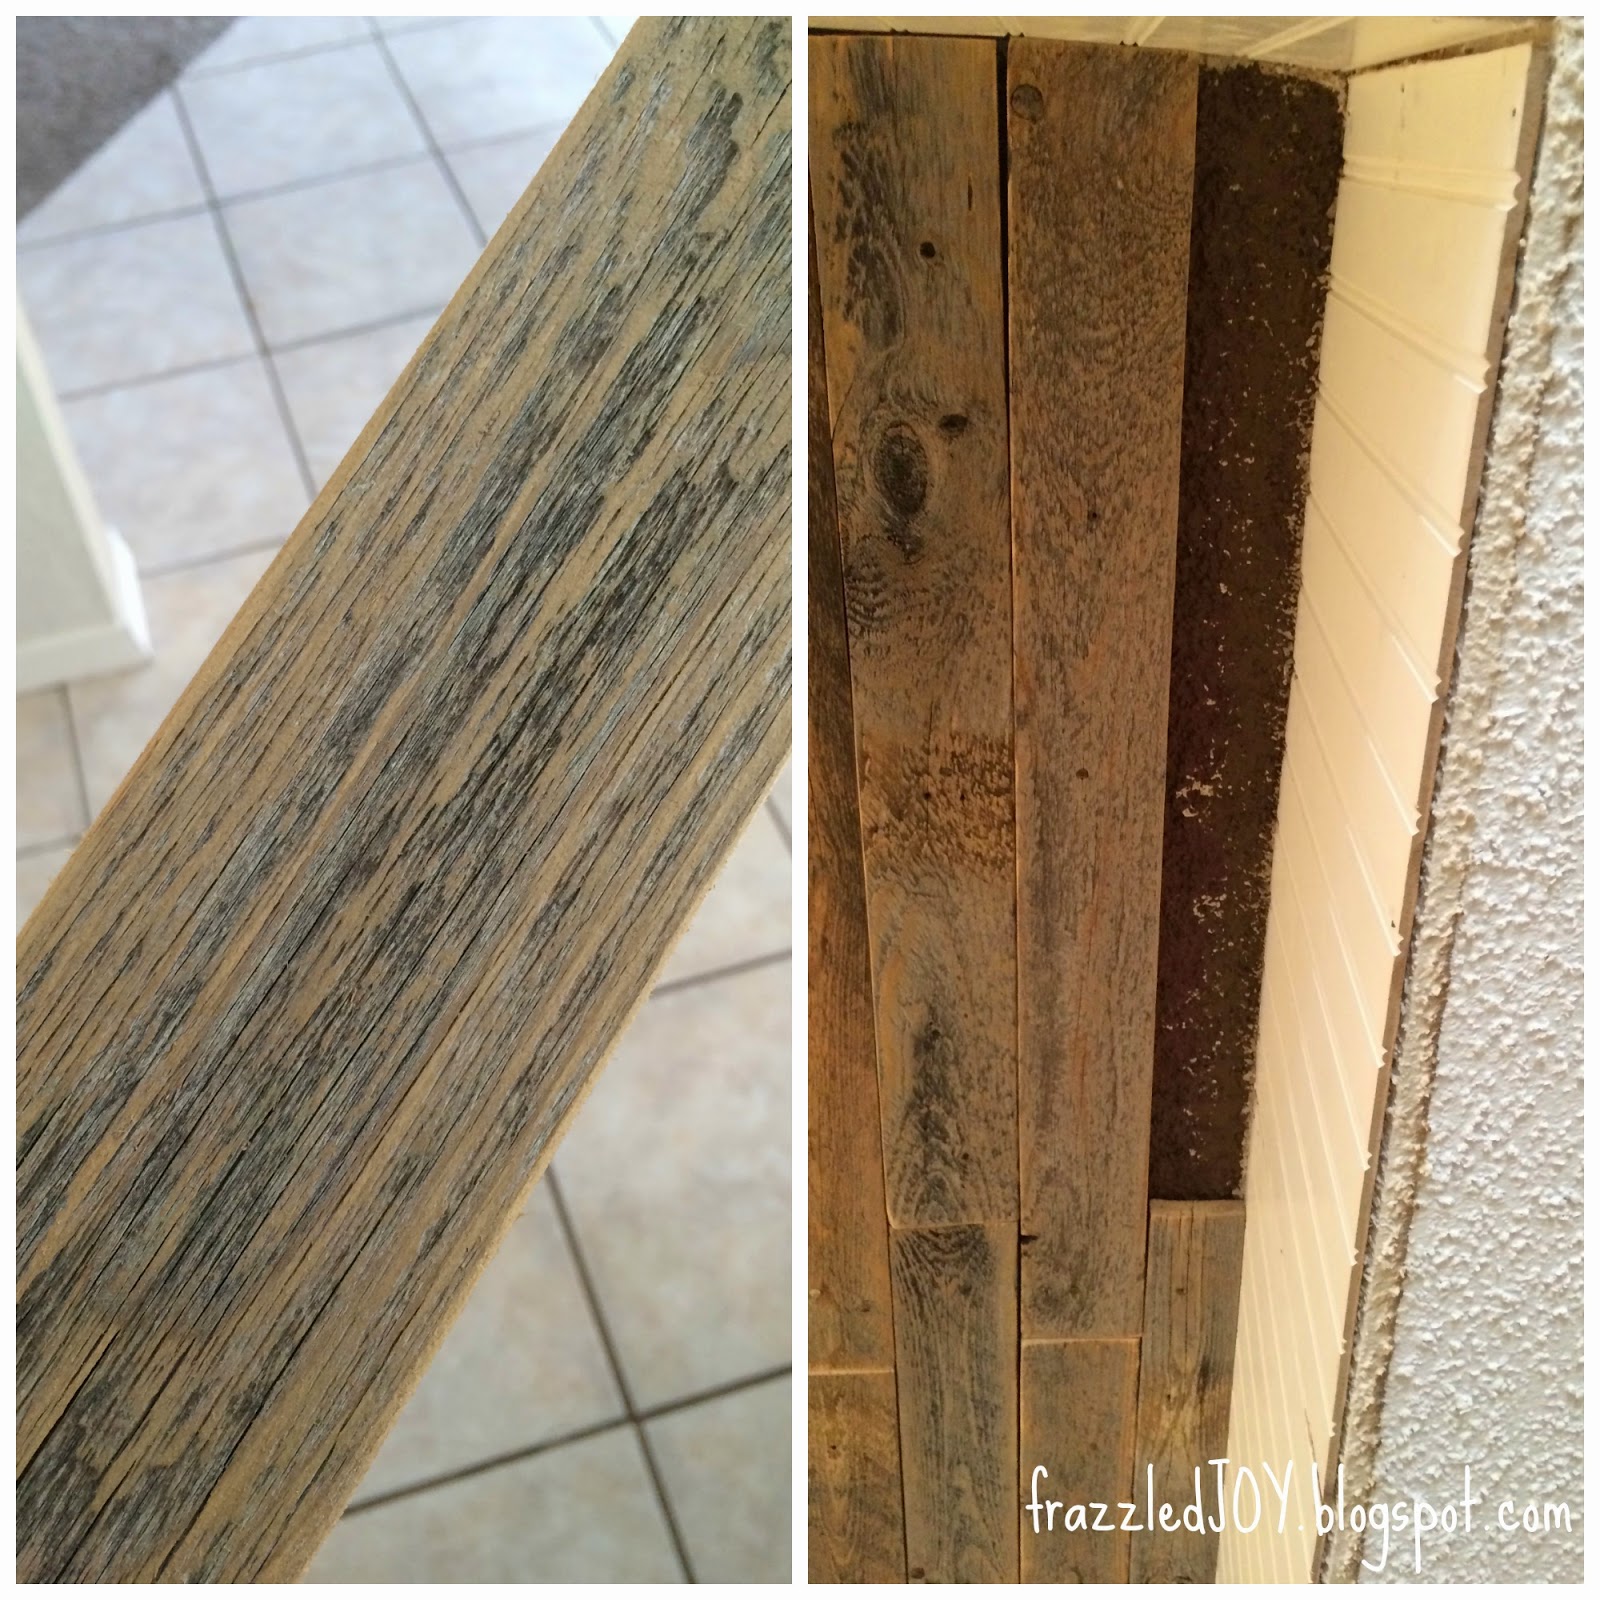
I had my plan for the ceiling, but had no idea the sides of the inset were popcorn – ugh. So, rather than scraping that off, or painting over it, I pulled some beadboard from my scrap pile, held it up over the sides and voila!  Perfect!  And it tied in with the beadboard on the backsplash!!


We attached the beadbaord to the sides with a little liquid nails and finishing nails into as many studs as we could.  

From previous planking experience, I knew it was necessary to paint the ceiling for imperfection purposes.  I did not want to see white popcorn in between those boards.


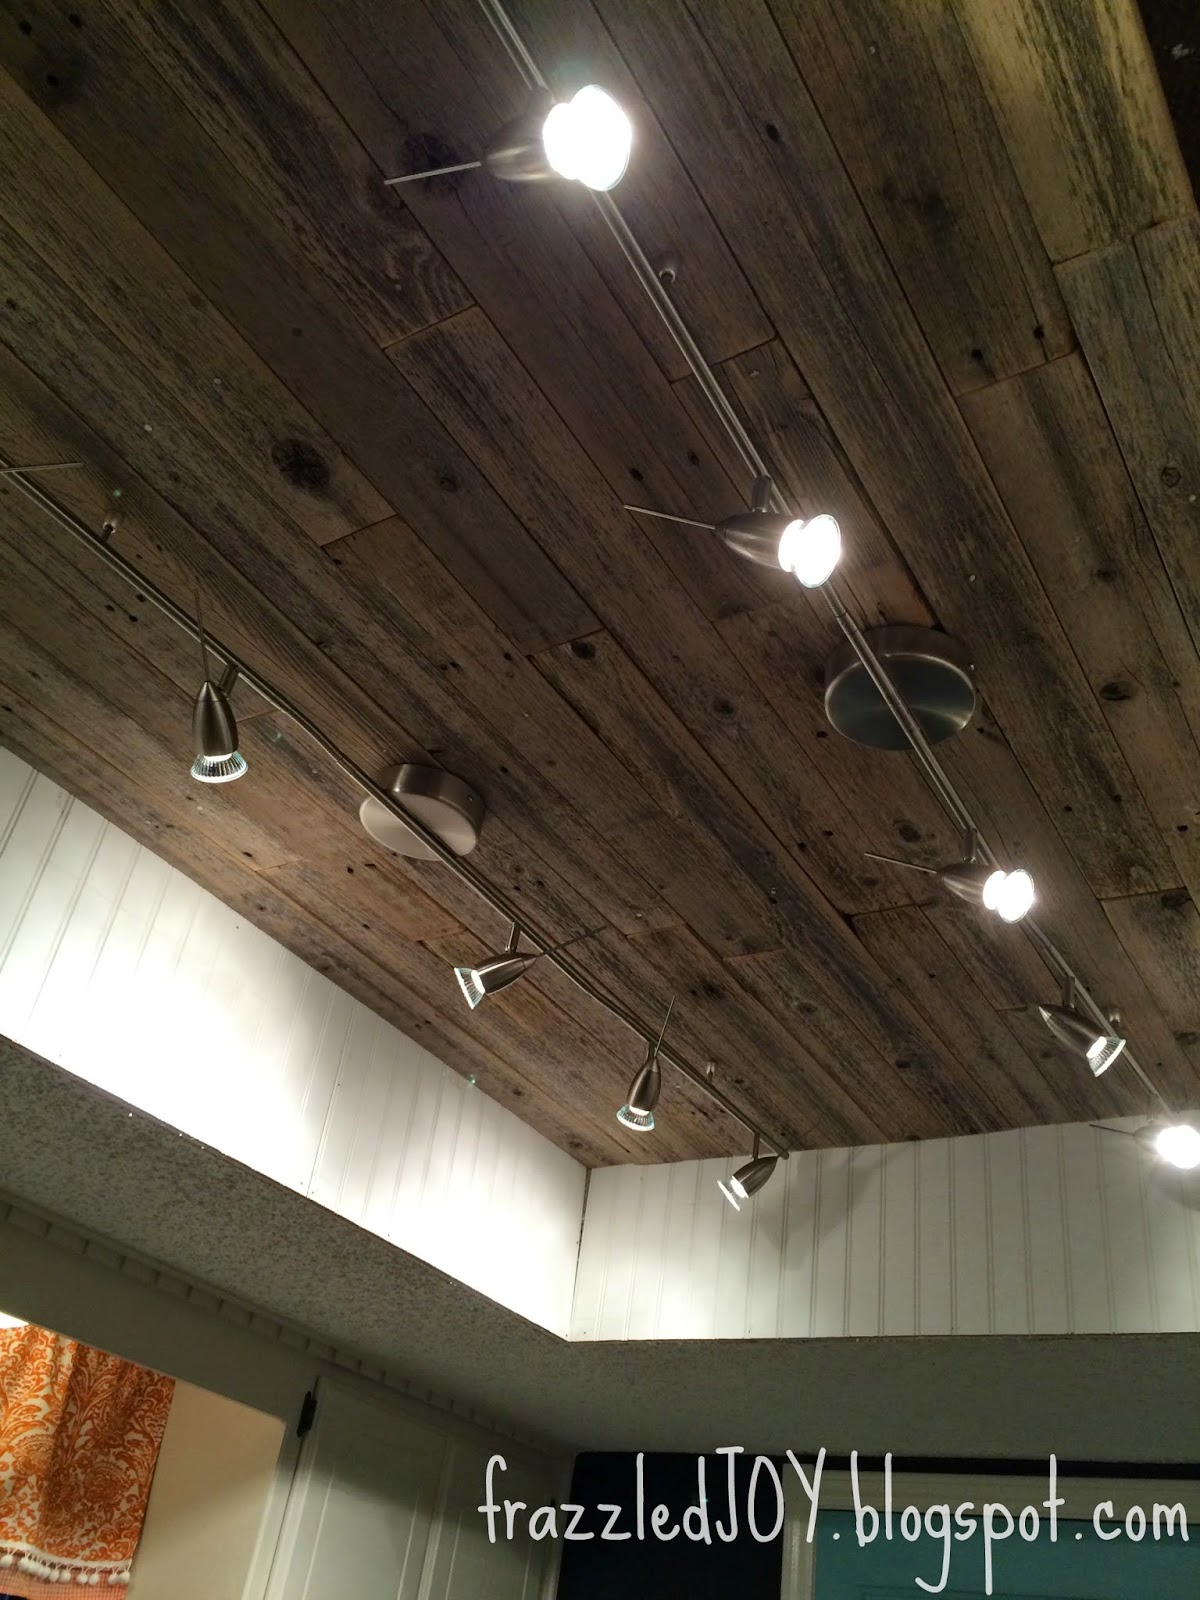
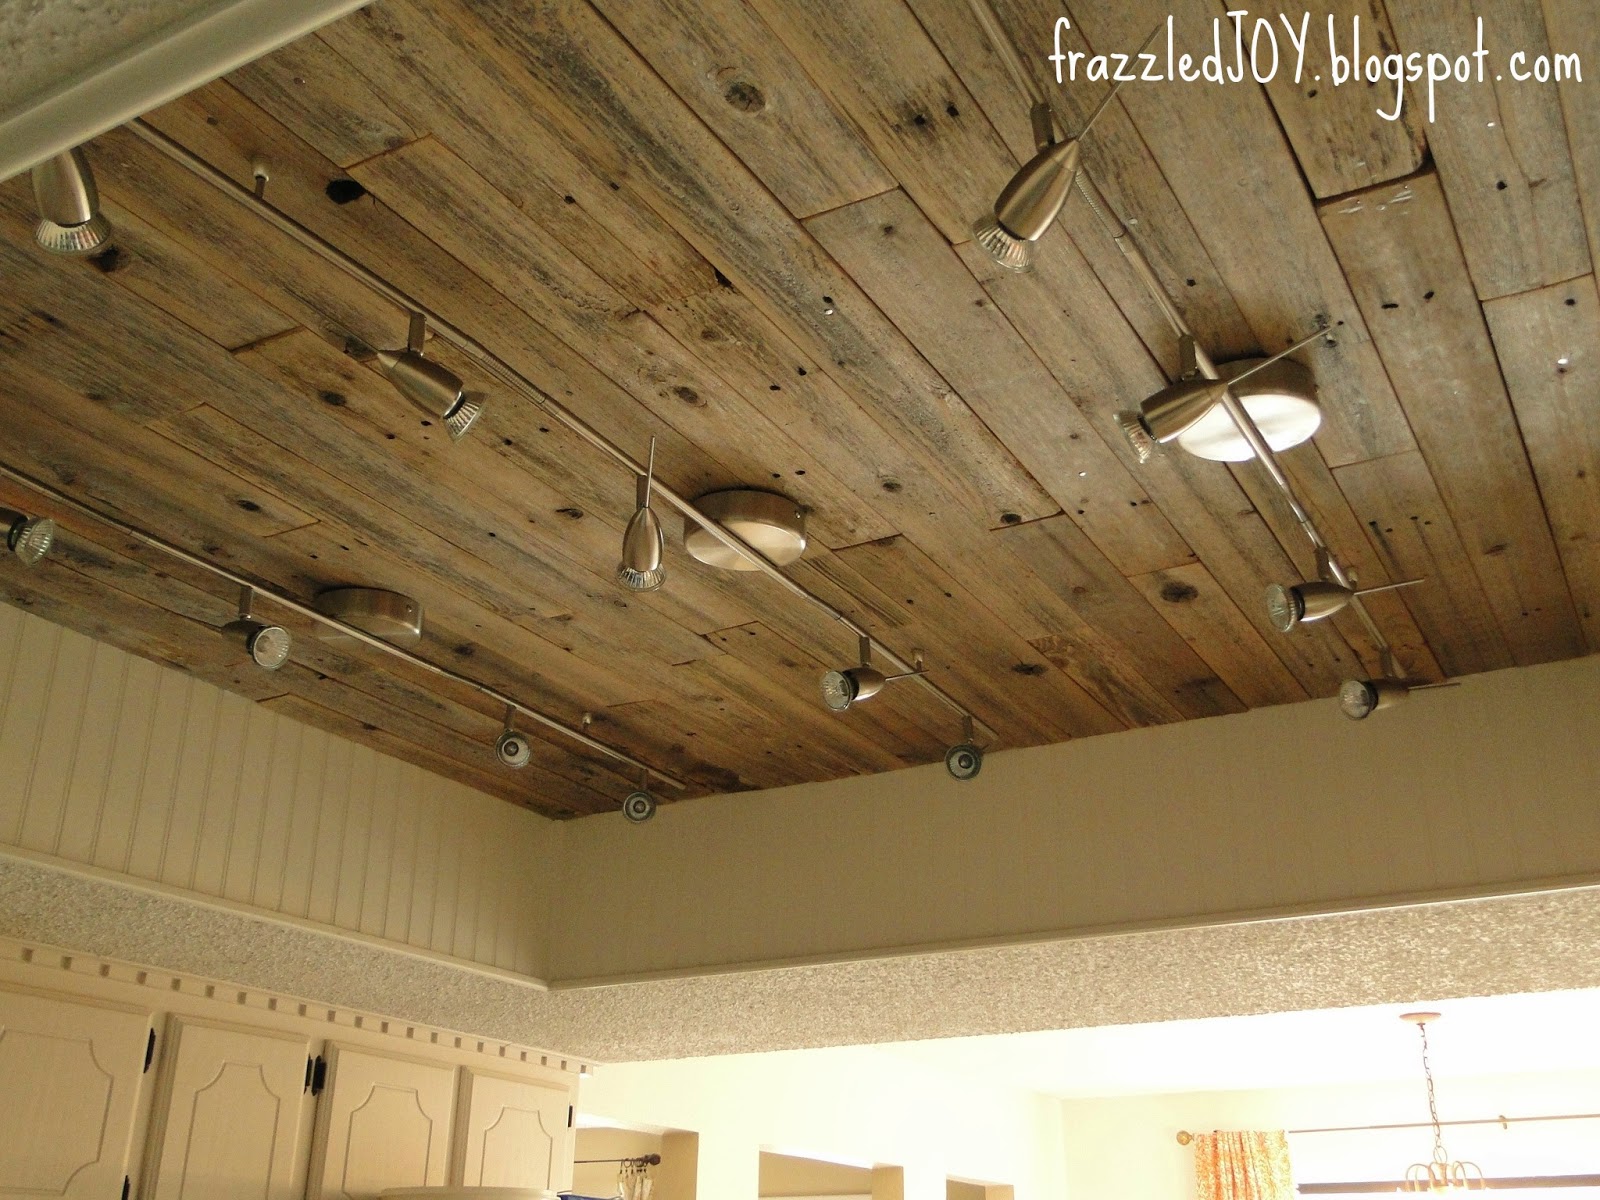
Then we found the ceiling joists and started planking, using the same wood we used on our rustic kitchen island. We nailed the boards into the studs, staggering the sizes of the boards along the way.  


We installed the light fixtures as we went. Mostly because we wanted to see what it was going to look like!!  You know, then if I hated it I could tear it down and start over!  Ha!


When that was all finished…the last board!!


And the lights were all in place


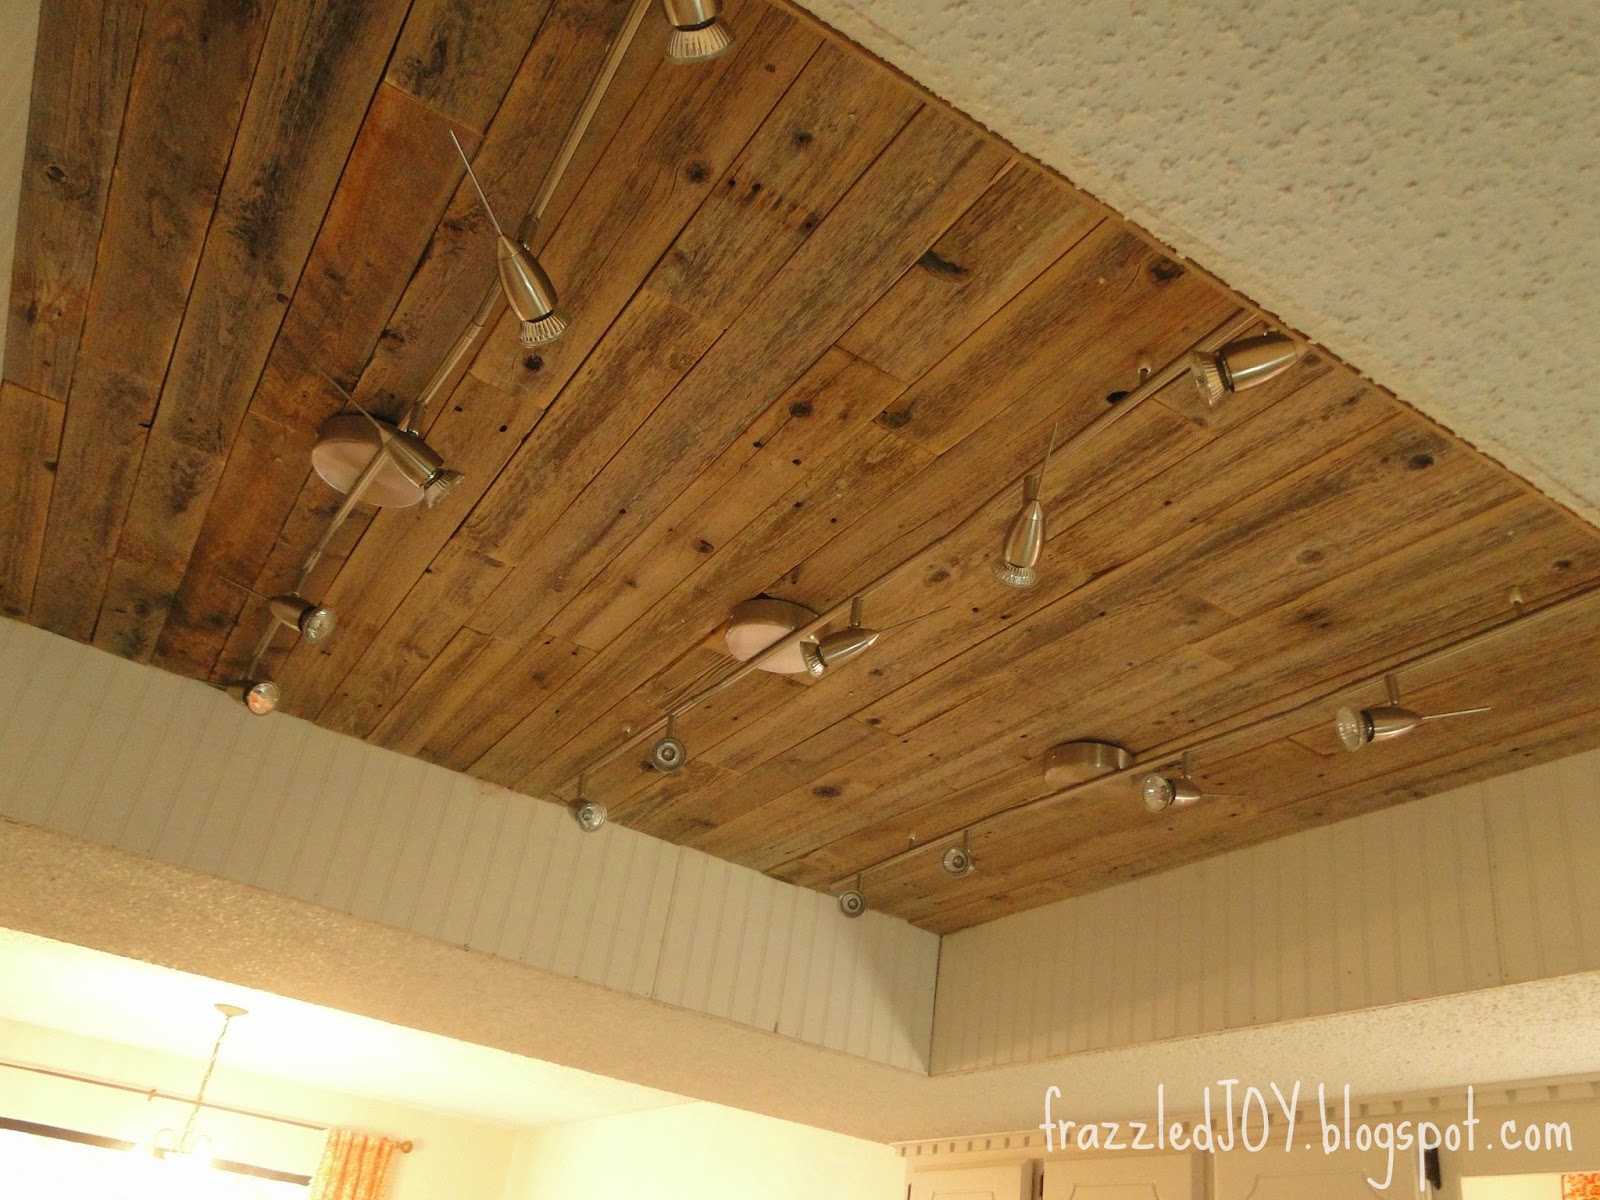
I used some molding to trim out the beadboard, caulked to fill in all the cracks and imperfections, and lastly painted the beadboard and molding.  I used corner round in the corners, and a chair-rail molding around the bottom edge. 


Here is the approximate price break-down for the project:

Three sets of lights + light bulbs – $130
One 4×8 sheet of beadboard paneling – $20
Trim molding – $30
Liquid Nails – $3
Paint – $3 (I used a sample jar because it was such a small area – and because I started with a sample jar that I already had :)).

Not a bad transformation for under $200!! For more after photos check out Monday’s post.

 photo Blessingssignature_zps514a1303.png

 photo Namesignature_zpsd15d2f6d.png

Linking up with Inspiration2 Link Party
 photo bloglovin_zpsb0b70cab.png  photo pinterest_zps708232ae.png  photo twitter_zps554a4be1.png  photo rss_zpsa097a399.png  photo google_zpsa411dd38.png  photo instagram_zpsff3b8af2.png  photo facebook_zpsd7445160.png
Previous Post: « New Kitchen Lighting + Planked Ceiling
Next Post: Just a Little Sparkle »

Reader Interactions

Comments

  1. Kris @ Driven by Décor says

    November 19, 2014 at 1:35 pm

    It looks awesome Denise!!! LOVE the wood on the ceiling!

    Reply
  2. pam {simple details} says

    November 19, 2014 at 11:45 pm

    Wow, so creative!! I love that it ties in with the wood on your island! Wonderful job!

    Reply

Leave a Reply Cancel reply

Your email address will not be published. Required fields are marked *

Recipe Rating


This site uses Akismet to reduce spam. Learn how your comment data is processed.

Primary Sidebar

Welcome

Hey friend!! I'm so glad you stopped by today!! I am married to the love of my life and I have been blessed with four amazing kids. My life is kinda crazy some days and I feel frazzled often. But, Jesus brings me JOY each and everyday in the little things. I love everything home decor, DIY, and crafts!!
Read More…

Categories

Archives

Copyright

I share to inspire!! Please feel free to use and share my ideas!! I simply ask that you give credit back to my site and add a link back to my blog if you reference one of my projects, or photos. Thank you so much!!

Recent Posts

  • Empty Nesting, My Thoughts
  • Kitchen Cabinet Facelift
  • Just Popping In To Say “HI”
  • Knock, Knock….Anyone There?
  • Easter Tablescape 2022
  • CONTACT ME
  • DISCLOSURES

Footer

Hubby and I took a little trip to Colorado Springs Hubby and I took a little trip to Colorado Springs and had the best time! ❤️ We took off as the sun was rising in OKC and landed in the mountains! 🥰 It was so good to get away together! We hit all the high points (pun intended haha) - Royal Gorge, Pikes Peak, Garden of the Gods, and Seven Bridges. We hiked everyday! Can’t wait for our next adventure!! 🥰
.
#emptynestingrocks #travel #marriage #emptynesterlife❤️
31 years with my favorite! So thankful for you! ❤️❤️ #marriage #anniversary #growingoldtogether
Our baby graduated from college last night!! From Our baby graduated from college last night!! From our alma mater! 🧡🖤 We are feeling beyond blessed and are so loving this stage of parenting! Watching our adult kids live life well is truly remarkable! God has big plans for you Gavin and we can’t wait to watch him work in and through you! Love you!
Happy Resurrection Day!! He is risen!! Happy Resurrection Day!! He is risen!!
Haven’t shared something from my house in months Haven’t shared something from my house in months! Just refreshed our mantle for spring and I love it! So happy that Oklahoma’s weather has finally chilled out and become more springy! ☀️🌸🌺
.
#homedecor #ourhome #spring #springismyfavorite #springdecor
One month of being Gigi and Pops to this precious One month of being Gigi and Pops to this precious little blessing!! 💕 We love you so much Blair!!
Five more sleeps! ❤️🎄 Nothing better than t Five more sleeps! ❤️🎄 Nothing better than twinkle lights on a Christmas tree ✨☺️ Looking forward to all the family festivities over the next few days. Merry Christmas to you all!! 
.
#christmas #christmastree #christmasdecor #christmaslights #merrychristmas
32 years ago today I made one of the best decision 32 years ago today I made one of the best decisions of my life when I said “yes” to marrying this guy. We celebrated our 30th anniversary back in May! We’ve experienced a lot over the years but there’s no one I would rather be doing life with! @vangreenwood you’re my favorite!! ❤️❤️
.
#marriage #proposalanniversary #youremyfavorite
I really enjoyed decorating my new kitchen shelves I really enjoyed decorating my new kitchen shelves for Christmas! What’s your favorite spot to decorate? I really like to spread out Christmas décor throughout the house! 🎄❤️
.
#homedecor #christmasdecor #christmas #itsbeginningtolookalotlikechristmas #favoritetimeofyear
Follow on Instagram

Copyright © 2025 · Captivating Theme on Genesis Framework · WordPress · Log in