• ALL ABOUT ME
  • OUR HOME
  • ABOUT FAITH
  • CONTACT ME
  • DISCLOSURES
  • Nav Social Menu

    • Bloglovin
    • Facebook
    • Instagram
    • Pinterest
    • Twitter

  • DIY
  • Family
  • Home Decor
  • Encouragement
  • Organizing
  • Shop My Favorites

March 19, 2013 · 7 Comments

DIY Chevron Backdrop

DIY

Okay, so like a week ago I shared with you my burlap wreath.  And, my frustration over how well it blended in with the brick.  I was so bummed and had hit a brick wall {ha!}.  Then, as I walking in the back yard, I spotted this.
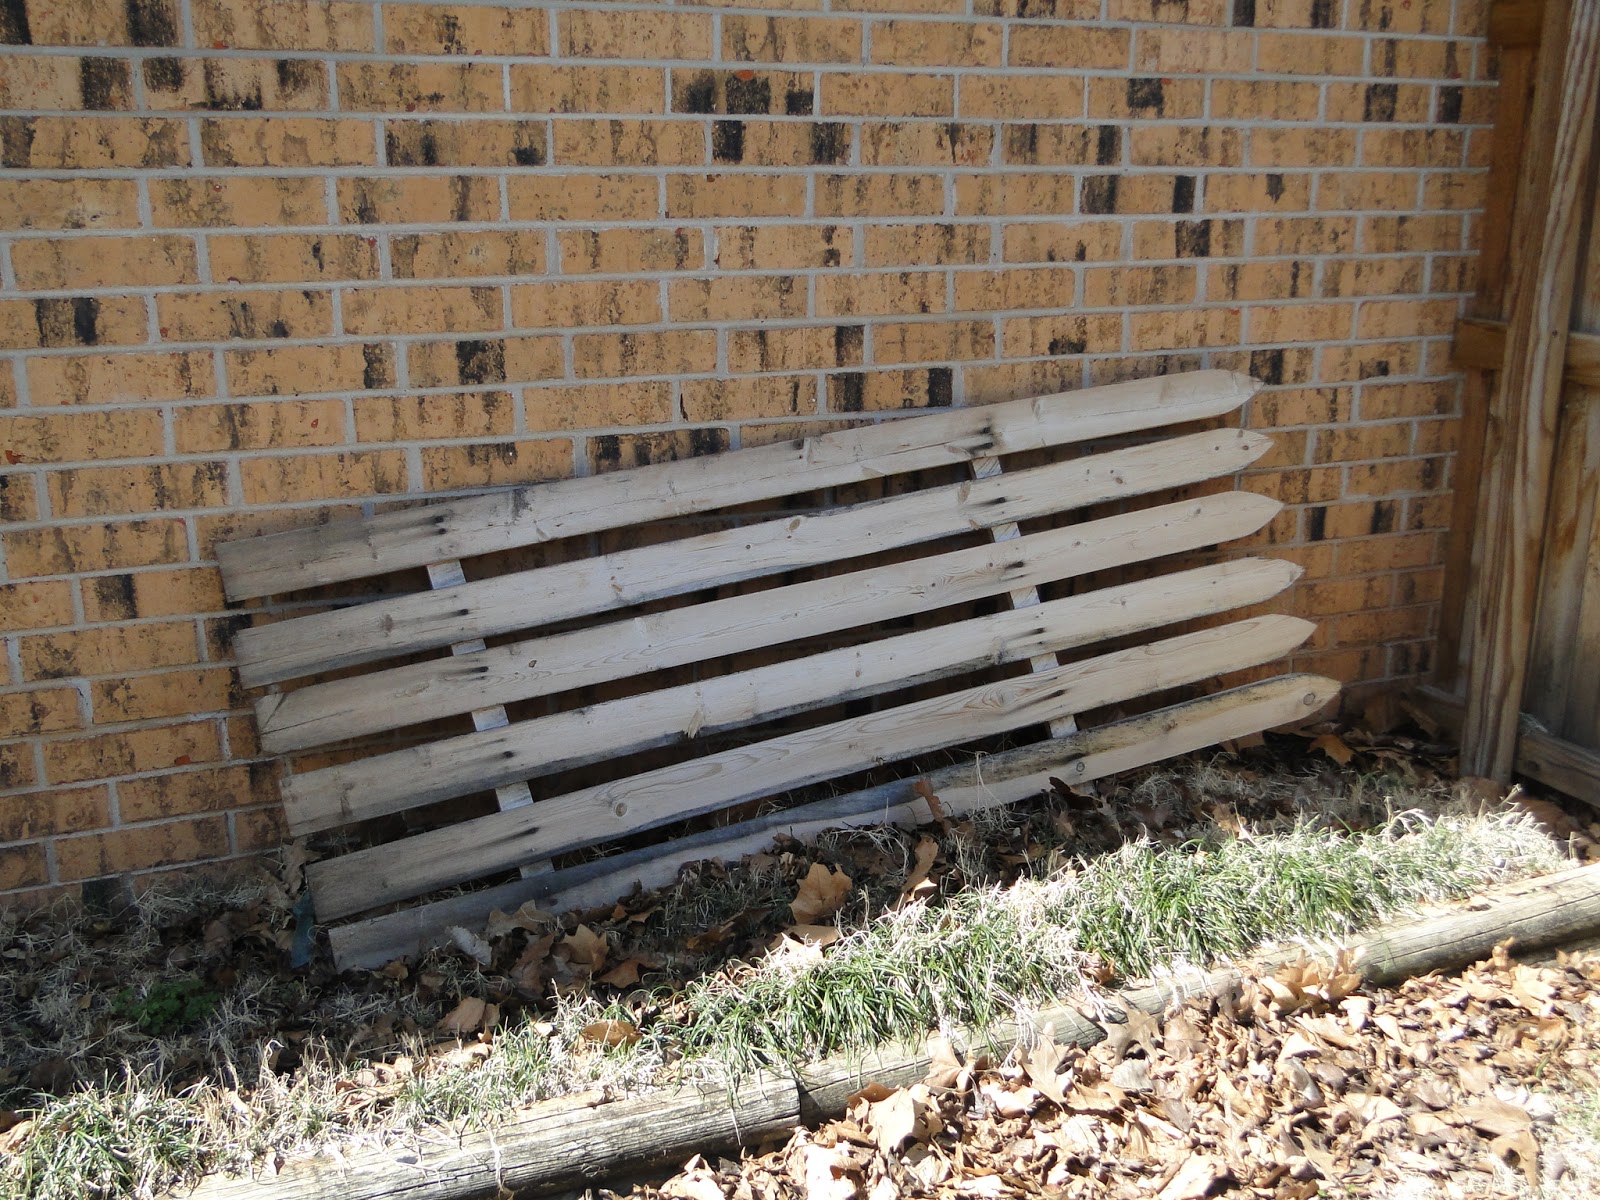
This was our attempt at building a “door” for our small shed to keep the dog out.  It never stayed together the way we intended, the dog ran away :(, and we took it down.  I asked my husband not to throw it out last summer because “I might use it”… and here it has sat since then.  {have I mentioned our back yard needs lots of work?}
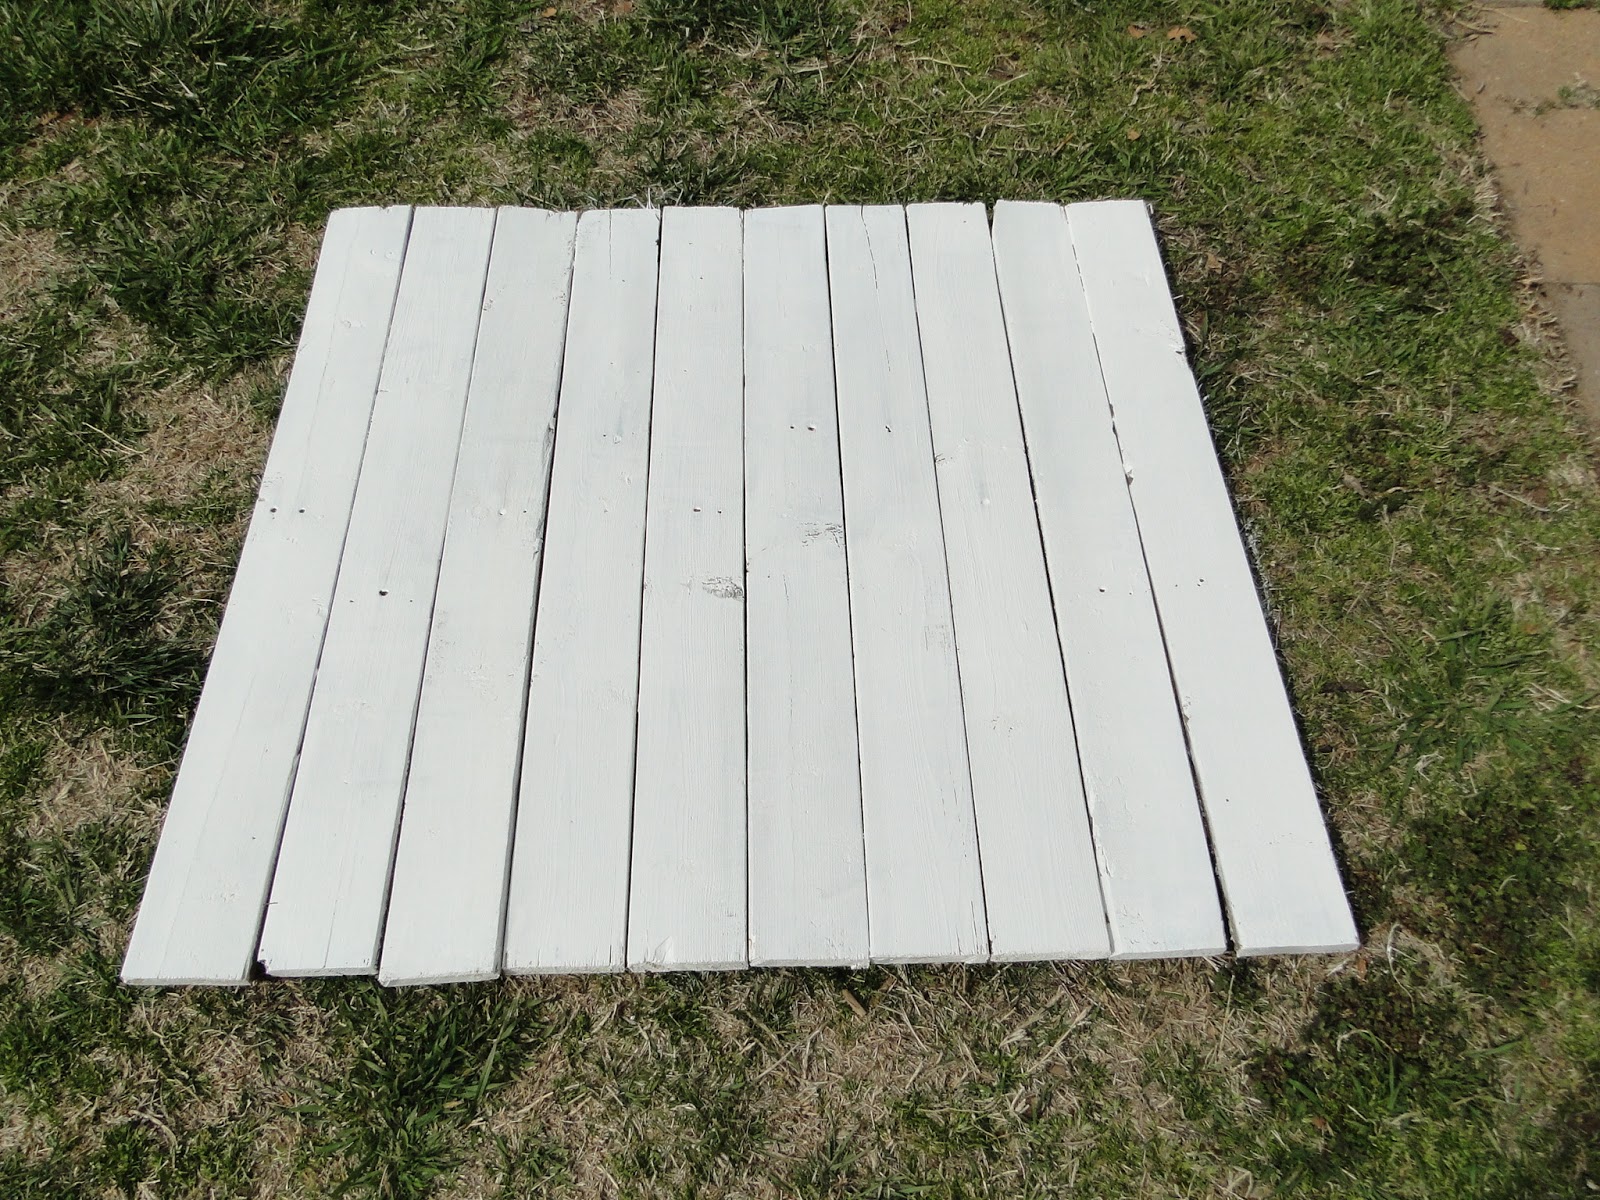
So, I started in tearing it apart.
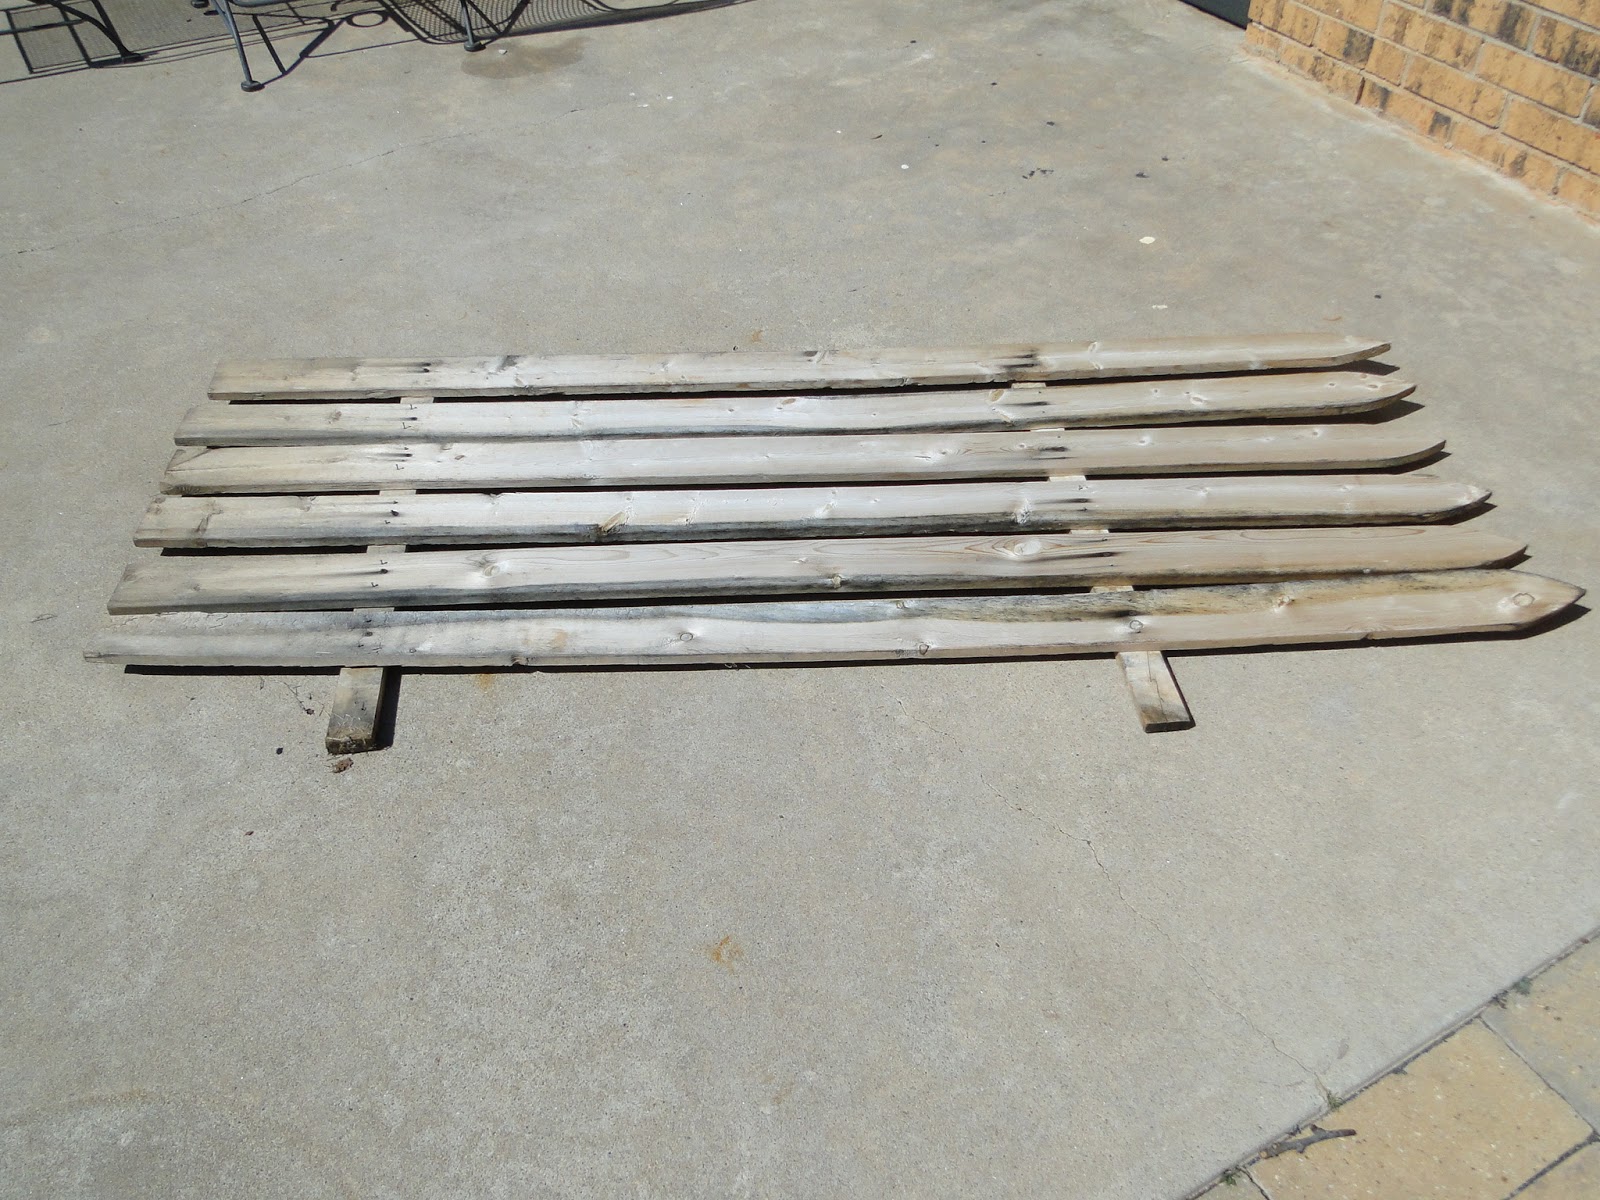
And then cutting it up.  I decided I didn’t really want it that long, so I thought I would cut the pickets in half.  But, then I didn’t want only one end to have the points, so I decided to cut those off too.  And then I put it back together using the same 1×2’s to anchor the pieces together.
Remember this wood wasn’t perfect to begin with and it had been sitting outside for months through all the elements.  Perfectly imperfect!!
 
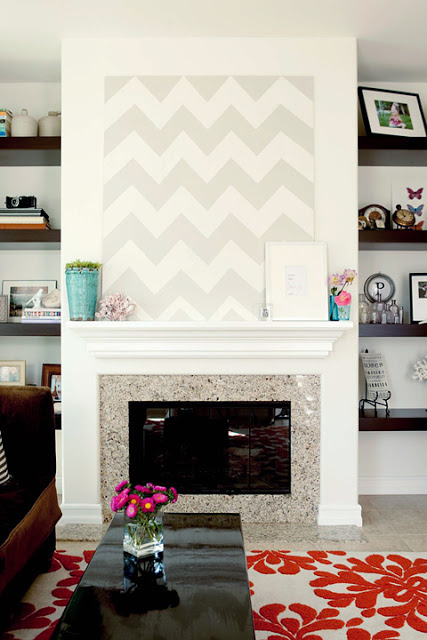
I had grand plans for this piece.  I love the look of chevron and you remember I shared this picture with you.  
source: MadeByGirl
So….I read several tutorials on how to make chevron stripes and finally thought I had it figured out….sorta.
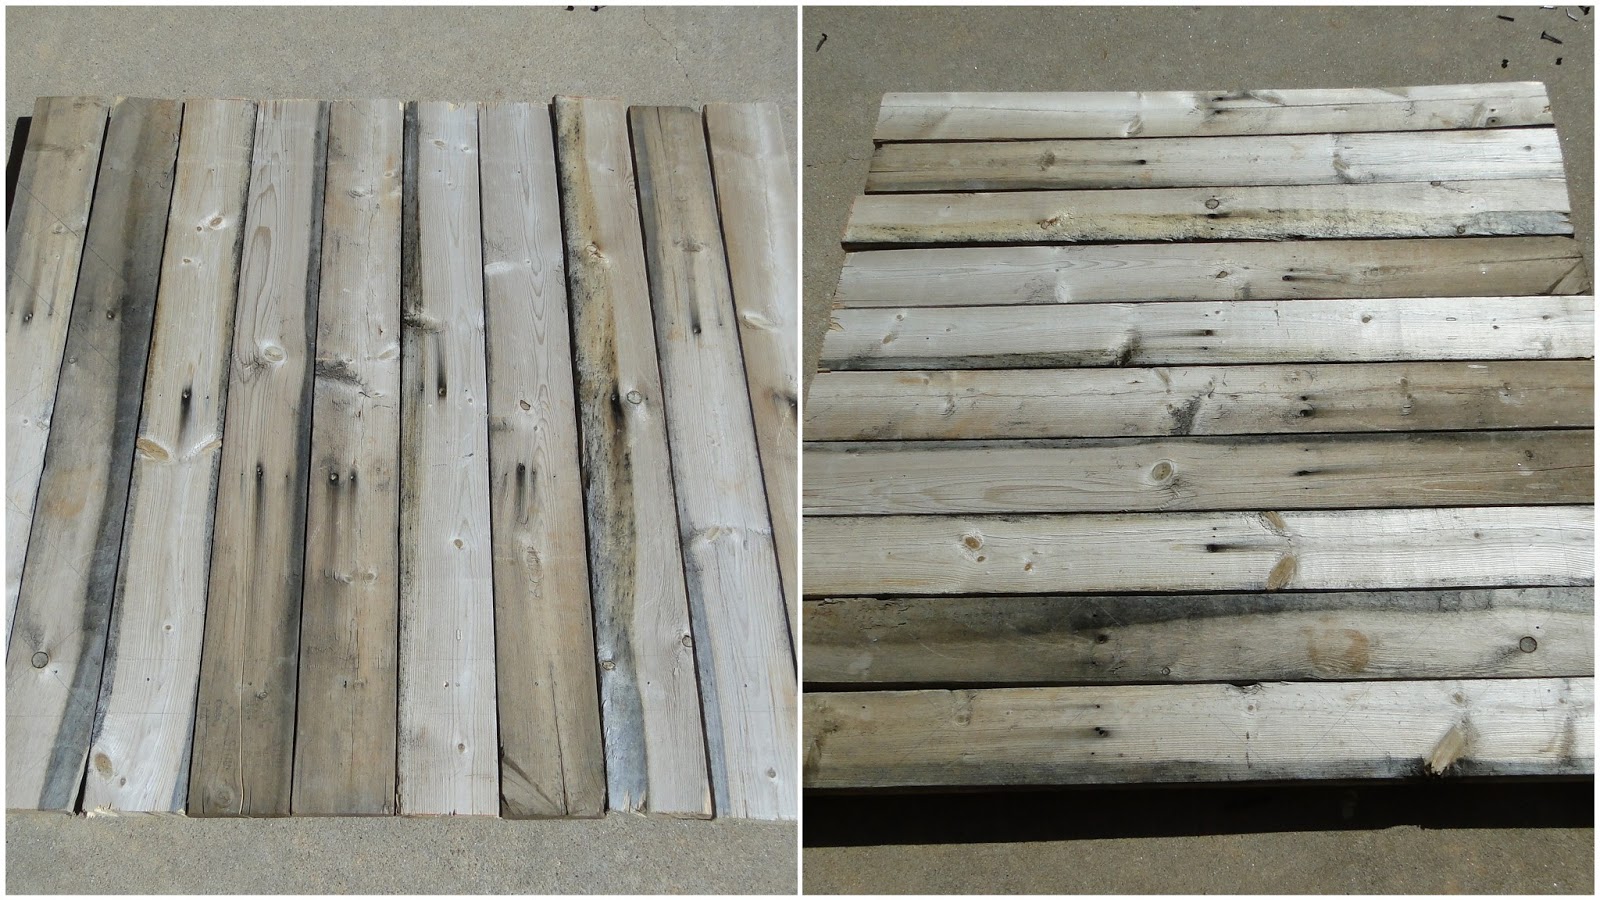
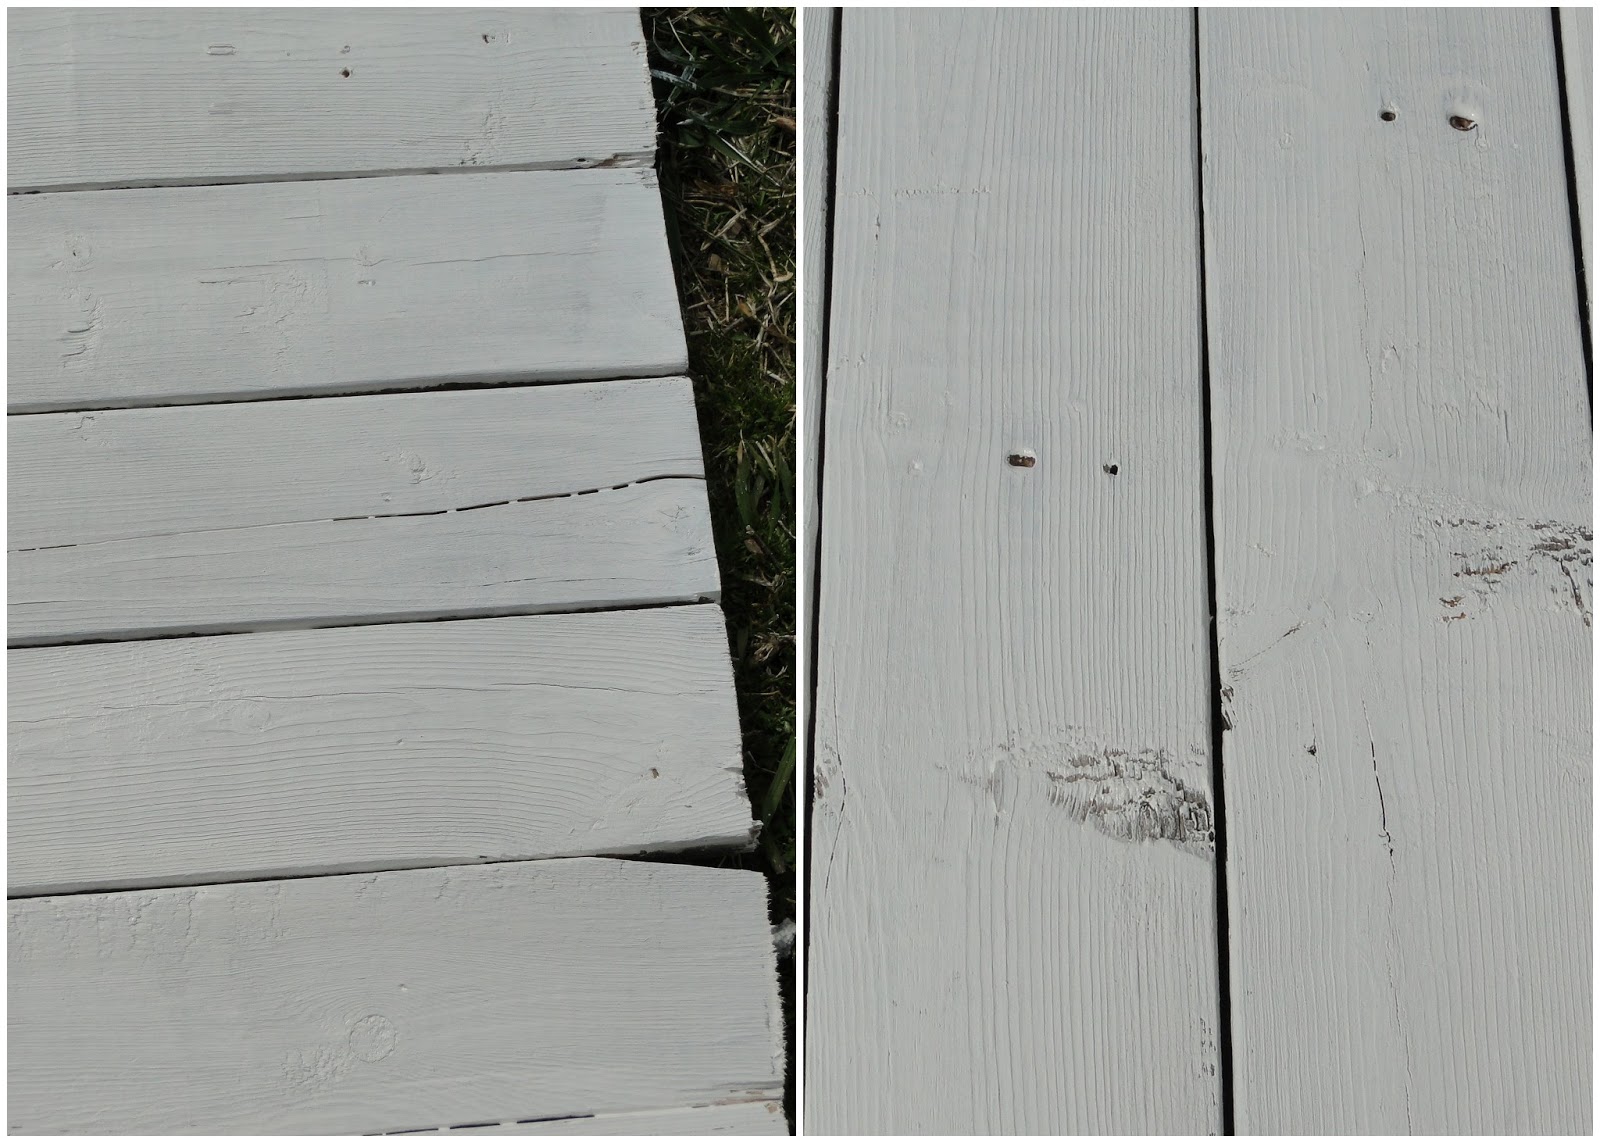
For the background color, I used the white paint that I used to paint my built-ins, and doors for a cohesive look that I might be able to use year around.  Remember, I’m not worried about it being perfect so I just slapped the paint on there, not bothering with the holes, or getting complete coverage.  
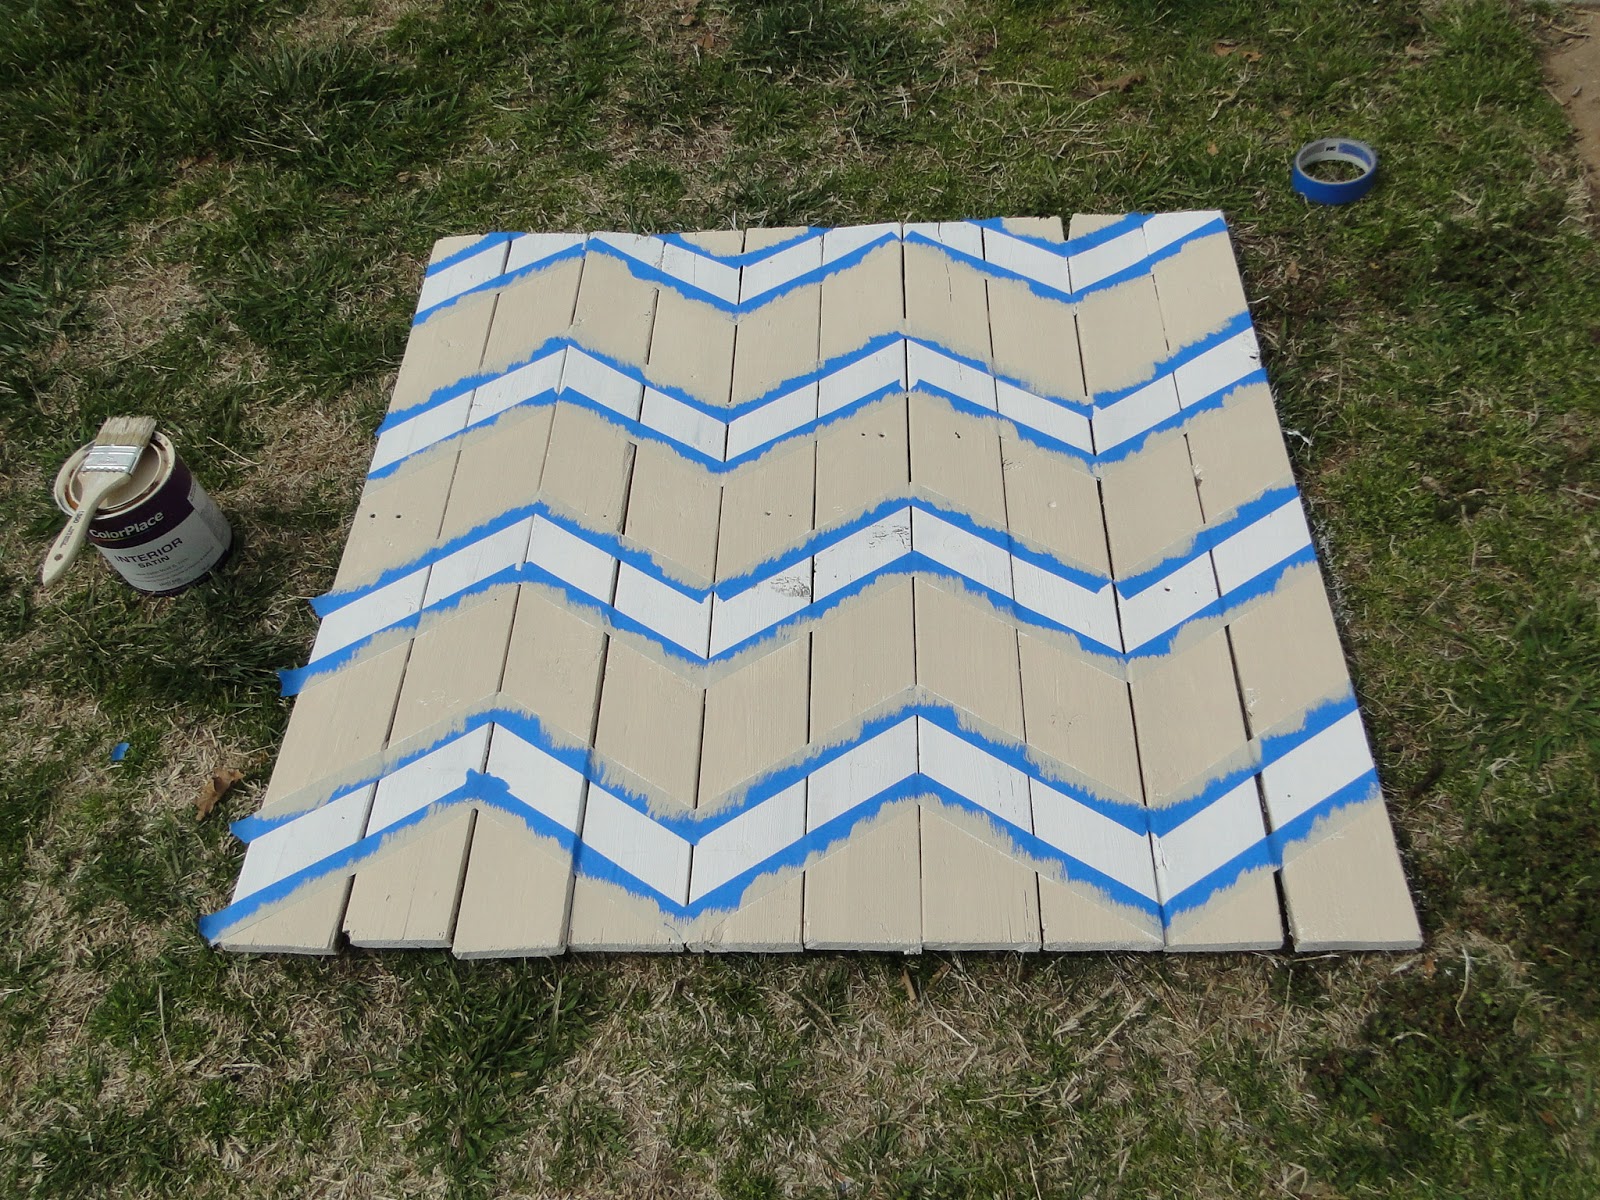
Then for the chevron design.  I’m so not one for measuring more than necessary so I decided to use the planks for the vertical lines and use a yard stick for the horizontal lines.  Honestly I wasn’t sure how wide I wanted the stripes to be.  I’ve told you before I’m a VERY visual person.  So I decided to just use the width of the yardstick to make horizontal lines across the whole piece.  I would decide after which ones to use. 
Then I brought out the tape and starting making the angles.  Simply choose how many “rectangles” wide you want the stripe to be and how many “planks” long you want the stripe to be and you have your angle.  Okay – seriously – I was majorly winging it.  🙂  The taping part can get a little tricky – don’t get in too big of a hurry.  I’m soooo impatient so yes this was hard for me, but luckily it was a small piece.  The big spaces are where you will paint, and the small spaces will stay the original color.  Make sure you press down the edges of the tape to prevent the paint from seeping under.
I decided to use the wall color that I used in my living room, again to achieve a cohesive look.  Again, not worried about perfection, {but not wanting the paint to bleed under the tape} I painted on a fairly light coat.  By the time I got to the end of the board I was almost giddy!!  I couldn’t wait to pull the tape…
so I didn’t!!!  Look at the finished product!!
It is exactly how I envisioned!!  

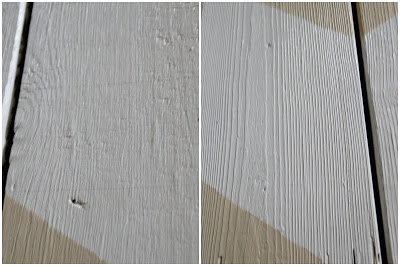
I was left with quite a few pencil lines on the white paint.  


Nothing that a damp rag won’t remove, especially if you make your lines as light as possible.

Now, it is fairly heavy so I plan on mounting a nice picture hanger wire to the back.  My hubby had installed a screw into the brick years ago for me to hang things on.  Then I will use a command hook on the board to be able to hang things {like my wreath} on the front of the board.  Perfect imperfection!!  LOVE!! 

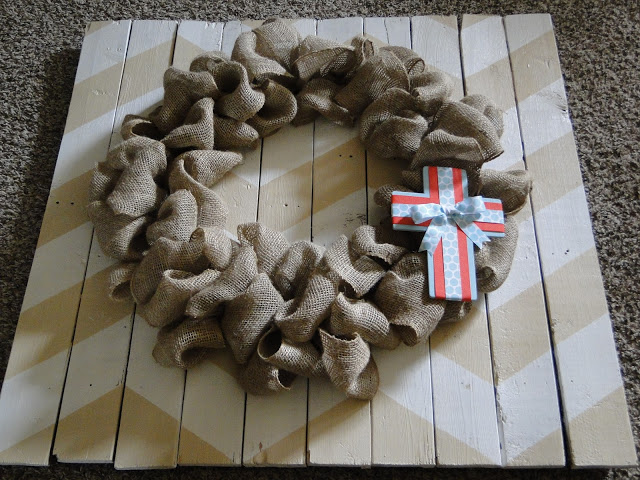
This will give you an idea of what it will look like.


I hope to get my mantel spruced up sometime this week, so I can share with you the complete look.  But, let’s get real folks – it’s spring break ;)!!

Blessings to you and yours!!

Linking up 

at Beneath My Heart
best of march

and here at

Time to Shine Party

and at It’s Overflowing
Overflowing with Creativity

and here

Previous Post: « Memories and Family Recipes
Next Post: Springified Mantel »

Reader Interactions

Comments

  1. Jennifer @ Dimples and Tangles says

    March 19, 2013 at 8:25 pm

    Looooove it! I've got some old fence panels sitting outside for another project, but you've got my wheels turning! Can't wait to see it up on the mantle!

    Reply
  2. absolutelybositively says

    March 19, 2013 at 11:10 pm

    SO so cute!! Love it!! 🙂

    Reply
  3. Lauren says

    March 20, 2013 at 10:24 pm

    I love anything with chevron. So I definitely love this. I would love it if you would link this up to my party.

    http://www.ifitsnotbaroquedesignblog.blogspot.com/2013/03/tuesday-link-party-11.html

    Reply
  4. pam {simple details} says

    March 24, 2013 at 1:48 pm

    Don't you love it when your project turns out just as you were hoping? It's so pretty, I love the subltle colors and your wreath looks great against it! Have fun with your mantle and Happy Spring Break! 🙂

    Reply
  5. Gabbi @ Retro Ranch Reno says

    March 29, 2013 at 2:48 pm

    I adore this! It's absolutely gorgeous…great job!! 🙂

    Reply
  6. Cher-Ann Texter says

    April 2, 2013 at 10:39 pm

    So fantastic! Stopping by from the Beneath My Heart March linky party!

    Cher @ Designs by Studio C
    http://designsbystudioc.com

    Reply
  7. EMILY WISE says

    April 3, 2013 at 2:24 pm

    Looks great! I love me some Chevron!

    Reply

Leave a Reply Cancel reply

Your email address will not be published. Required fields are marked *

Recipe Rating


This site uses Akismet to reduce spam. Learn how your comment data is processed.

Primary Sidebar

Welcome

Hey friend!! I'm so glad you stopped by today!! I am married to the love of my life and I have been blessed with four amazing kids. My life is kinda crazy some days and I feel frazzled often. But, Jesus brings me JOY each and everyday in the little things. I love everything home decor, DIY, and crafts!!
Read More…

Categories

Archives

Copyright

I share to inspire!! Please feel free to use and share my ideas!! I simply ask that you give credit back to my site and add a link back to my blog if you reference one of my projects, or photos. Thank you so much!!

Recent Posts

  • Empty Nesting, My Thoughts
  • Kitchen Cabinet Facelift
  • Just Popping In To Say “HI”
  • Knock, Knock….Anyone There?
  • Easter Tablescape 2022
  • CONTACT ME
  • DISCLOSURES

Footer

Hubby and I took a little trip to Colorado Springs Hubby and I took a little trip to Colorado Springs and had the best time! ❤️ We took off as the sun was rising in OKC and landed in the mountains! 🥰 It was so good to get away together! We hit all the high points (pun intended haha) - Royal Gorge, Pikes Peak, Garden of the Gods, and Seven Bridges. We hiked everyday! Can’t wait for our next adventure!! 🥰
.
#emptynestingrocks #travel #marriage #emptynesterlife❤️
31 years with my favorite! So thankful for you! ❤️ 31 years with my favorite! So thankful for you! ❤️❤️ #marriage #anniversary #growingoldtogether
Our baby graduated from college last night!! From Our baby graduated from college last night!! From our alma mater! 🧡🖤 We are feeling beyond blessed and are so loving this stage of parenting! Watching our adult kids live life well is truly remarkable! God has big plans for you Gavin and we can’t wait to watch him work in and through you! Love you!
Happy Resurrection Day!! He is risen!! Happy Resurrection Day!! He is risen!!
Haven’t shared something from my house in months! Haven’t shared something from my house in months! Just refreshed our mantle for spring and I love it! So happy that Oklahoma’s weather has finally chilled out and become more springy! ☀️🌸🌺
.
#homedecor #ourhome #spring #springismyfavorite #springdecor
One month of being Gigi and Pops to this precious One month of being Gigi and Pops to this precious little blessing!! 💕 We love you so much Blair!!
Five more sleeps! ❤️🎄 Nothing better than twinkle Five more sleeps! ❤️🎄 Nothing better than twinkle lights on a Christmas tree ✨☺️ Looking forward to all the family festivities over the next few days. Merry Christmas to you all!! 
.
#christmas #christmastree #christmasdecor #christmaslights #merrychristmas
32 years ago today I made one of the best decision 32 years ago today I made one of the best decisions of my life when I said “yes” to marrying this guy. We celebrated our 30th anniversary back in May! We’ve experienced a lot over the years but there’s no one I would rather be doing life with! @vangreenwood you’re my favorite!! ❤️❤️
.
#marriage #proposalanniversary #youremyfavorite
I really enjoyed decorating my new kitchen shelves I really enjoyed decorating my new kitchen shelves for Christmas! What’s your favorite spot to decorate? I really like to spread out Christmas décor throughout the house! 🎄❤️
.
#homedecor #christmasdecor #christmas #itsbeginningtolookalotlikechristmas #favoritetimeofyear
Follow on Instagram

Copyright © 2025 · Captivating Theme on Genesis Framework · WordPress · Log in