• ALL ABOUT ME
  • OUR HOME
  • ABOUT FAITH
  • CONTACT ME
  • DISCLOSURES
  • Nav Social Menu

    • Bloglovin
    • Facebook
    • Instagram
    • Pinterest
    • Twitter

  • DIY
  • Family
  • Home Decor
  • Encouragement
  • Organizing
  • Shop My Favorites

May 6, 2014 · 6 Comments

Detailed Drapes DIY

DIY

Oh my!!  You guys!!  Thanks so much for all the sweet comments about my drapes!!  Yes, they were DIY, and yes they are made from a drop cloth.  They took a little bit of time, but really were not that difficult.  I made the drapes the same way as I made the drapes for our dining area.  The only change would be the width of the drapes.  Using a 6×9 drop cloth, I simply folded the drop cloth in half making 2 pieces that were 3×9.  

After the drapes were constructed, I grabbed more of the grosgrain ribbon that I used on the bed skirt.  (You could easily do this same treatment with purchased drapes.)  My inspiration came from the drapes in this Sarah Richardson room.

source

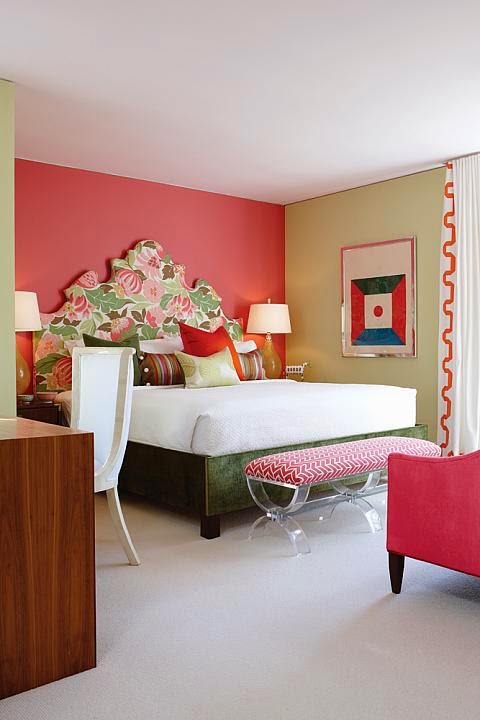
I loved her design, but I thought maybe it might be a little too labor intensive.  So, I made a couple of mock-ups.  


Even though I knew that the zig-zag would take less time and possibly less ribbon, I just could not let go of my inspiration.  
So, I dove in.  Mine does not look exactly like hers, but it is pretty close ;).  Basically, when I did the mock-up, I just started placing, folding, and pinning the ribbon in a way that looked pleasing to my eye.  Then I pulled out my little ruler and used it as a guide to keep things as symmetrical as possible.


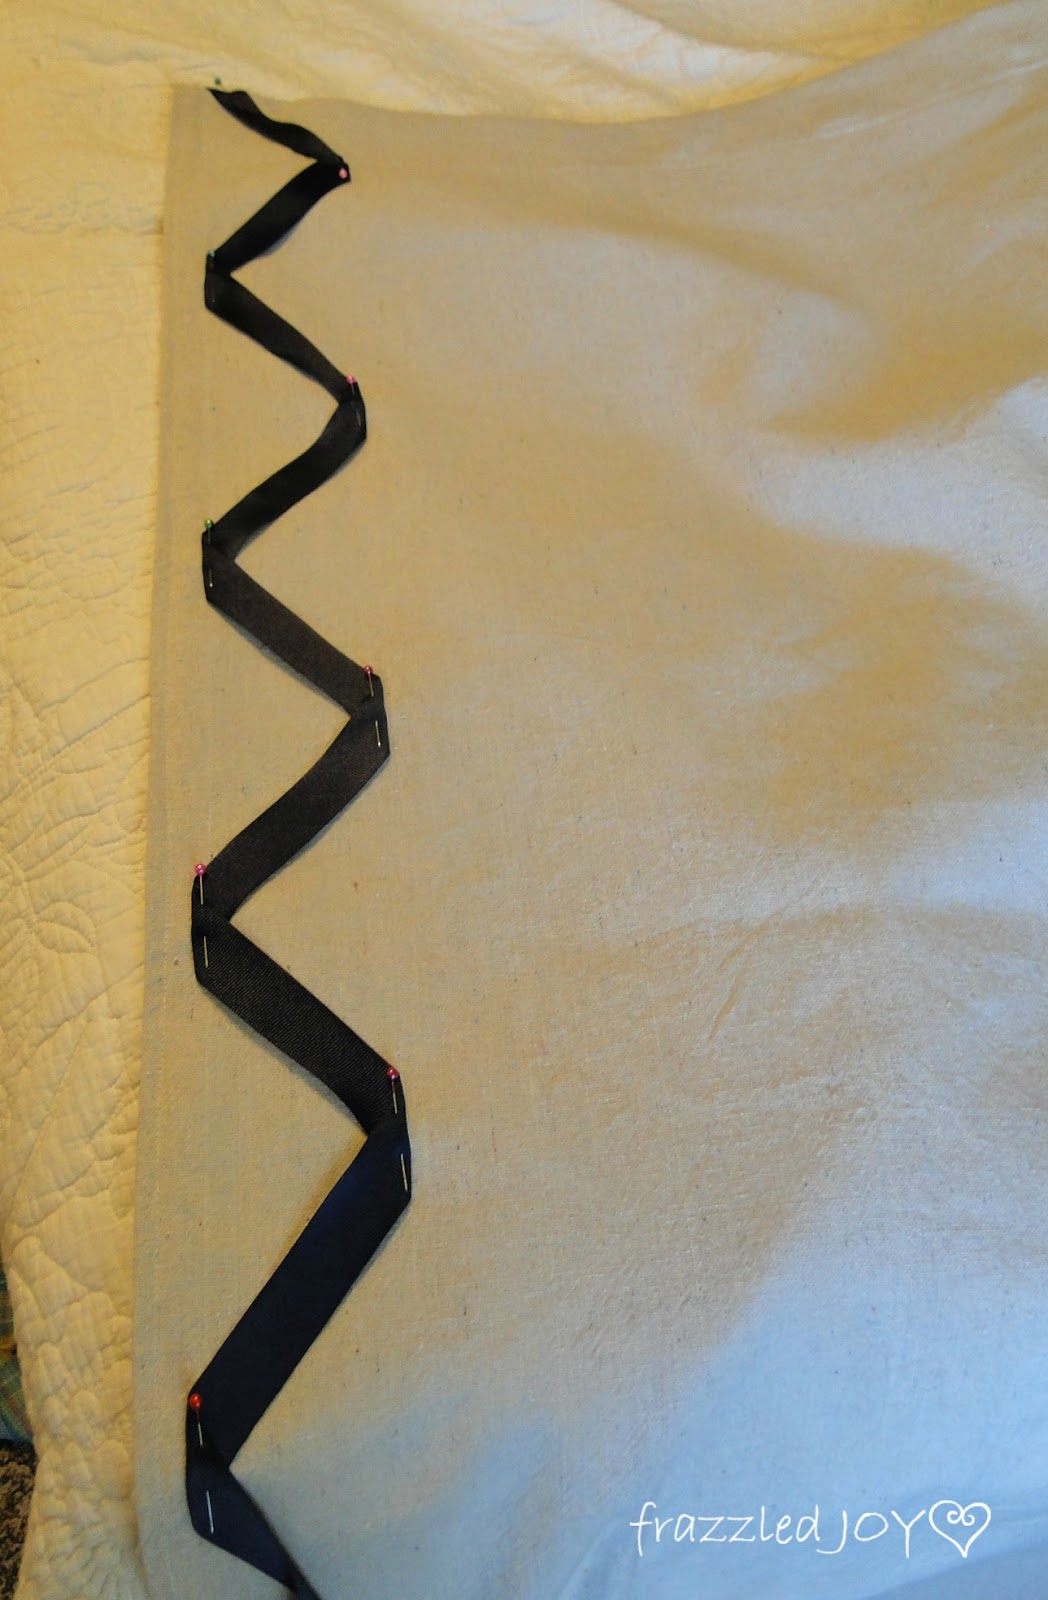
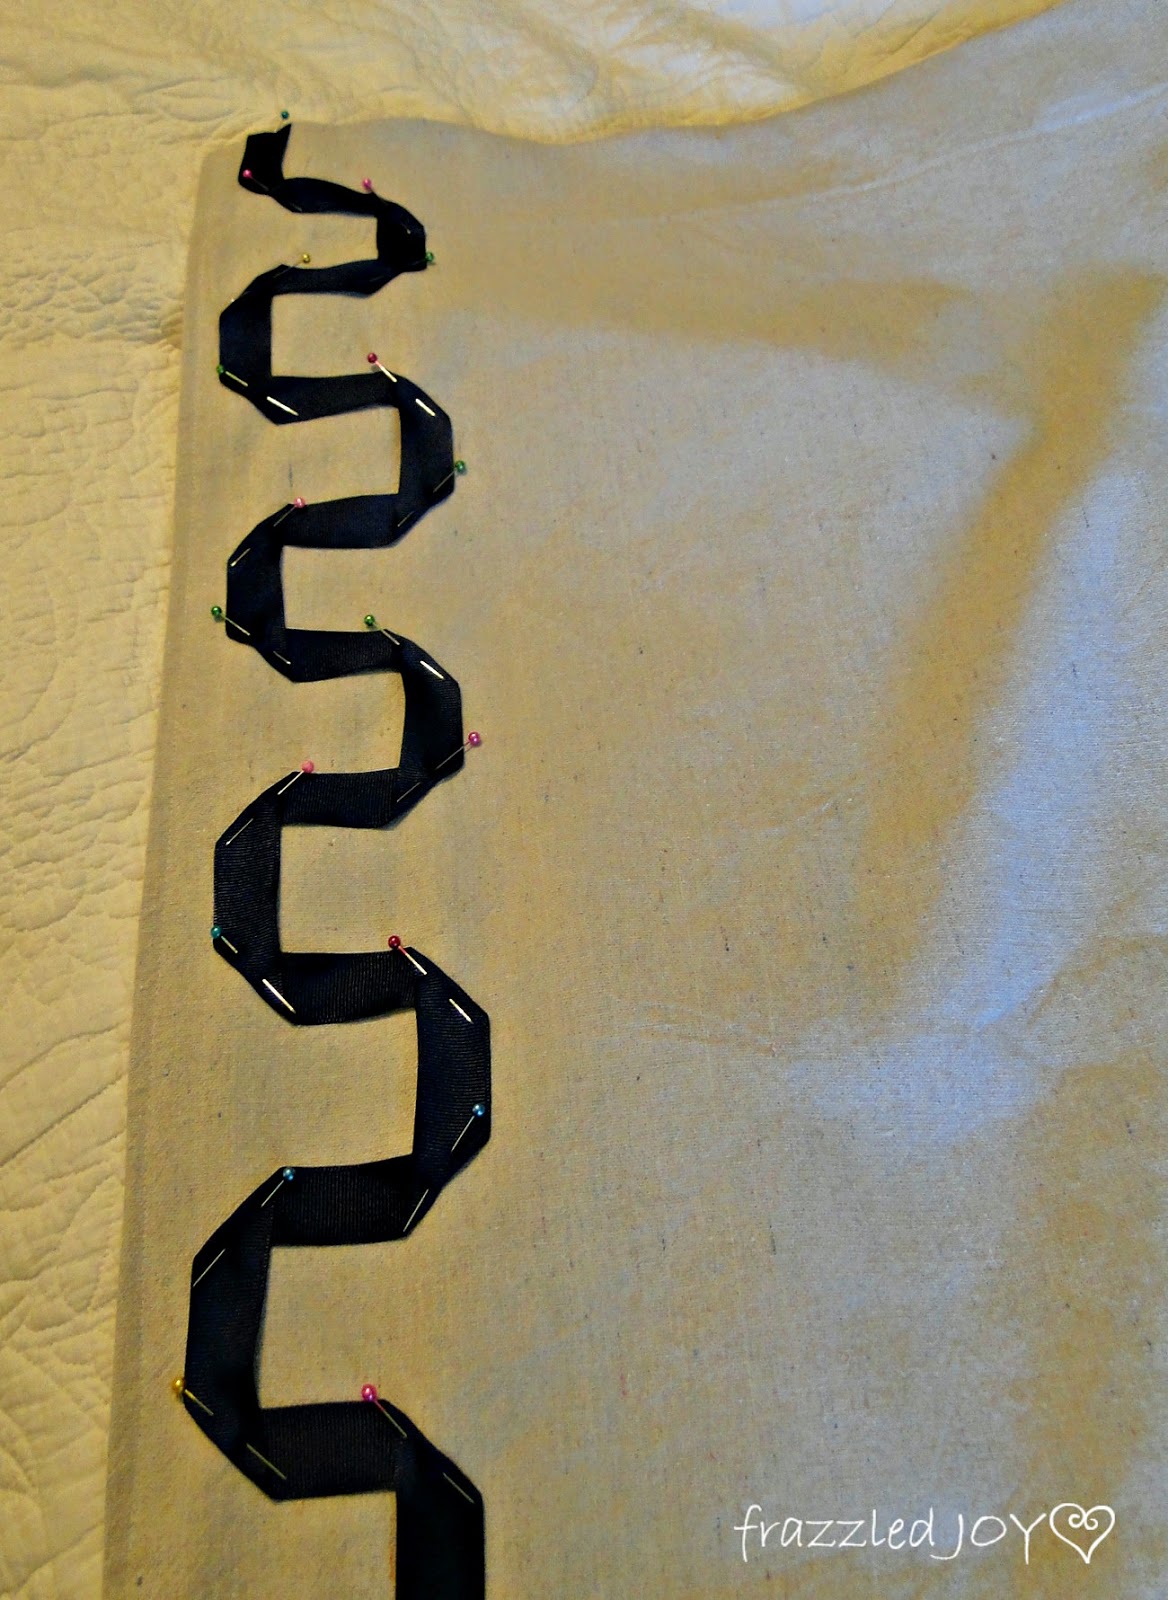
I measured the distance from the top of the design to the edge of the curtain, and kept that consistent.  


Then I measure the distance between the points at the top and bottom “u’s”.  


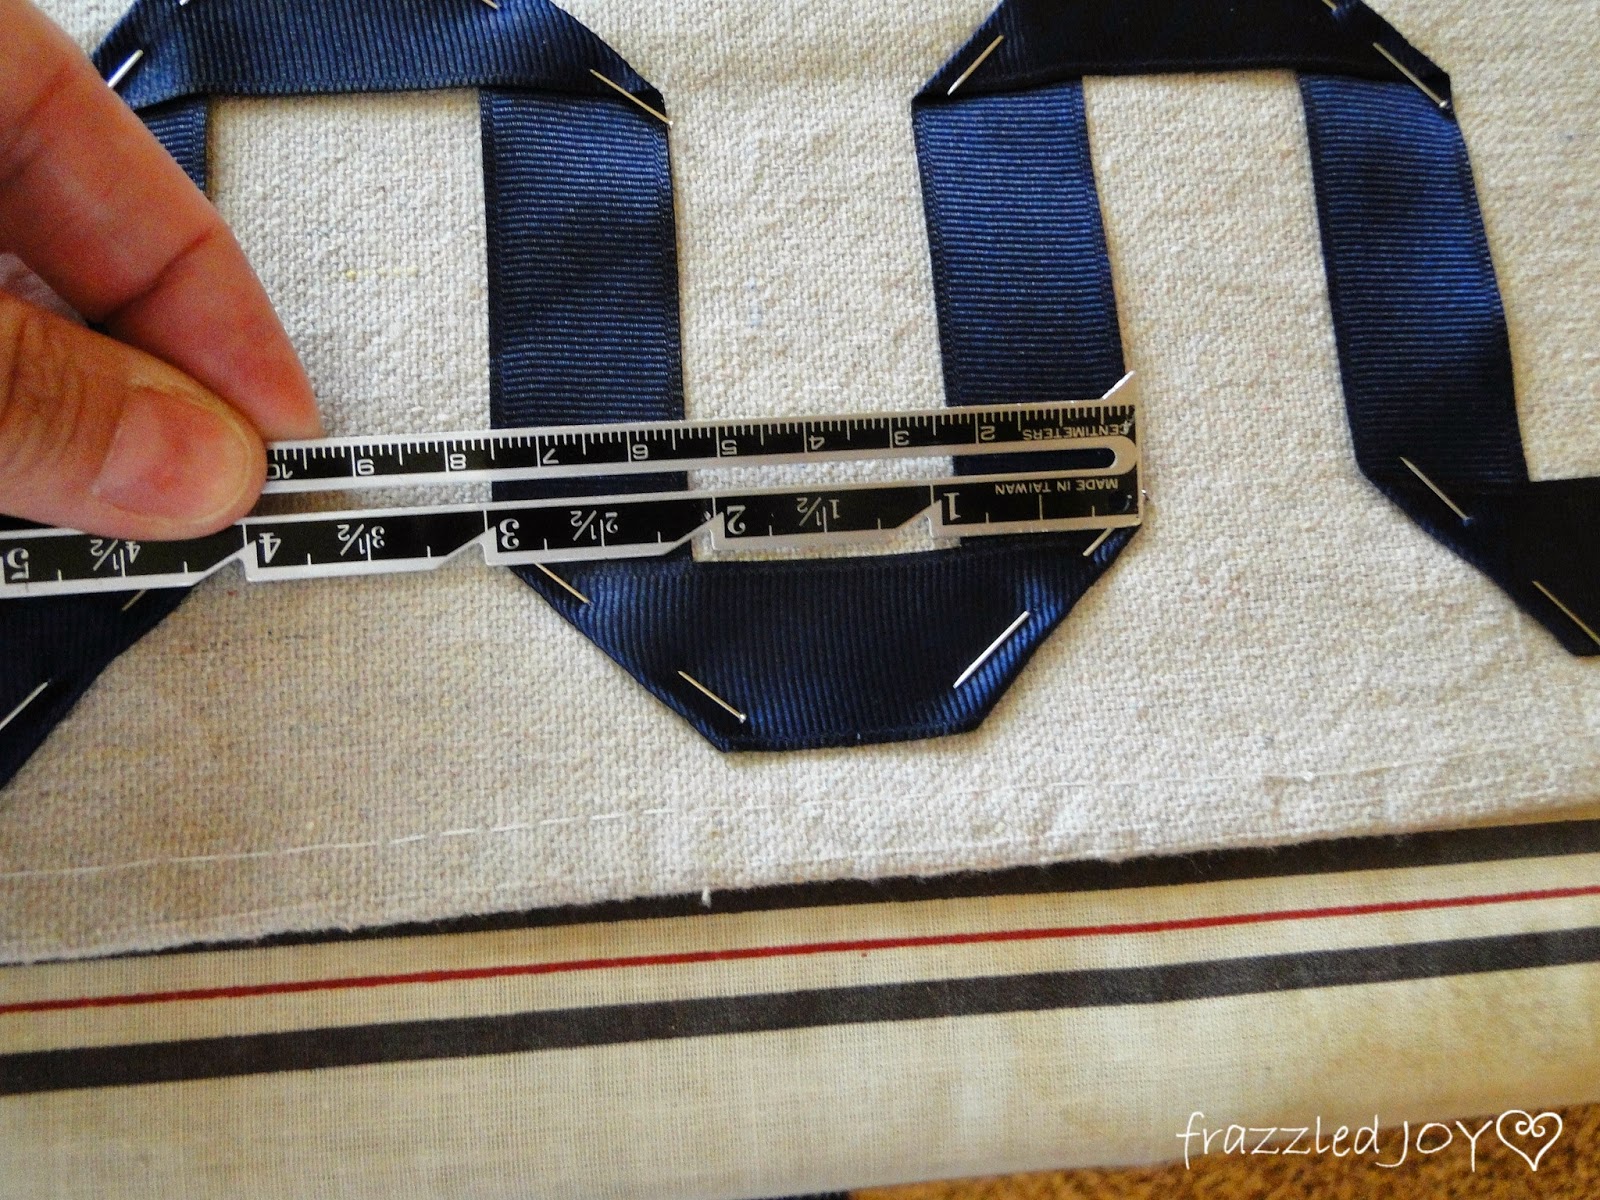
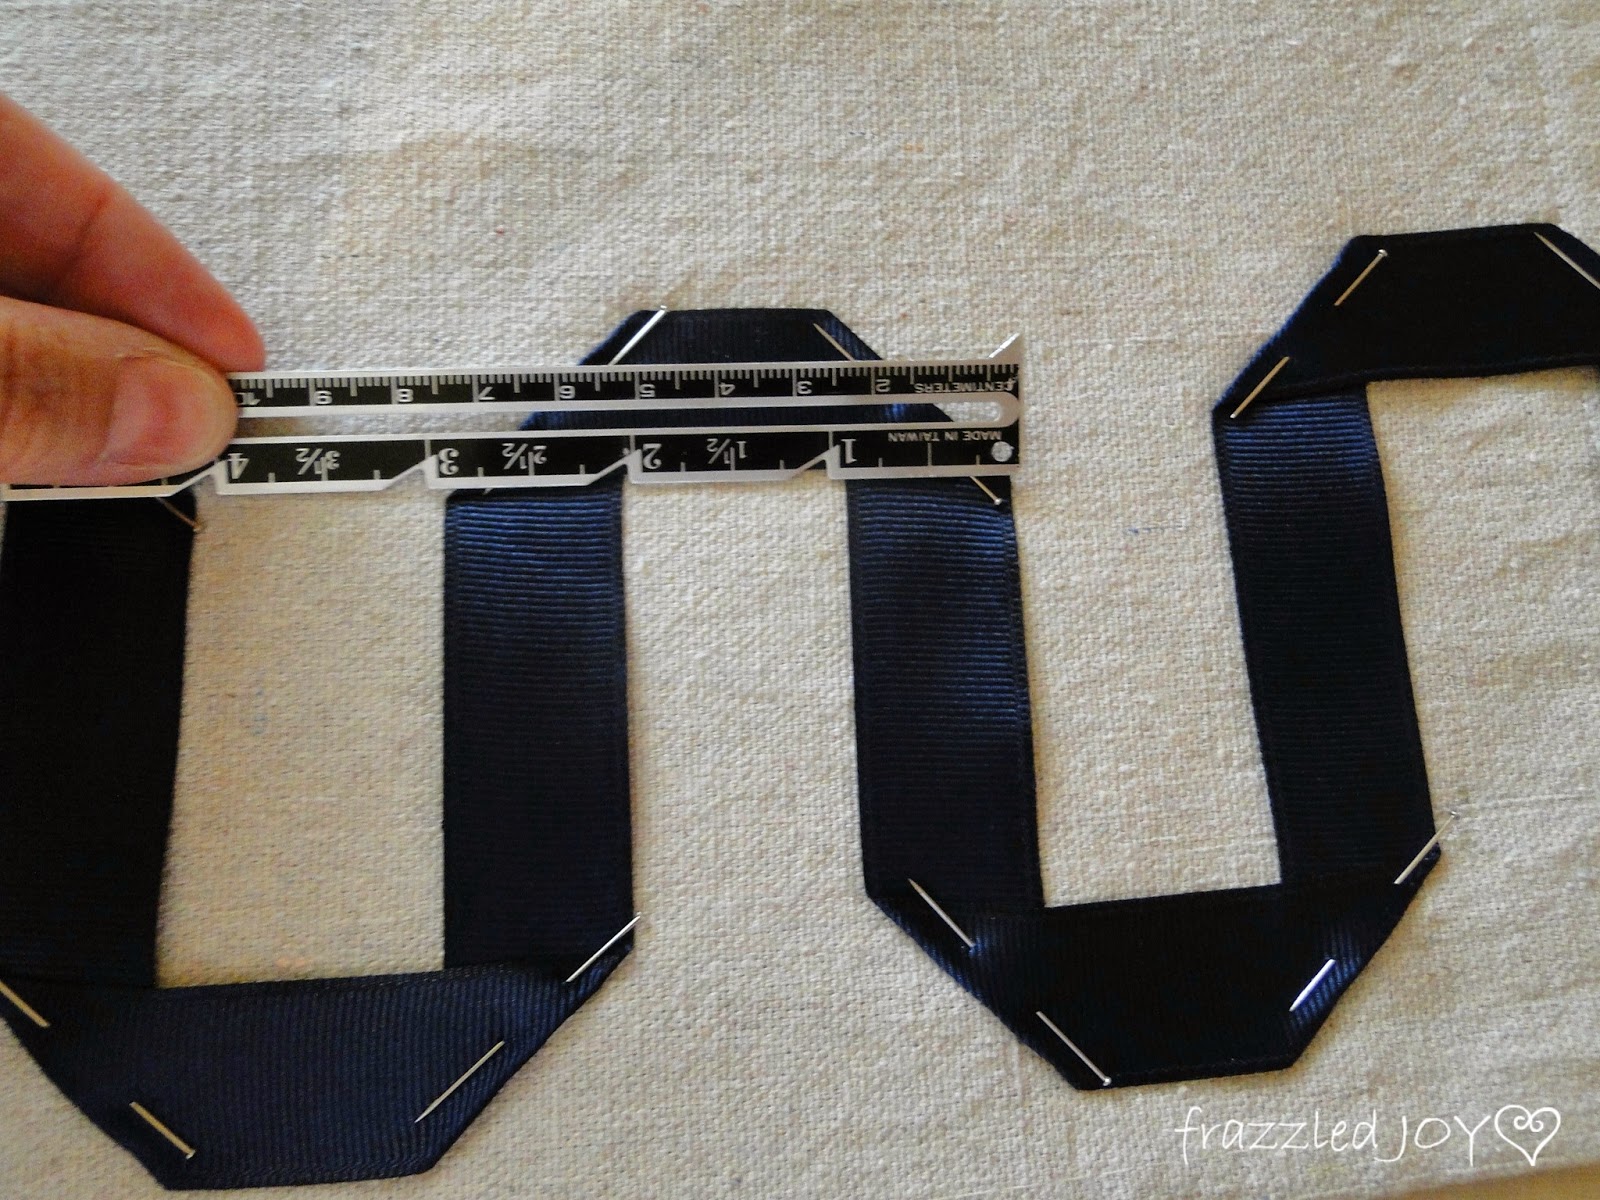
By keeping these three spots measured and uniform, everything else will be uniform.  I feel like I’m pretty good at eye-balling a straight line, so I did not worry about using a level on the straight parts.  Also, I’m not that concerned about it being perfect!!  

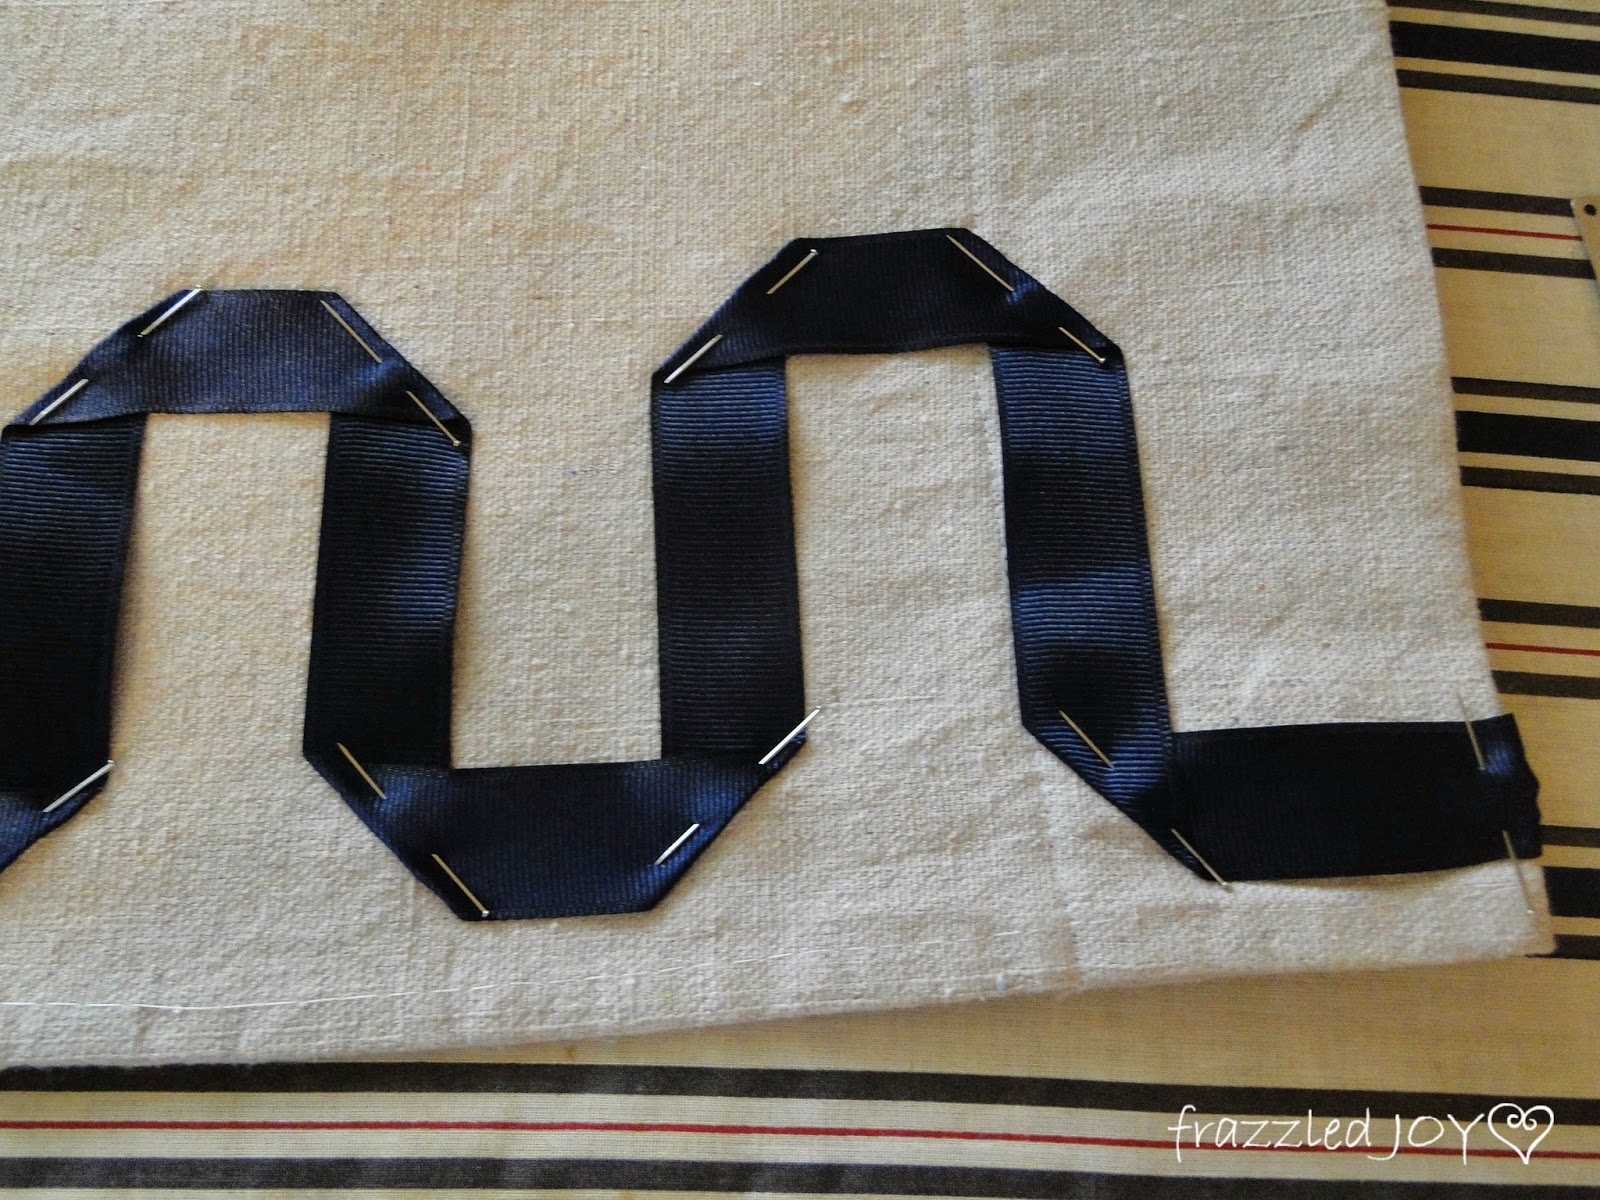
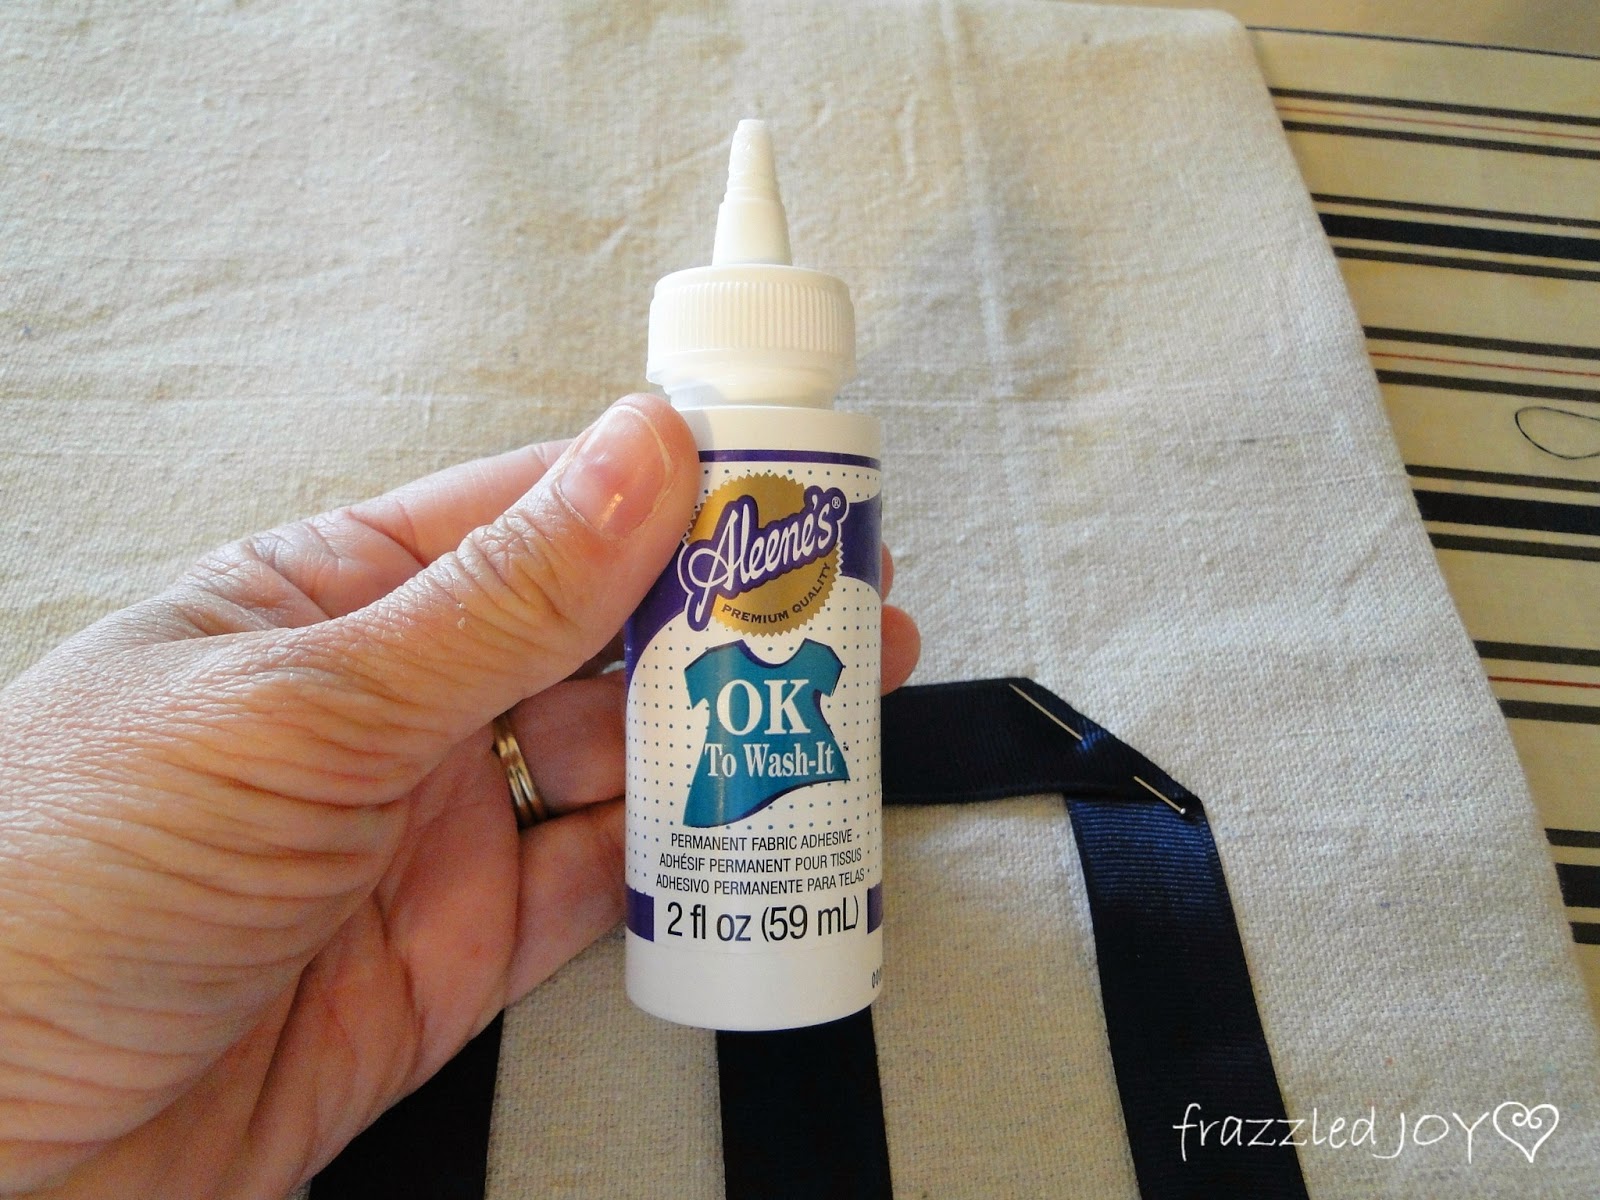
After I got it all pinned down I pondered how I was going to hold to design in place.  Originally I planned on using the iron-on hem tape I used before to apply the ribbon.  But, as I was folding the ribbon for the design, I realized that would not work since both sides of the ribbon were exposed.  I toyed with sewing it down, for about two seconds, and then I decided glue would be the best bet.  Yes, I said glue!!


I shopped my local fabric store for just the right option.  I had considered hot glue, but I knew I would probably want to throw these in the wash at some point.  So, I went with this, and I am very happy with the outcome.  (not sponsored – just sharing :))  It dried clear, was not crunchy, held well, and of course I can wash it!!  The other bonus of this over a couple of other products I looked at was drying time.  Some needed to be left alone for several hours, this one was dry enough for me to move the piece around after about 30 minutes, which made the project go a little quicker.  All-in-all the ribbon detail took an afternoon including drying time.  Well worth the look in the end if you ask me!!


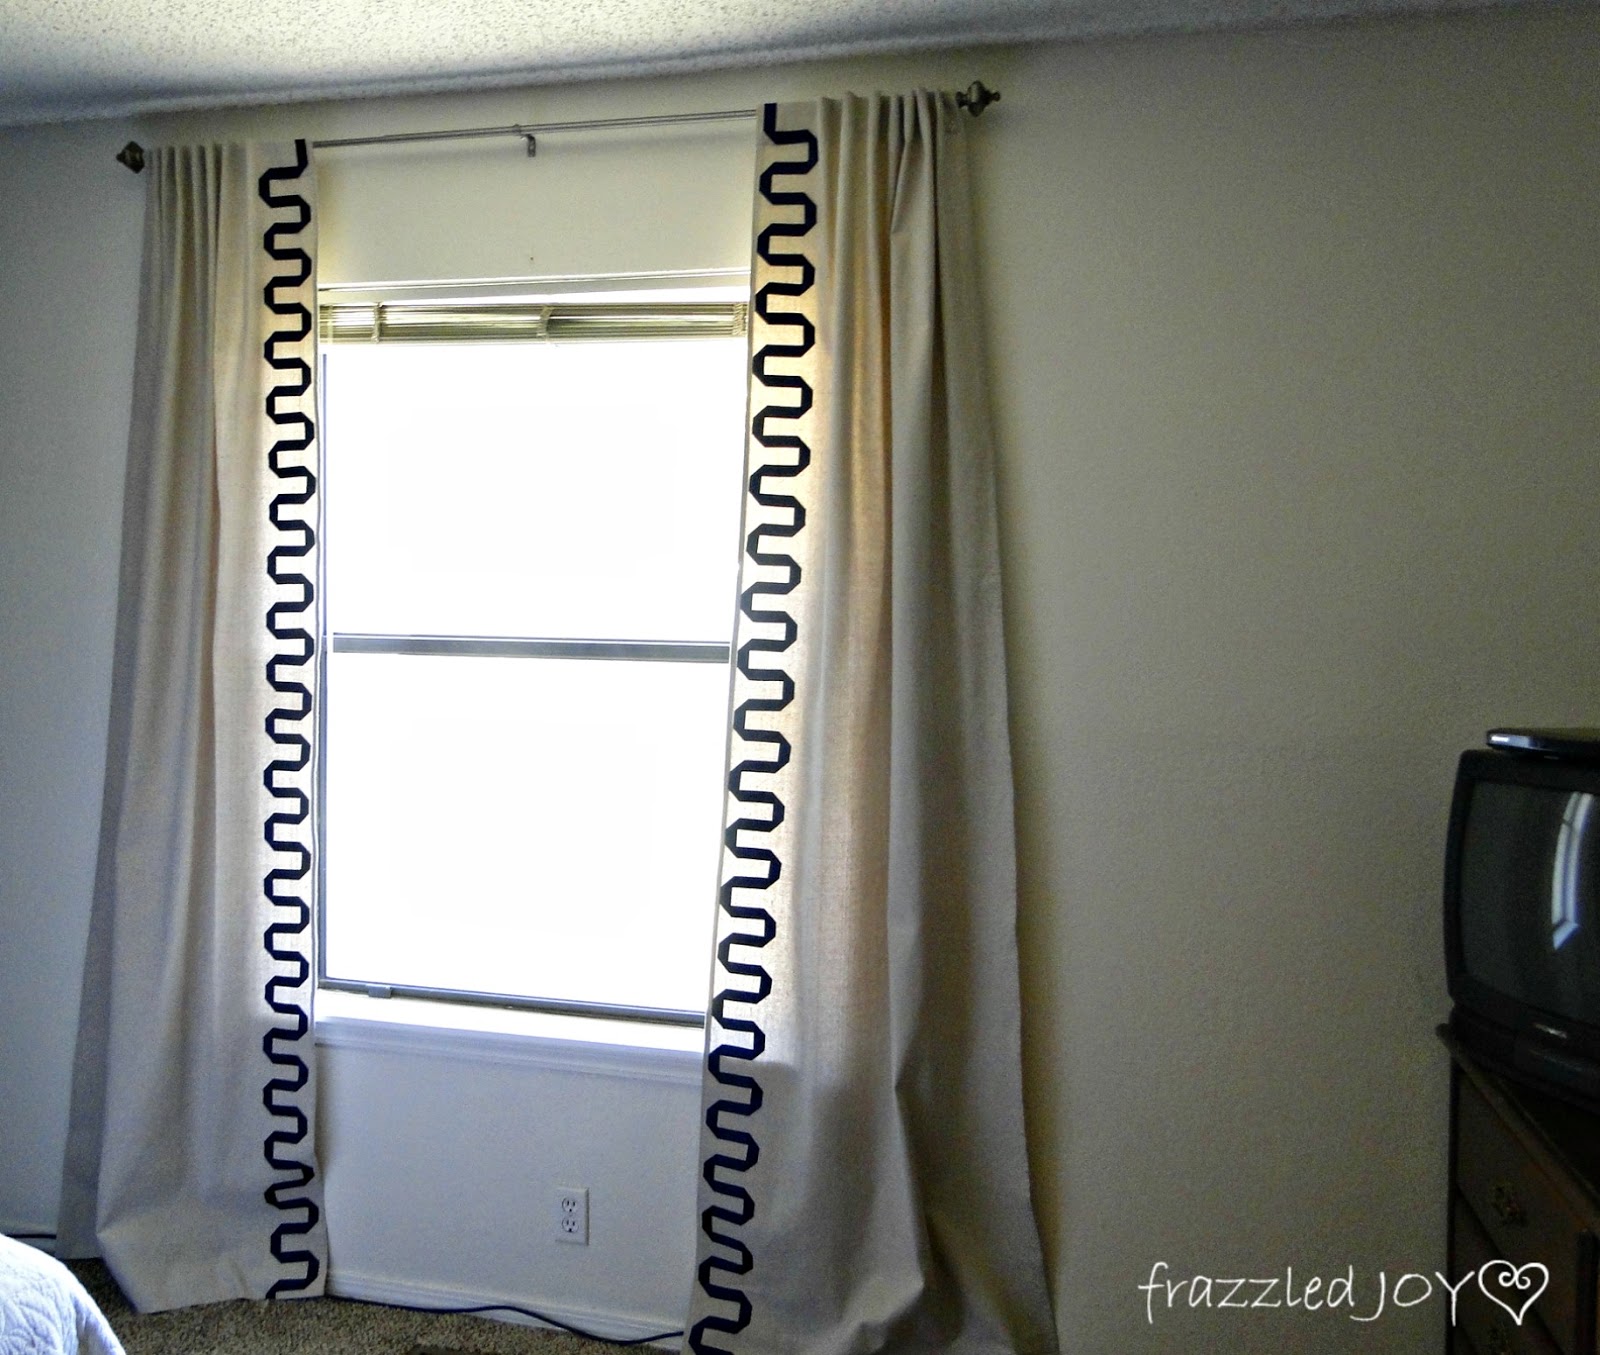
Thanks again for your encouraging words throughout my master bedroom redo!!  Lots of little things to finish up in the next couple of days and cleaning everything up (if you could only see the sides of the room not in the pictures!!). I can’t wait to show you the finished product on Thursday!!

 photo Blessingssignature_zps514a1303.png

 photo Namesignature_zpsd15d2f6d.png

Linking up at Remodelaholic – All Things Windows / One Project At A Time / Show Me What Ya Got / Hit Me With Your Best Shot / Works For Me Wednesday / Create It Thursday / Thrifty Thursday / Fridays Unfolded / Remodelaholic / Frugal Friday / Link Party Palooza / Share Your Creativity / That DIY Party / Inspire Me Monday / Tutorials & Tips Link Party / Take-A-Look Tuesday / DIY Sunday Showcase

 photo bloglovin_zpsb0b70cab.png  photo pinterest_zps708232ae.png  photo twitter_zps554a4be1.png  photo rss_zpsa097a399.png  photo google_zpsa411dd38.png  photo instagram_zpsff3b8af2.png  photo facebook_zpsd7445160.png
Previous Post: « Master Bedroom – One Room Challenge Link Up Week 5
Next Post: Master Bedroom Reveal!! – One Room Challenge Done »

Reader Interactions

Comments

  1. Jennifer @ Dimples and Tangles says

    May 6, 2014 at 1:44 pm

    I just love those SO SO much! I glued some ribbon trim on Em's duvet cover and it has not stayed well, but it was a different kind. I think I'll try this one!

    Reply
  2. Alison Agnew says

    May 9, 2014 at 2:10 pm

    Thanks for showing us how you made those lovely drapes! When we redo our master, I'll be using dropcloths for the curtains, so I'll be tucking this gem away for then. Thanks for sharing at Fridays Unfolded!

    Alison
    Nancherrow

    Reply
  3. Lorene Nance says

    May 10, 2014 at 12:55 am

    I love what a statement they are! Thanks for sharing over at the Remodelaholic party this weekend — I work there with Cassity and we'll be sharing this on Facebook! Have a great weekend!

    Reply
  4. Amy Gregson says

    May 10, 2014 at 1:23 am

    These look so cool. I never would have thought of that pattern on my own, so thanks for sharing. I'm filing this idea away for my future living room re-do!

    Reply
  5. ana@carpe_diem says

    May 10, 2014 at 9:06 pm

    great idea! so quickly and so effective, too!

    Reply
  6. Vanessa says

    May 14, 2014 at 2:52 pm

    Wow, these are great! I love how it turned out

    Reply

Leave a Reply Cancel reply

Your email address will not be published. Required fields are marked *

Recipe Rating


This site uses Akismet to reduce spam. Learn how your comment data is processed.

Primary Sidebar

Welcome

Hey friend!! I'm so glad you stopped by today!! I am married to the love of my life and I have been blessed with four amazing kids. My life is kinda crazy some days and I feel frazzled often. But, Jesus brings me JOY each and everyday in the little things. I love everything home decor, DIY, and crafts!!
Read More…

Categories

Archives

Copyright

I share to inspire!! Please feel free to use and share my ideas!! I simply ask that you give credit back to my site and add a link back to my blog if you reference one of my projects, or photos. Thank you so much!!

Recent Posts

  • Empty Nesting, My Thoughts
  • Kitchen Cabinet Facelift
  • Just Popping In To Say “HI”
  • Knock, Knock….Anyone There?
  • Easter Tablescape 2022
  • CONTACT ME
  • DISCLOSURES

Footer

Hubby and I took a little trip to Colorado Springs Hubby and I took a little trip to Colorado Springs and had the best time! ❤️ We took off as the sun was rising in OKC and landed in the mountains! 🥰 It was so good to get away together! We hit all the high points (pun intended haha) - Royal Gorge, Pikes Peak, Garden of the Gods, and Seven Bridges. We hiked everyday! Can’t wait for our next adventure!! 🥰
.
#emptynestingrocks #travel #marriage #emptynesterlife❤️
31 years with my favorite! So thankful for you! ❤️ 31 years with my favorite! So thankful for you! ❤️❤️ #marriage #anniversary #growingoldtogether
Our baby graduated from college last night!! From Our baby graduated from college last night!! From our alma mater! 🧡🖤 We are feeling beyond blessed and are so loving this stage of parenting! Watching our adult kids live life well is truly remarkable! God has big plans for you Gavin and we can’t wait to watch him work in and through you! Love you!
Happy Resurrection Day!! He is risen!! Happy Resurrection Day!! He is risen!!
Haven’t shared something from my house in months! Haven’t shared something from my house in months! Just refreshed our mantle for spring and I love it! So happy that Oklahoma’s weather has finally chilled out and become more springy! ☀️🌸🌺
.
#homedecor #ourhome #spring #springismyfavorite #springdecor
One month of being Gigi and Pops to this precious One month of being Gigi and Pops to this precious little blessing!! 💕 We love you so much Blair!!
Five more sleeps! ❤️🎄 Nothing better than twinkle Five more sleeps! ❤️🎄 Nothing better than twinkle lights on a Christmas tree ✨☺️ Looking forward to all the family festivities over the next few days. Merry Christmas to you all!! 
.
#christmas #christmastree #christmasdecor #christmaslights #merrychristmas
32 years ago today I made one of the best decision 32 years ago today I made one of the best decisions of my life when I said “yes” to marrying this guy. We celebrated our 30th anniversary back in May! We’ve experienced a lot over the years but there’s no one I would rather be doing life with! @vangreenwood you’re my favorite!! ❤️❤️
.
#marriage #proposalanniversary #youremyfavorite
I really enjoyed decorating my new kitchen shelves I really enjoyed decorating my new kitchen shelves for Christmas! What’s your favorite spot to decorate? I really like to spread out Christmas décor throughout the house! 🎄❤️
.
#homedecor #christmasdecor #christmas #itsbeginningtolookalotlikechristmas #favoritetimeofyear
Follow on Instagram

Copyright © 2025 · Captivating Theme on Genesis Framework · WordPress · Log in