Well, it’s March and I finally took down my Valentine’s decor this weekend :). I have several projects that I have pinned that I wanted to craft for the spring. I’m pretty sure these were there last year and I never got to them, so I was determined to at least get to one or two. One of my favs are those cute burlap wreaths I have seen out in blog-land thanks to pinterest. (I’m a pinterest addict – at least I can admit it.) So I went to Hobby Lobby and bought my supplies. Thankfully the ribbon was on sale 50% off. As I’ve said before, I try not to buy many things at HL at full price because if you wait a week it will be on sale!
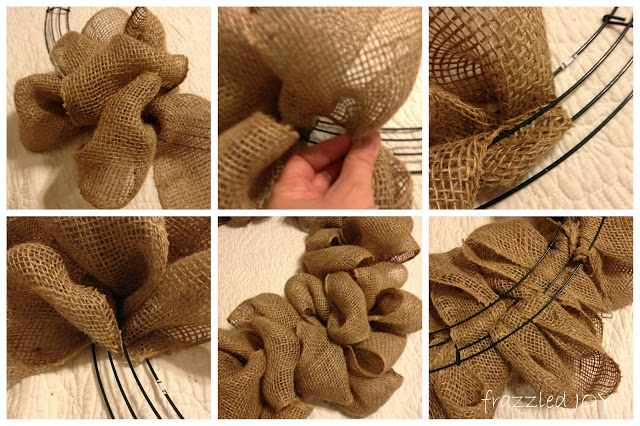
Then I checked out several of my pins to see how they went about making this cute. There are two or three methods that I found and I tried a couple but this one was by far my favorite and pretty easy really. Follow the link to Top This Top That and check out her tutorial.
 |
| source: Top This Top That |
All that is involved is weaving the burlap ribbon in and out of the metal frame. Easy peasy – yes!! The best thing is it doesn’t have to be perfect, because it is simple to fluff and adjust as you work with it and even when it’s done.
I wanted to add a little color and something for spring/Easter. I found this fabulous CORAL ribbon at HL. (I had to take a picture with my orange scissors because the color just wasn’t coming through otherwise.)
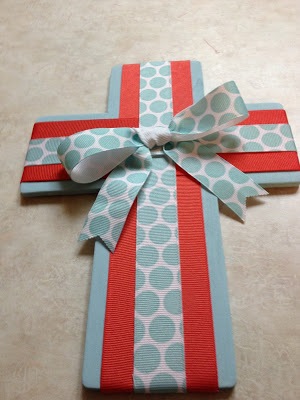
I found some cute polka-dot ribbon too. I also bought a wooden cross and some paint to match the ribbon, not exactly sure what I was going to do with all of it. I started by trying to make a bow with the ribbon….I stink at making bows with ribbon that isn’t wired so I scratched that idea. That’s when I came up with this.
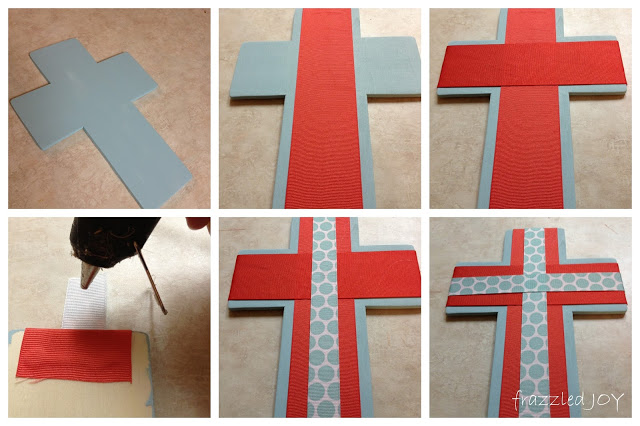
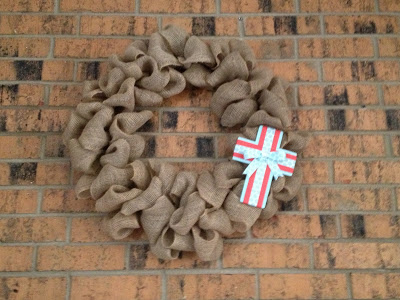
I decided I wanted the coral ribbon to shine because it’s awesome, so I painted the cross with the blue paint and then began layering the ribbon on the cross, simply hot-gluing it to the back. {As a side note – I finally bought myself a big-girl glue gun! 🙂 I have been using one of those mini low temp jobbies for years, and I was tired of the glue drying before I got things in place. Sooo loving my new one!!} I added a bow to the front just for cuteness.
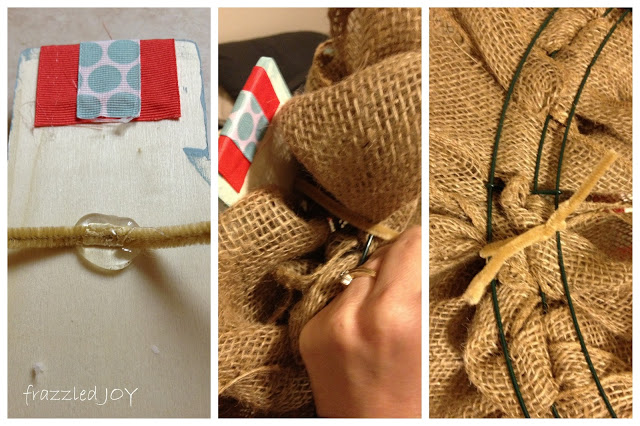
I knew I didn’t want this accessory to be permanent on my wreath because I knew I would want to use it at other times, so I simply made a big pile of glue on the back of the cross and stuck a pipe cleaner in the center. I then used the pipe cleaner to attach the cross to the wreath.
The plan was to hang this above my mantle as part of my spring decor. After hanging it up there I realized that it blended in with the brick. A. Lot.
So, I am thinking of ways to make it stand out. A mirror? A board behind it like this?
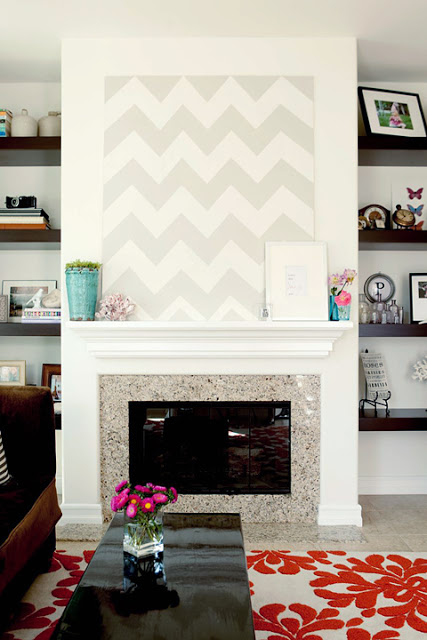 |
| source: MadeByGirl |
Really love the chevron on this. What do you think? Ideas?
Blessings and happy spring!!
Linking up at Tatertots & Jello
and It’s Overflowing
and Countdown to Spring at Its So Very Cheri
and to Carmel’s Hop To It Challenge at Our Fifth House.




I love your wreath! Spring decorations have barely crossed my mind… Do you have a big enough frame that the wreath would fit in? You could wrap a piece of cardboard with wrapping paper or fabric, attach it in the frame, and then hang you wreath on that and lean it on your mantle. I like the mirror idea too.
Thanks for sourcing back my tutorial. Your wreath turned out pretty.
I've got my eye set on making one of these wreaths. I already have the burlap ribbon – just needed the inspiration! Thanks for the tutorial.