• ALL ABOUT ME
  • OUR HOME
  • ABOUT FAITH
  • CONTACT ME
  • DISCLOSURES
  • Nav Social Menu

    • Bloglovin
    • Facebook
    • Instagram
    • Pinterest
    • Twitter

  • DIY
  • Family
  • Home Decor
  • Encouragement
  • Organizing
  • Shop My Favorites

March 17, 2015 · 14 Comments

How to ‘Slipcover’ An Ottoman

DIY

Several weeks ago a super sweet friend of mine who knew I was looking for a larger ottoman for our family room alerted me of a steal of a deal on Craigslist – $20! Gotta love friends like that right?!? (Thanks Jennifer :))

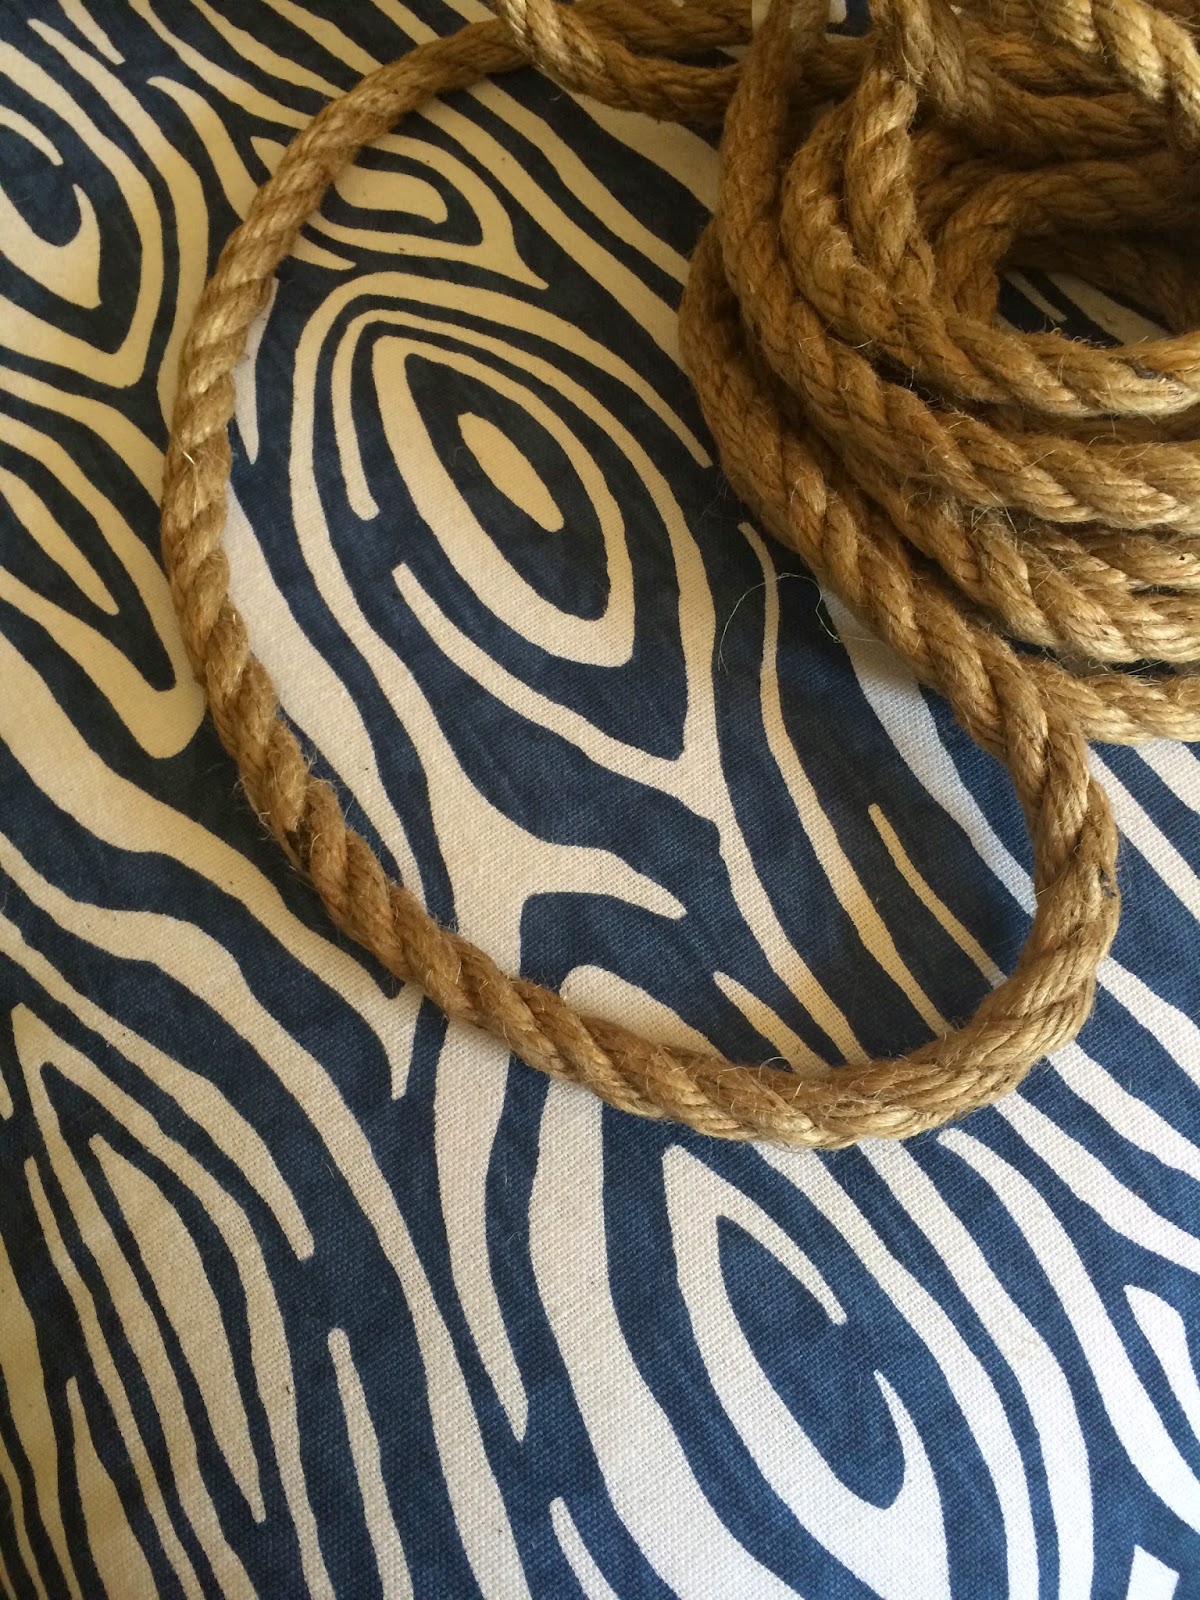
I spent weeks deliberating over a fabric choice. And finally we have this!!


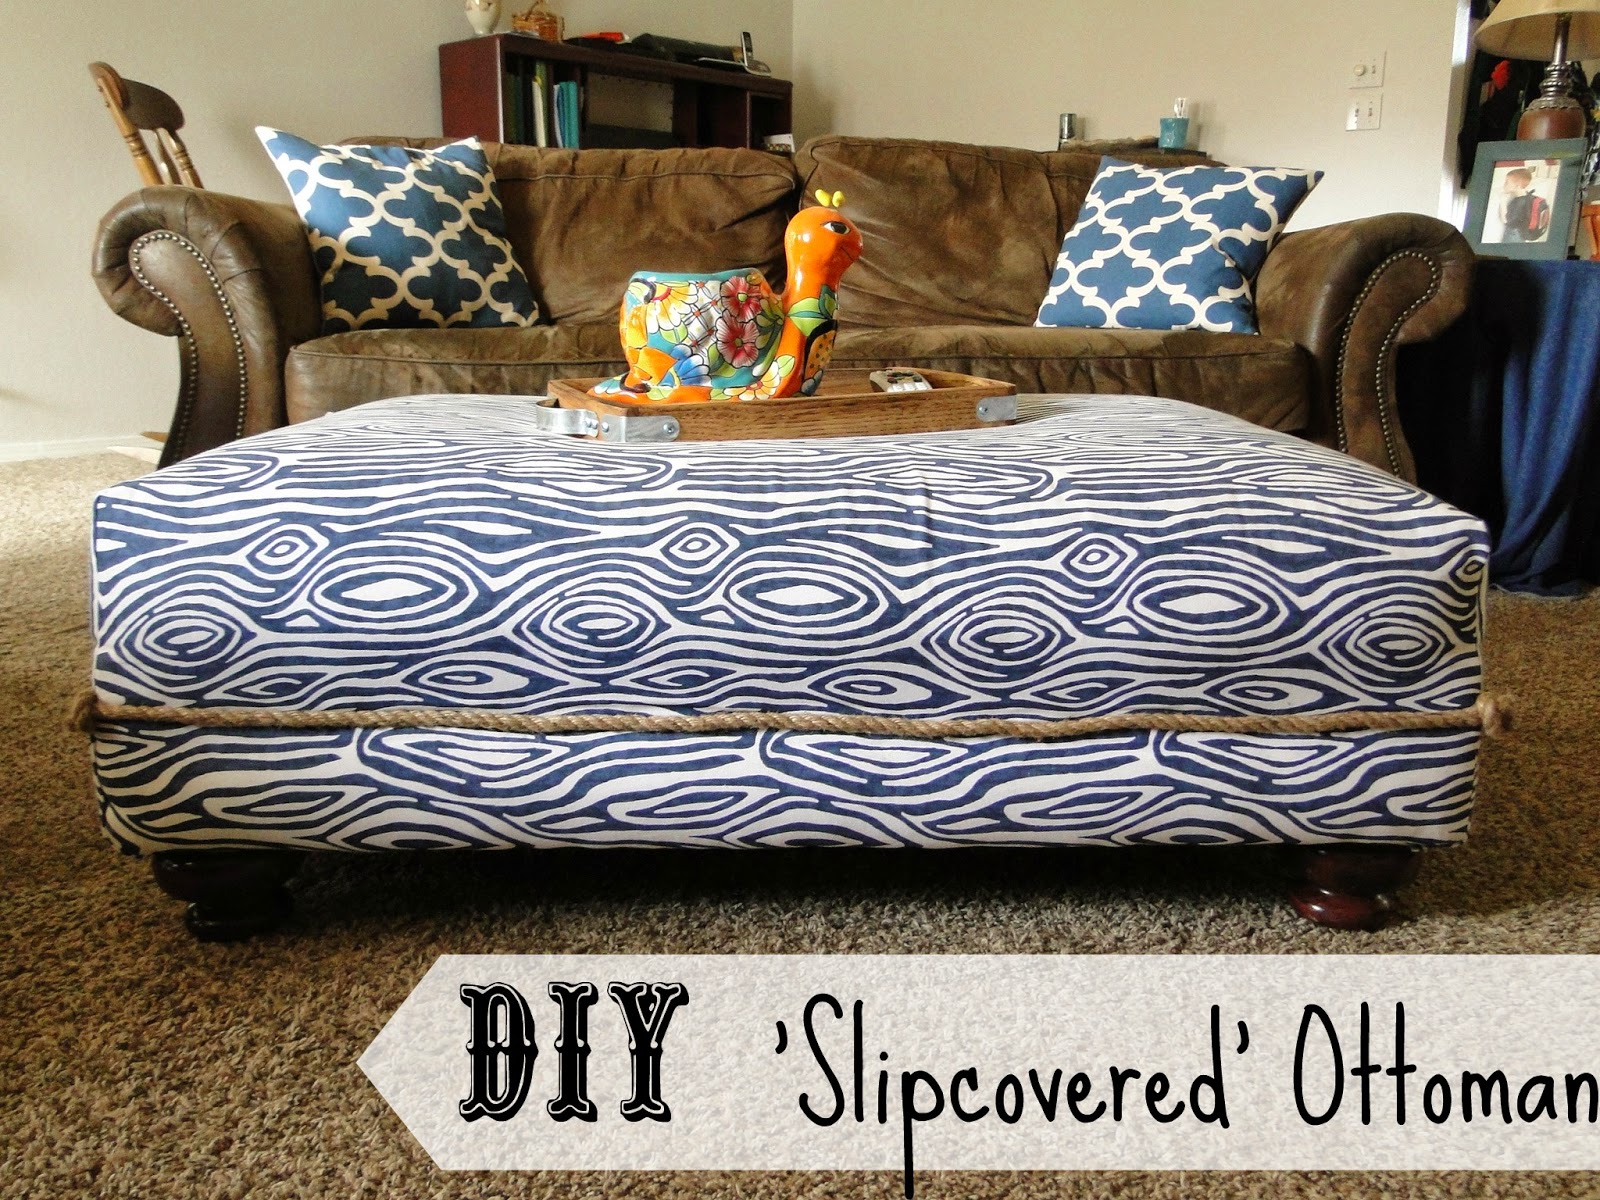
Yay!  Let’s back up and see where we started, and how we got to the finished product.


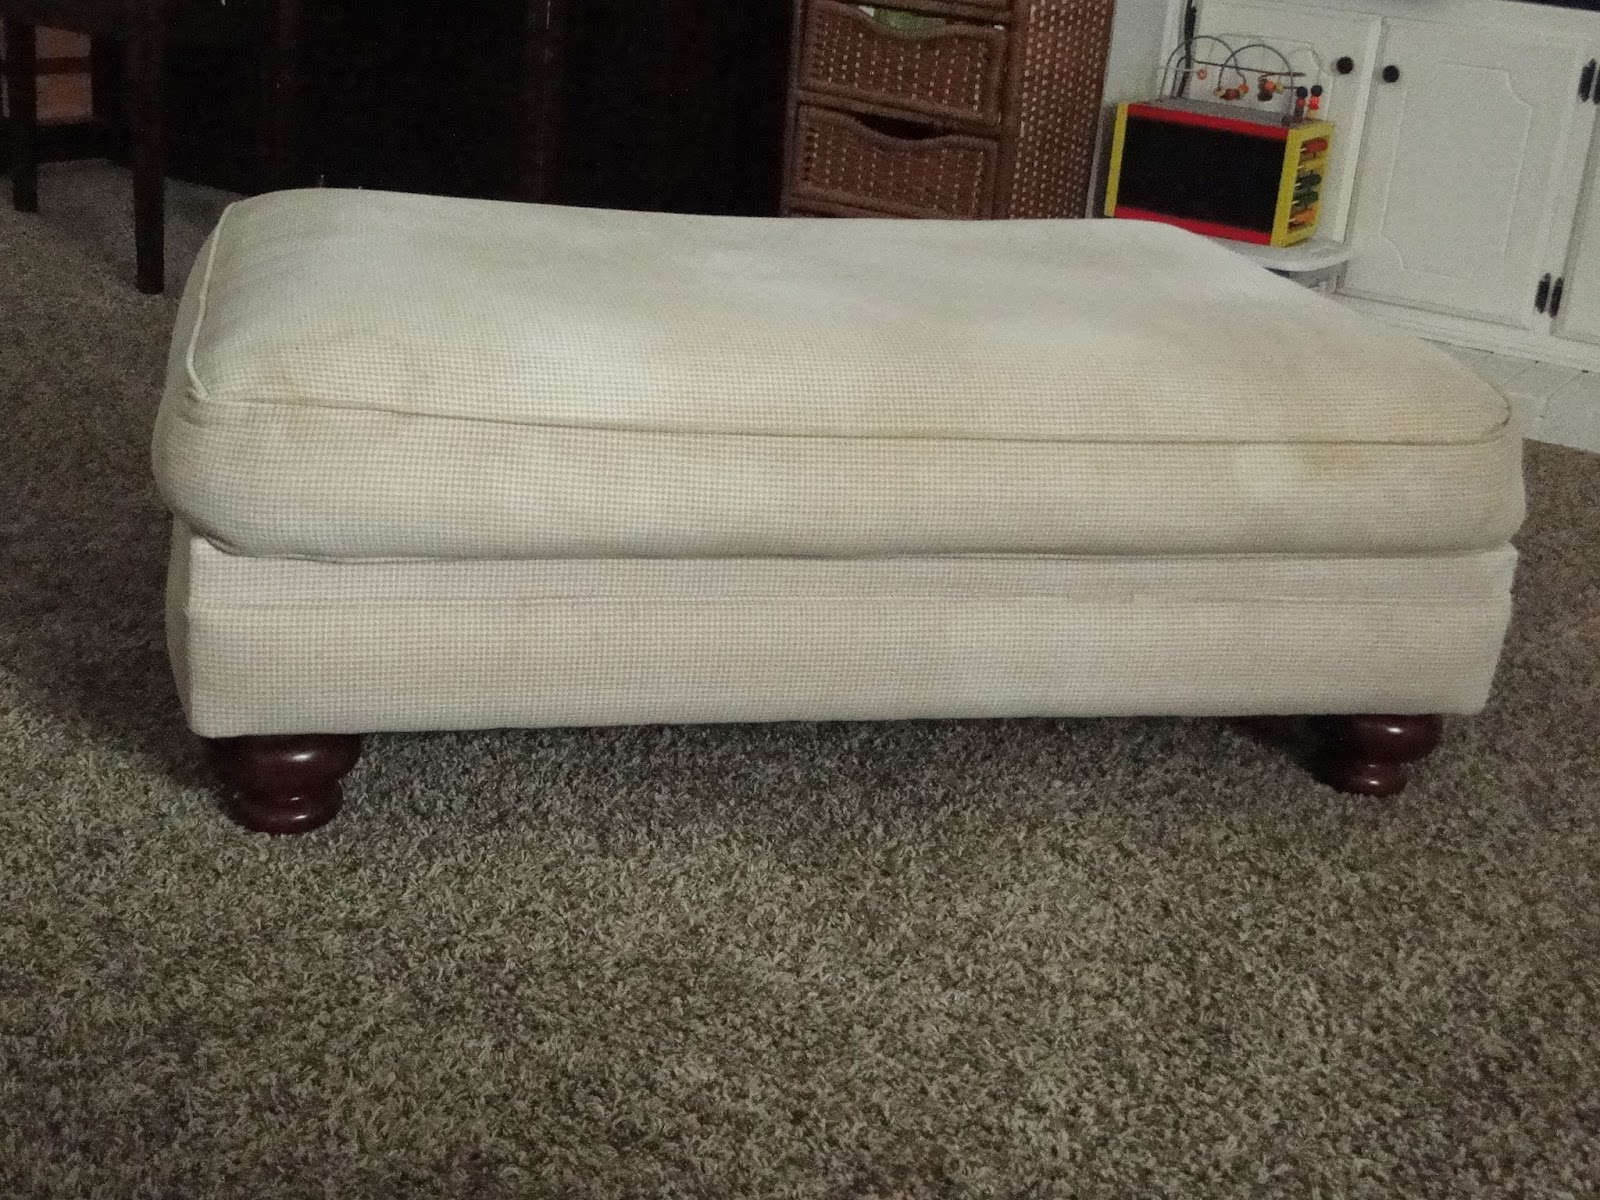
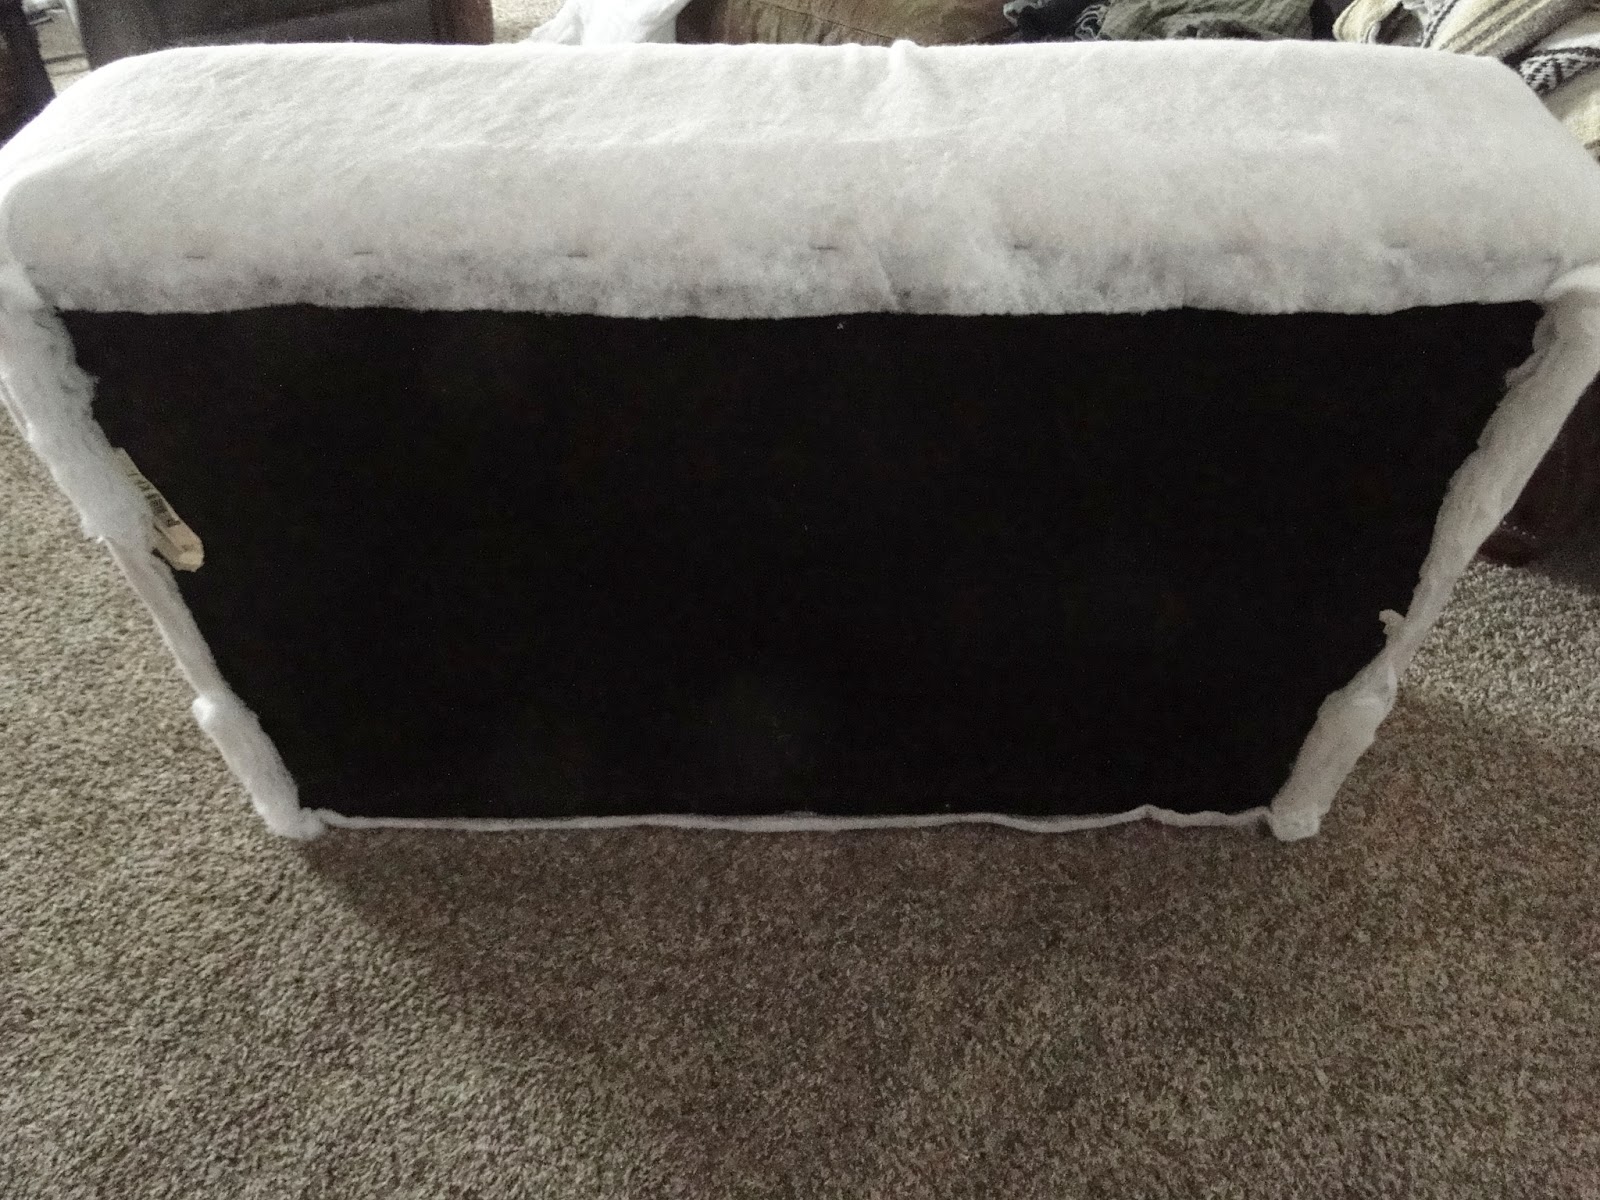
Awesome size and in really great shape aside from the stains.  I vacuumed the whole thing really good and went to work. My first task was to smooth out the bumps and bulges that came from use of course.


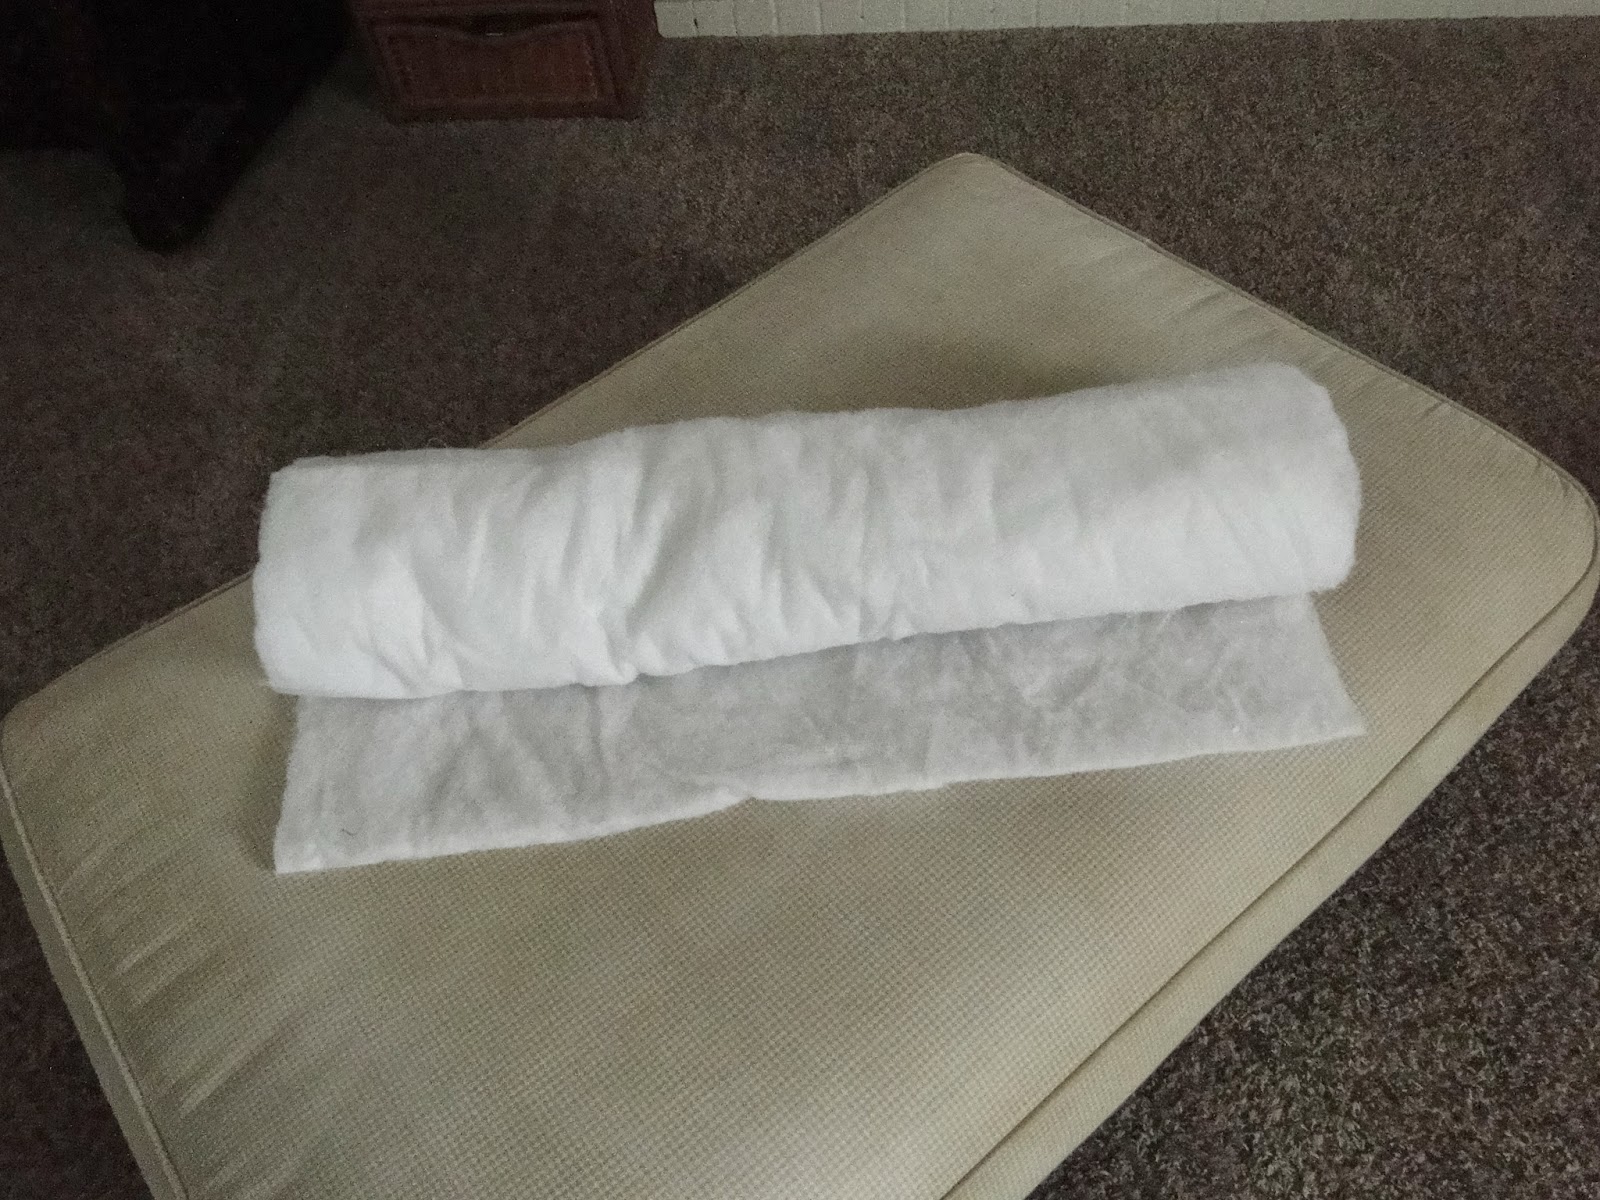
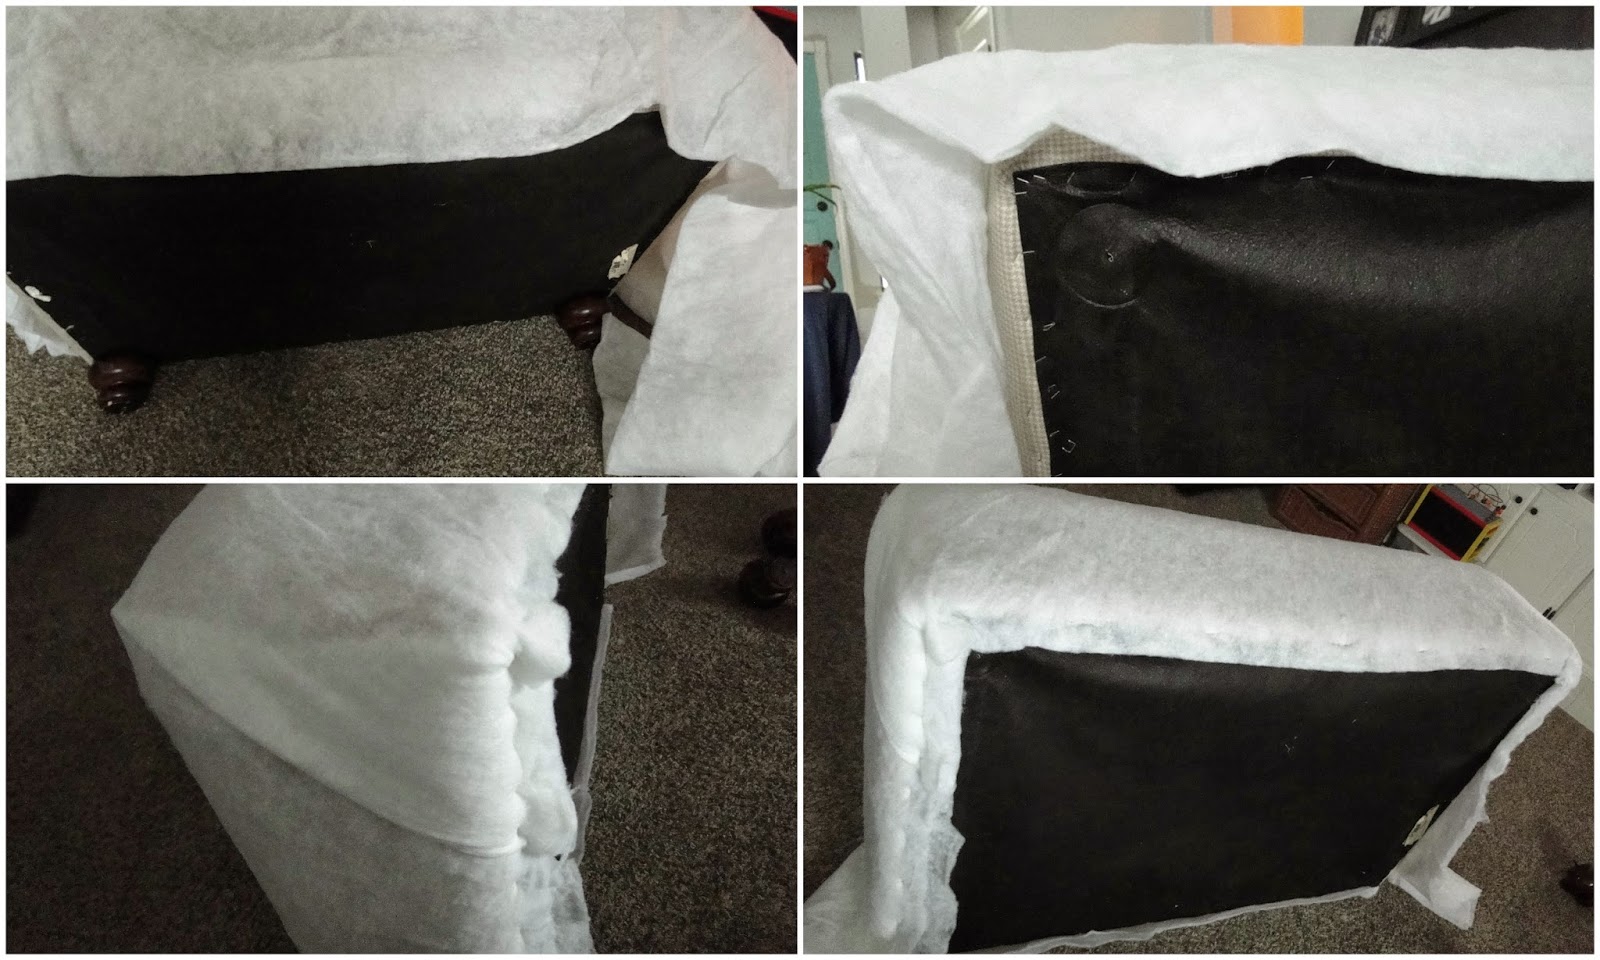
First thing – removed the legs, then I pulled some batting from my stash and covered the whole thing with it.  Using a staple gun to attach the batting underneath. This is why the title is ‘slipcovered’ – it’s not really a slipcover that you can take off, and not really re-upholstered since I left the old upholstery on it. 


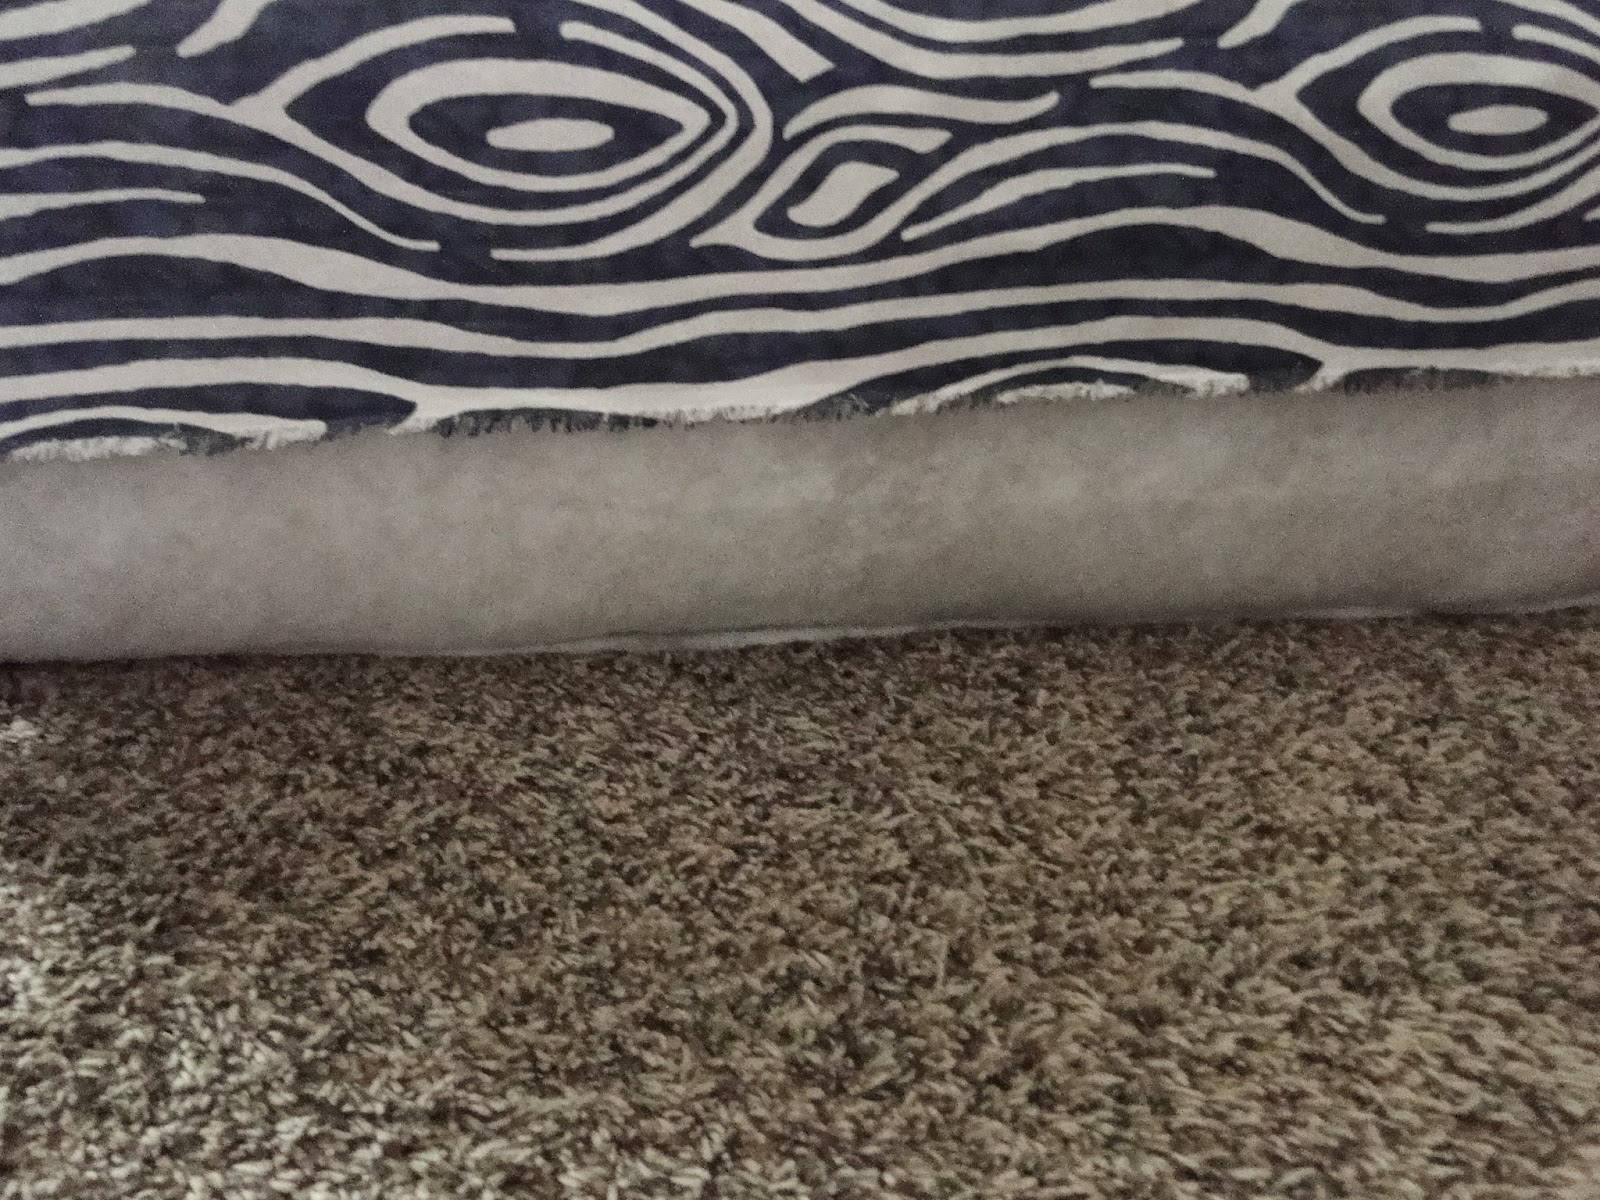
My fabric was actually not wide enough to cover all the way to the bottom.  But, that was okay. I had a plan.  🙂


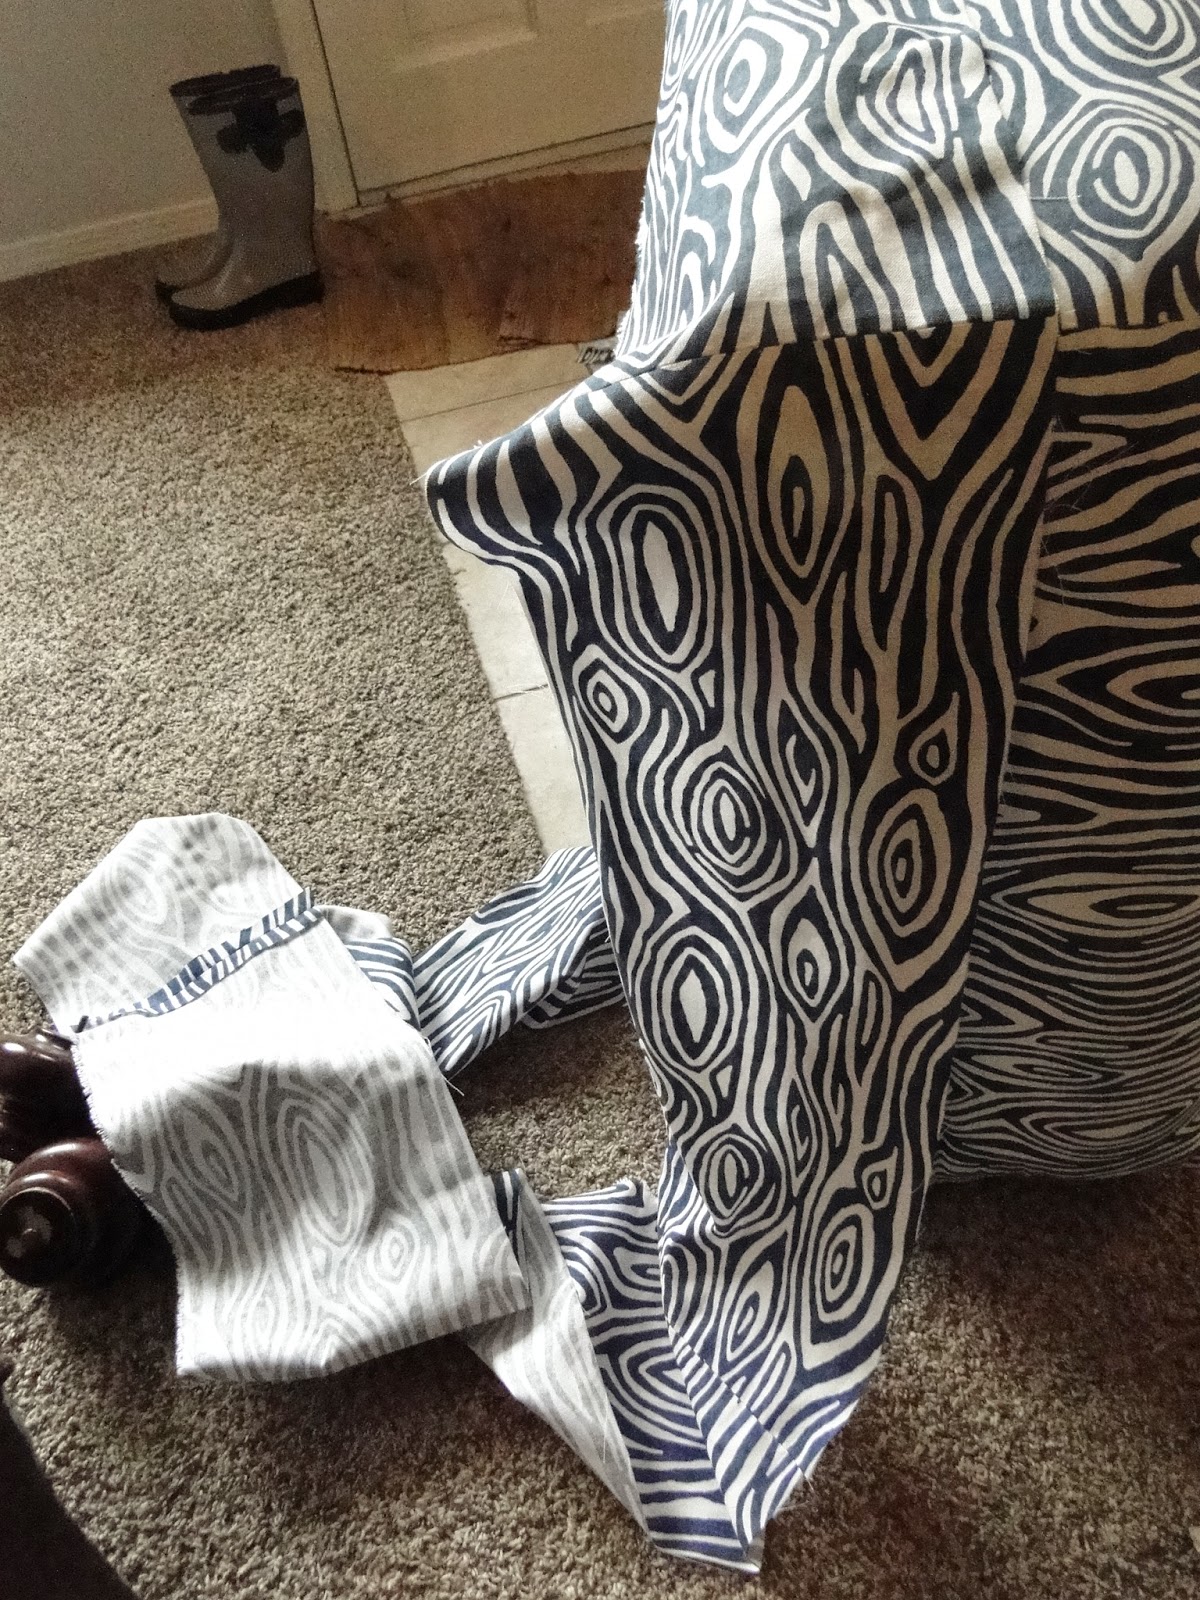
The corners needed a little extra work.  Since it was such a deep piece, I didn’t really want to just try to fold the fabric and staple.  So, I pinned the corners, and then stitched on the line I made with the pins.  Now I had a top-piece that fit love a cover.


Then I pulled the fabric snug and stapled all the way around to hold the top in place.  (I stapled around trying to follow the break in the original ottoman where the piping was.)

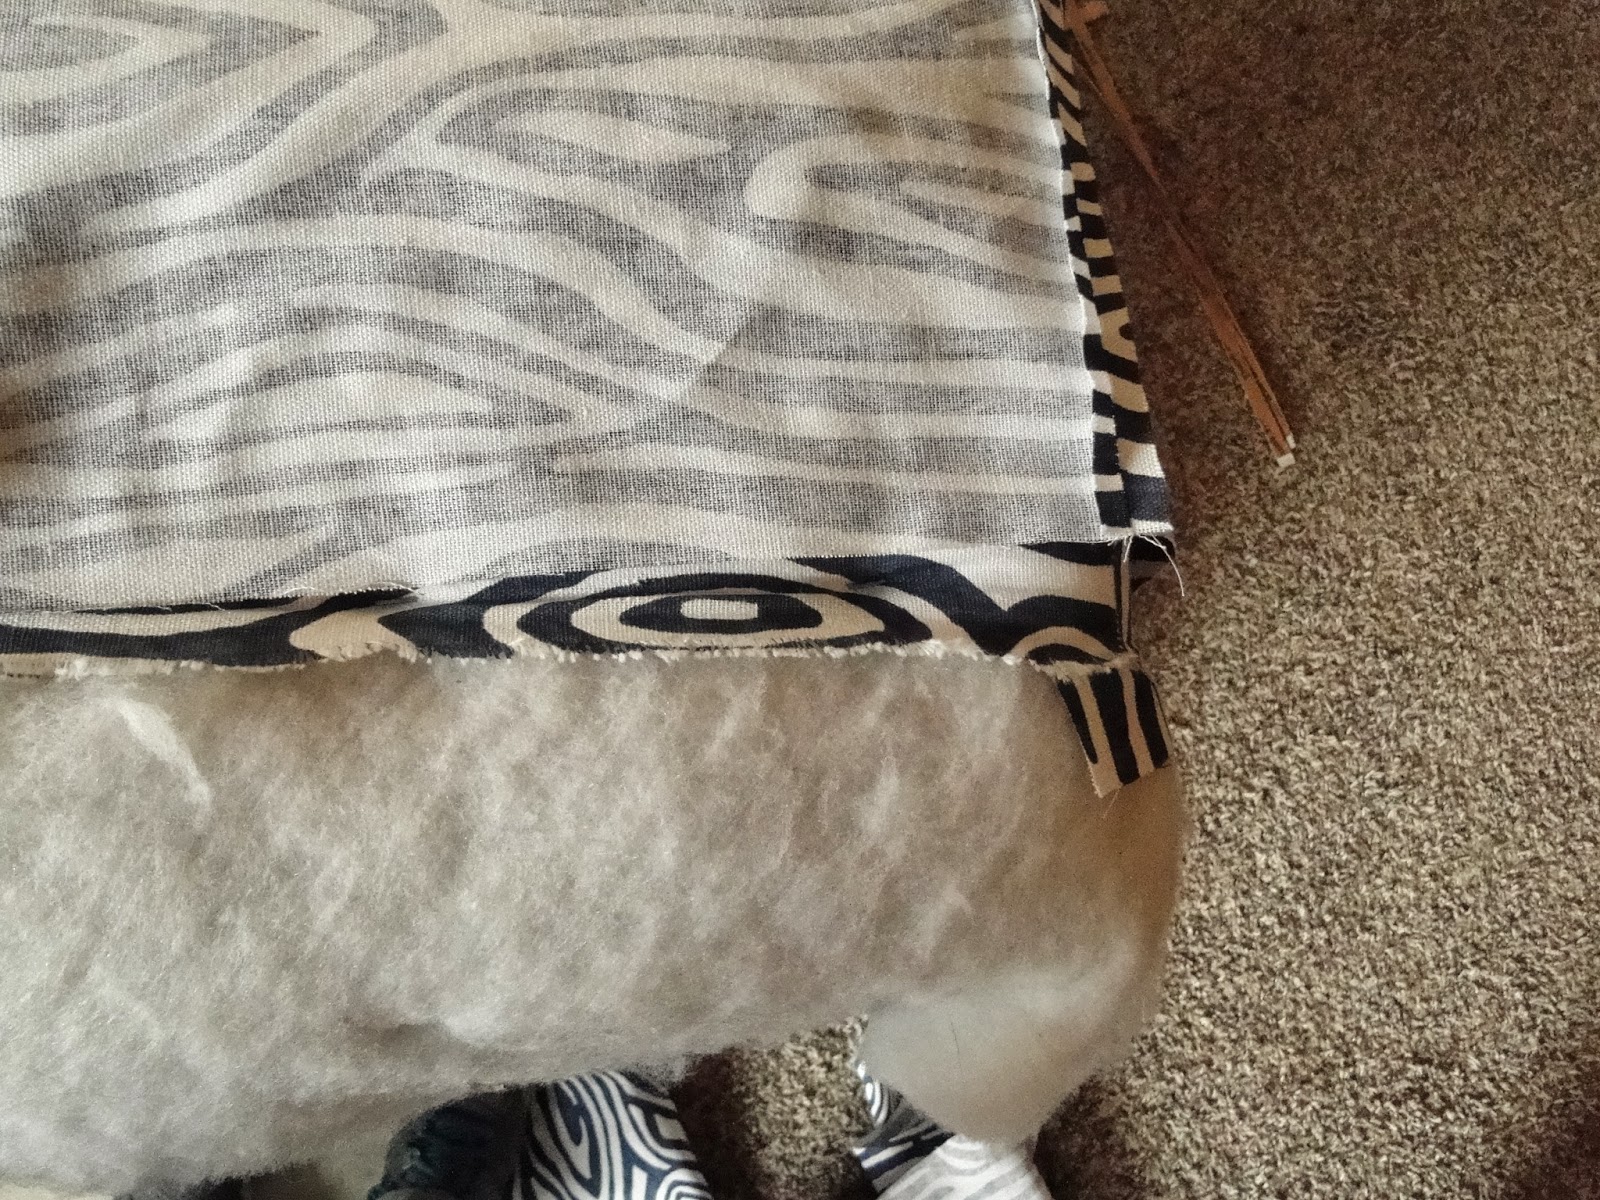
For the bottom half I measured and cut strips for each side and sewed them together to make a circle. 


Then, placing the strip wrong side-up against to ottoman I stapled around the bottom.


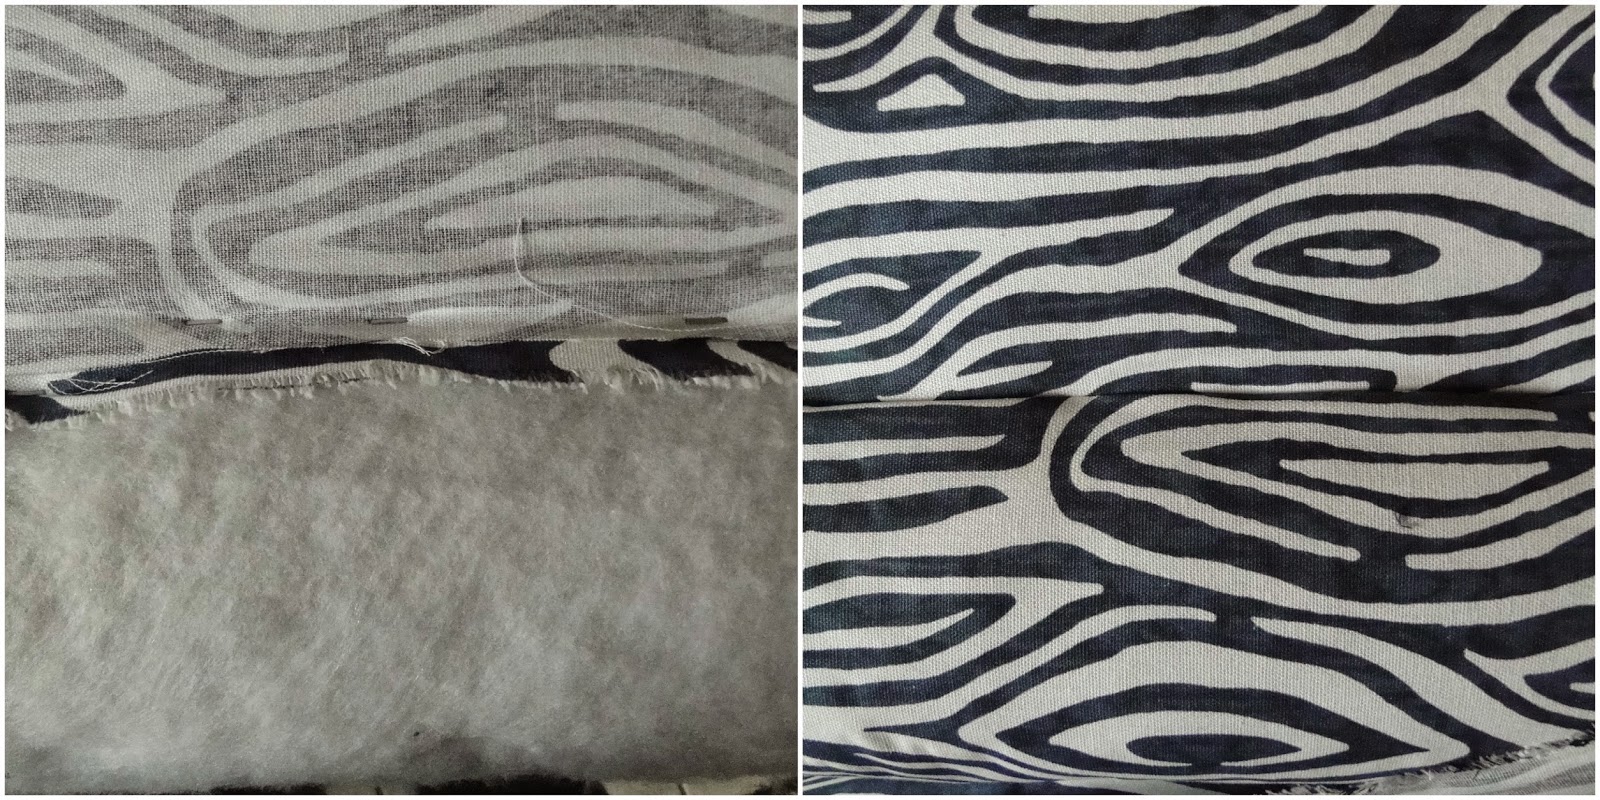
When you flip the fabric down, the staples are hidden. (see right photo above)

Next, I pulled the bottom fabric tight and stapled around the bottom underneath.  And this is where we were.


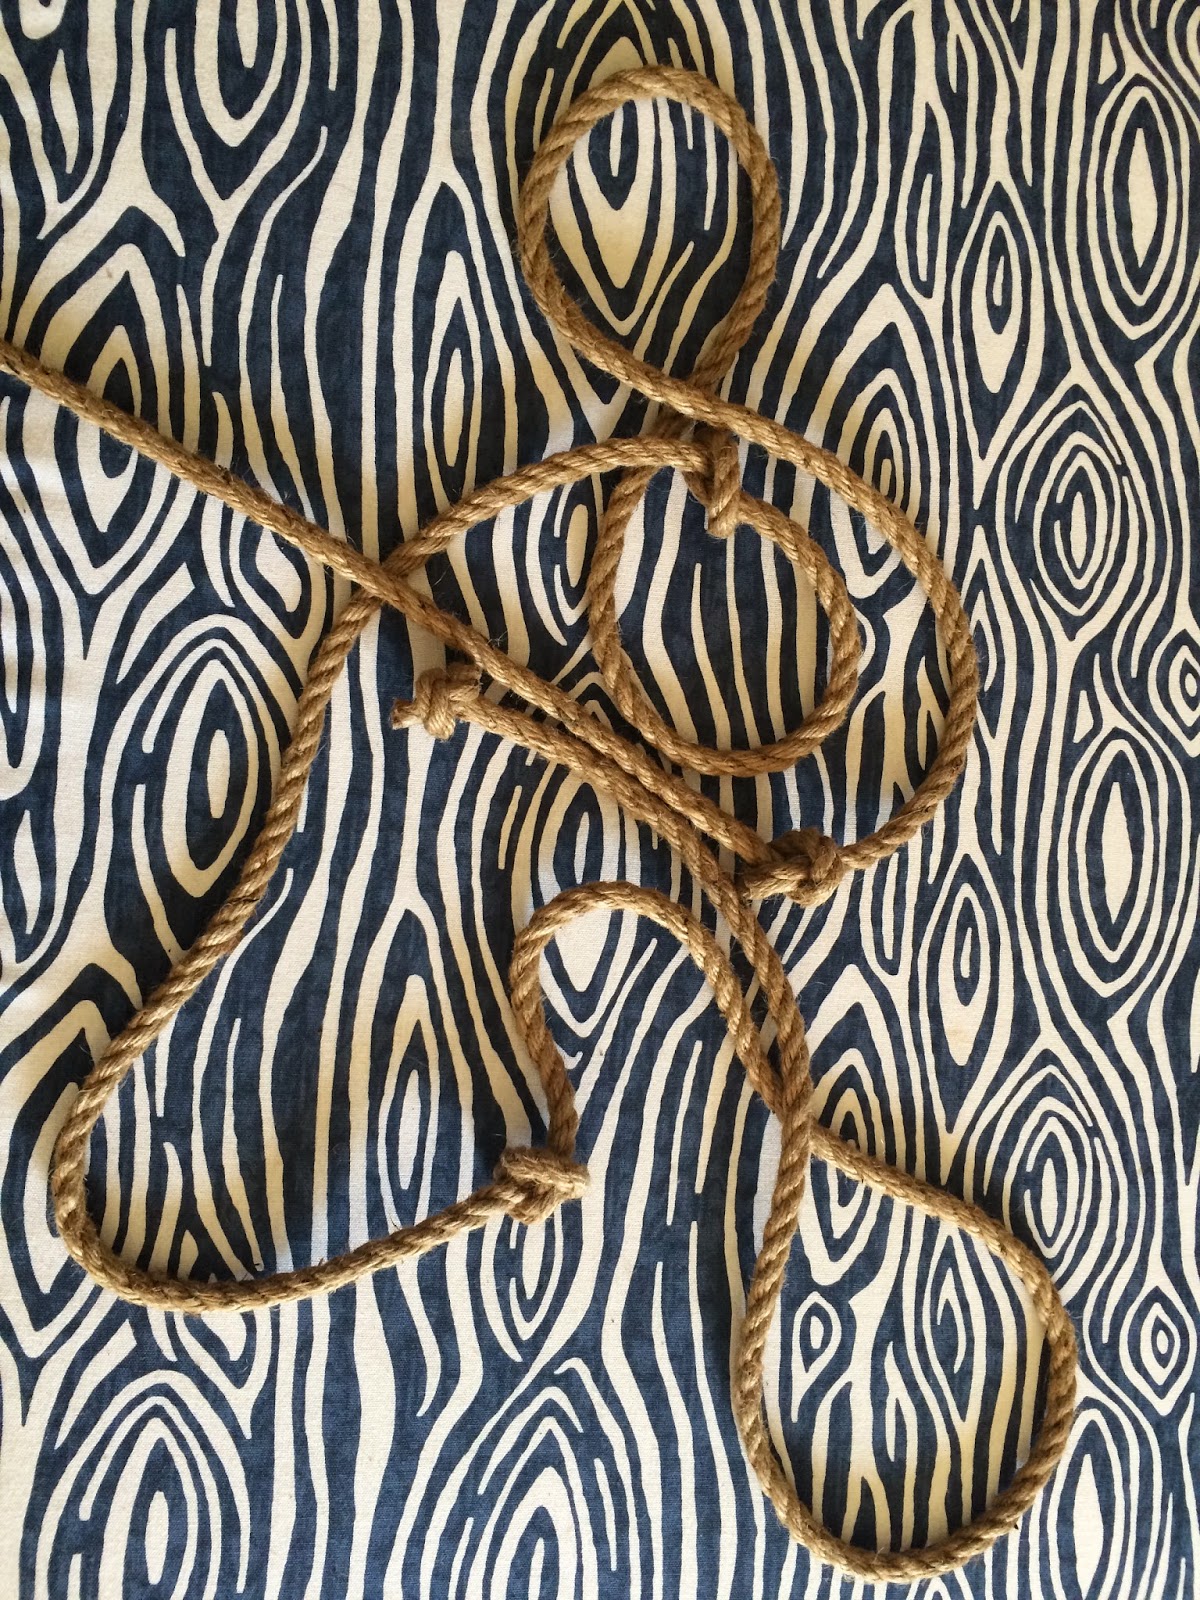
It stayed like this for days as I pondered what it needed.  I wanted some sort of trim to cover the transition from the top piece and the bottom piece.  I was shopping for my original plan, when I stumbled upon something even better.

I started by tying four knots in the rope. Approximately where the corners would be.


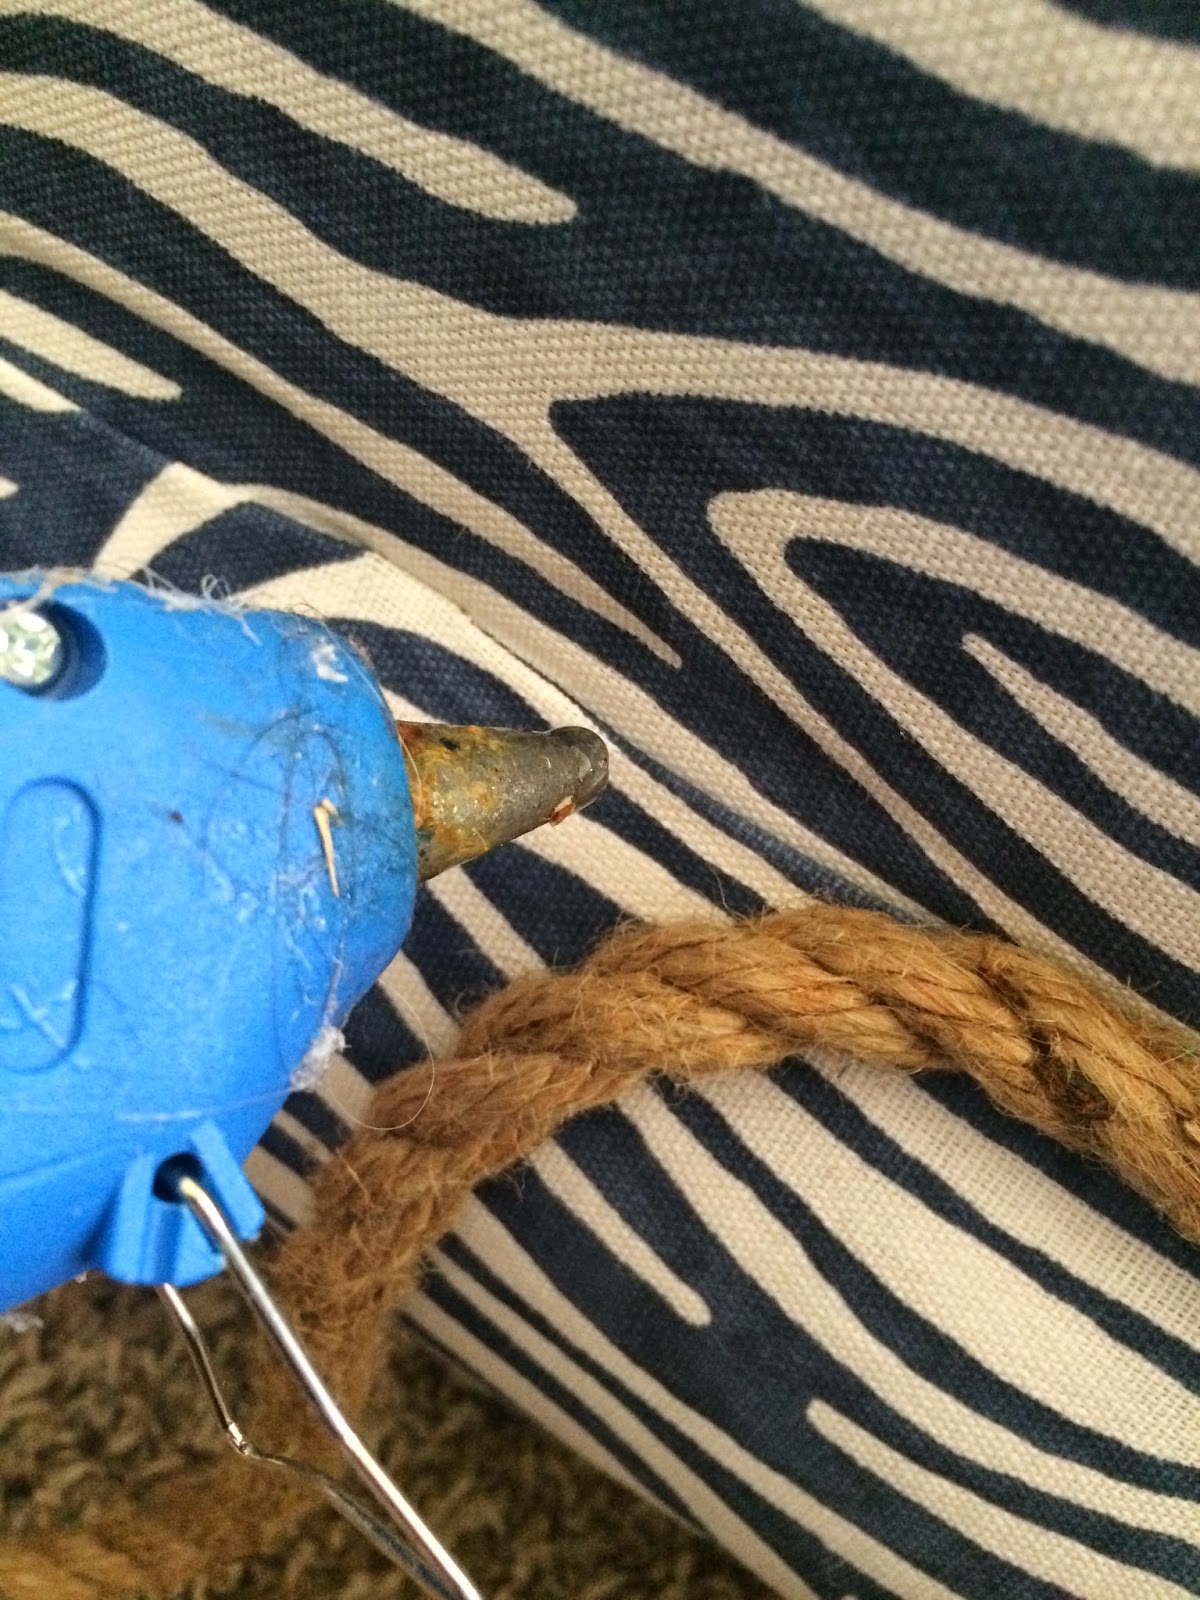
Then I took out my handy dandy glue gun and started attaching the rope trim.


Here is how the corners look.


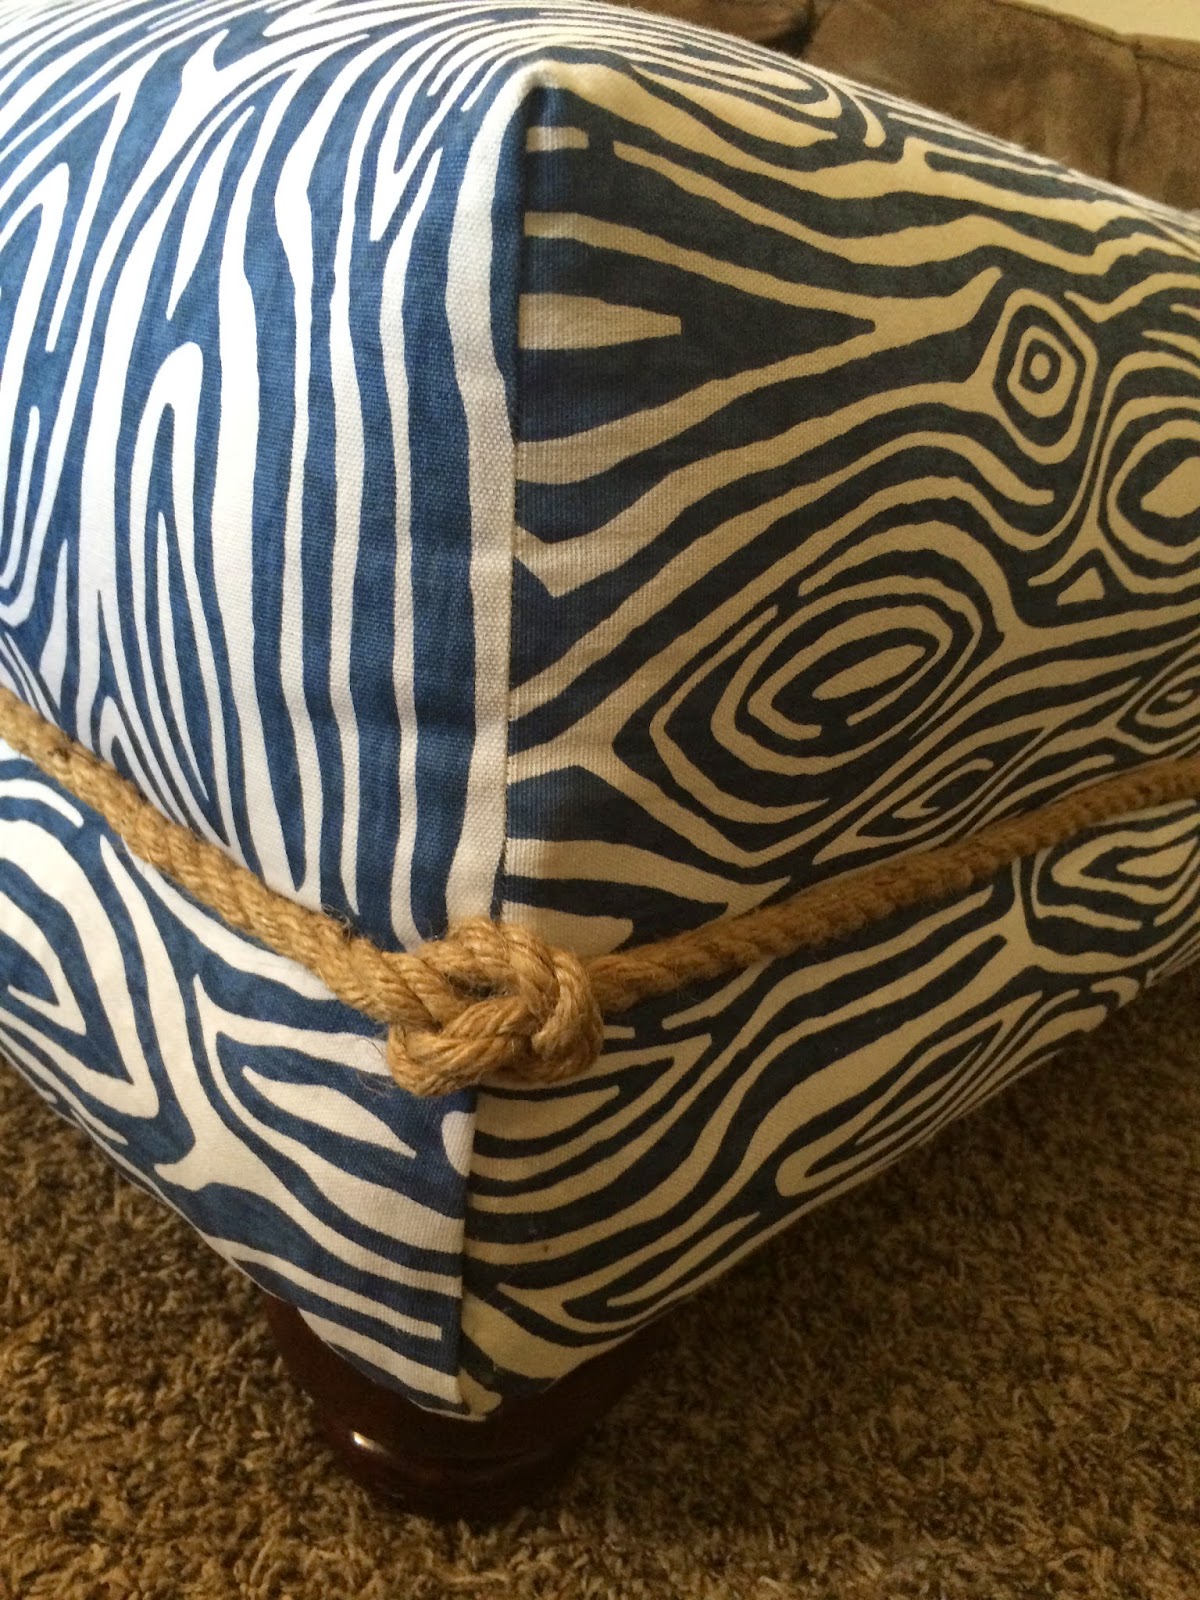
I’m so happy with the way it turned out.  A little bit fun and funky and very practical!!


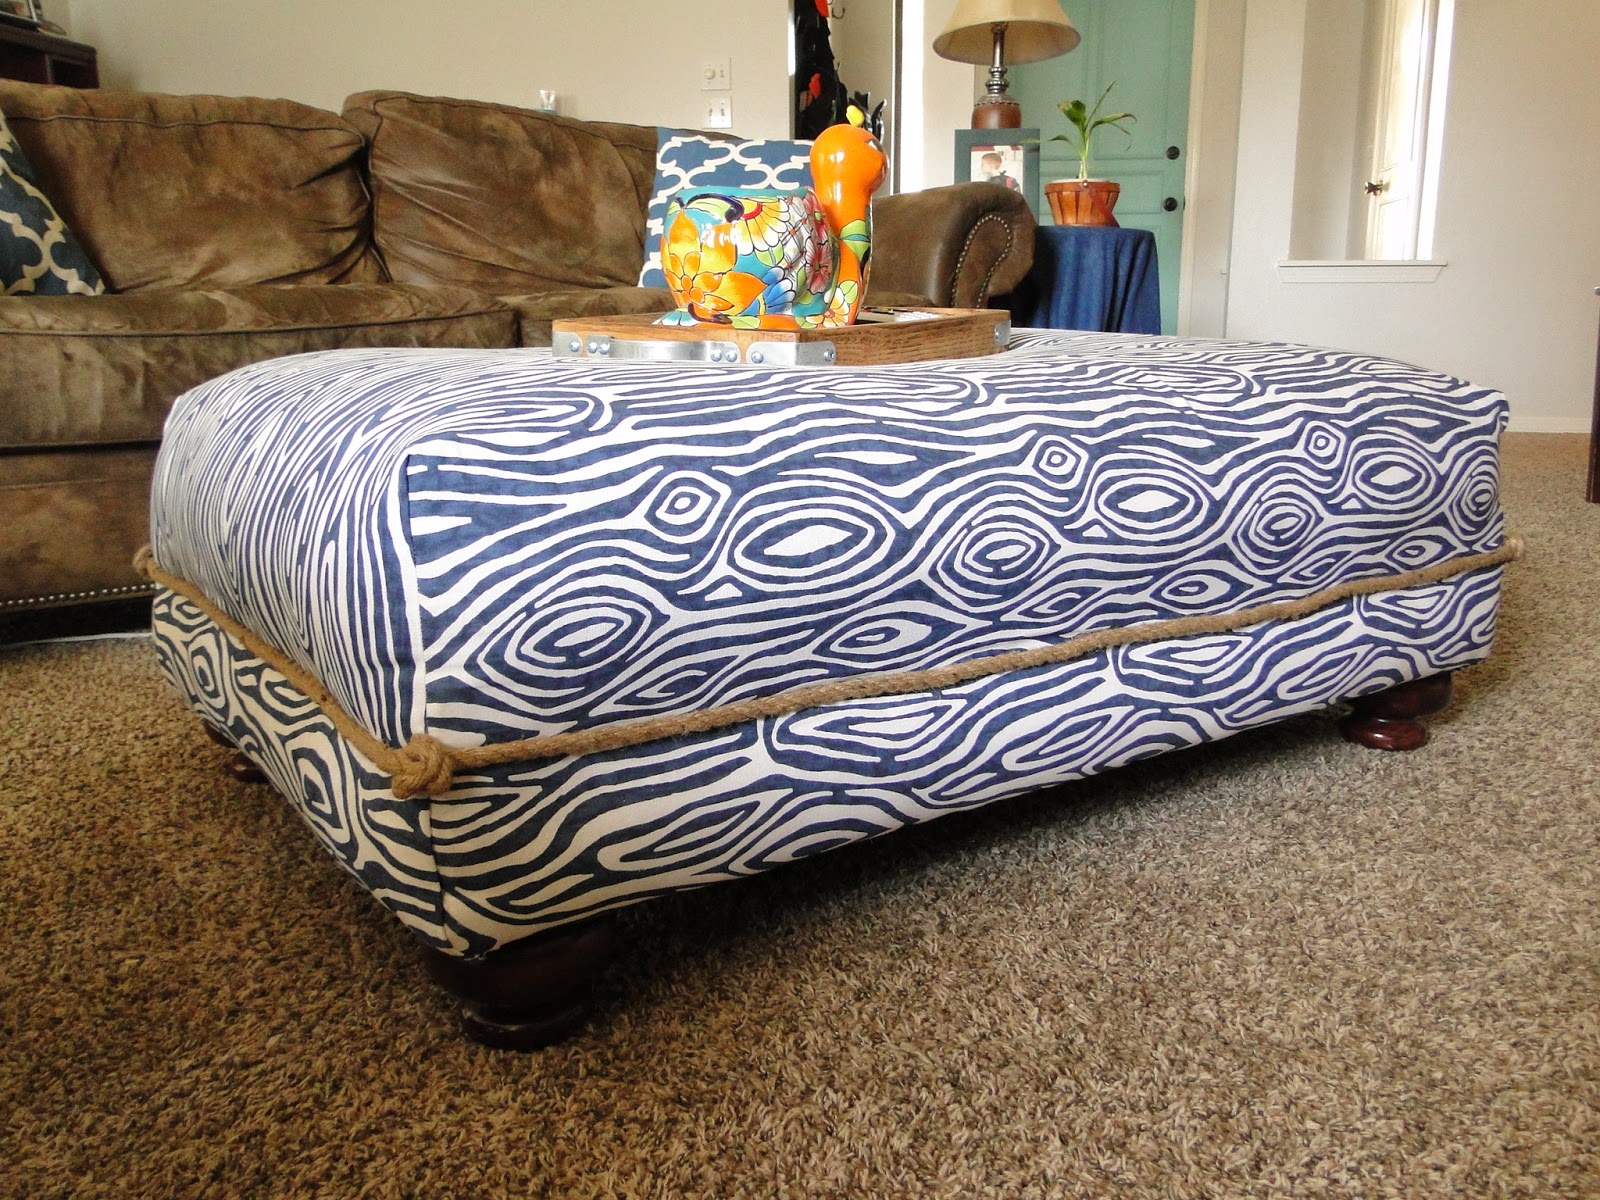
One more project crossed off the list on my way to my dream family room!!

 photo Blessingssignature_zps514a1303.png

 photo Namesignature_zpsd15d2f6d.png

Linking up with Tutorials & Tips Link Party / Show and Tell  / One Project at a Time / Totally Terrific Tuesday / Hit Me With Your Best Shot / Wow Us Wednesdays / Work It Wednesday / Create It Thursday / Share Your Style / Inspiration2 Link Party / Thrifty Thursday / The Creative Circle / March Pretty Preppy Party / Frugal Friday / Link Party Palooza / That DIY Party / Share Your Creativity / Something to Talk About
Previous Post: « Bringing New Life to the Built-Ins (again)
Next Post: DIY Floating Mantel »

Reader Interactions

Comments

  1. pam {simple details} says

    March 17, 2015 at 12:47 pm

    Oh wow, Denise that turned out so great! I love, love, love your fabric choice!

    Reply
  2. Heather Clamp says

    March 17, 2015 at 2:00 pm

    You had the vision, Denise! It's such a fun ottoman now. Like the rope idea!

    Reply
  3. Karen @ karensuponthehill says

    March 17, 2015 at 9:04 pm

    What a great transformation! I have 2 that are sitting in the basement that I should try this on! Thanks for the tutorial!
    I would love for you to stop by my blog and join our Something to Talk About link party!
    Have a great day!
    Karen

    Reply
  4. Jennifer @ Dimples and Tangles says

    March 19, 2015 at 2:26 pm

    Fantastic! What a great before and after. The rope is a great touch!

    Reply
  5. Stephanie Kent says

    March 19, 2015 at 3:23 pm

    What a great makeover! The rope is very cool. So nautical!

    Stephanie @ http://www.thestyledsoul.com

    Reply
  6. the cape on the corner says

    March 19, 2015 at 5:34 pm

    i love that fabric, and the rope detail makes it!
    b

    Reply
  7. Cindy DIYbeautify says

    March 21, 2015 at 12:30 am

    What a fabulous makeover! Definitely a diamond in the rough!!

    Reply
  8. Cindy DIYbeautify says

    March 21, 2015 at 12:30 am

    What a fabulous makeover! Definitely a diamond in the rough!!

    Reply
  9. Cindy DIYbeautify says

    March 21, 2015 at 12:30 am

    What a fabulous makeover! Definitely a diamond in the rough!!

    Reply
  10. On Being Bianca ... says

    March 24, 2015 at 6:01 pm

    The rope just makes it, what a smart addition. I love this re-do. Thanks for sharing over at the Pretty Preppy Party! xx, b @ being-blanca.com

    Reply
  11. On Being Bianca ... says

    March 24, 2015 at 6:19 pm

    Oh, and I'd love to feature your project this week as part of our monthly series – check in on Thursday to see it 😉

    Reply
  12. Julie says

    March 24, 2015 at 8:10 pm

    Way to bring a piece back to life! Great job!

    Reply
  13. Sharon Erickson says

    March 25, 2015 at 1:25 am

    You chose the best colors for this! I love it! Pinning! Thanks for sharing this at Totally Terrific Tuesday last week. I can't wait to see what you have lined up for this week!

    Sharon
    Her Organized Chaos

    Reply
  14. Kathy Baugher says

    March 26, 2015 at 6:43 am

    I love that fabric and what an easy way to repurpose without having to do a complete re-upholstery. Thanks for sharing at THe Creative Circle .

    Reply

Leave a Reply Cancel reply

Your email address will not be published. Required fields are marked *

Recipe Rating


This site uses Akismet to reduce spam. Learn how your comment data is processed.

Primary Sidebar

Welcome

Hey friend!! I'm so glad you stopped by today!! I am married to the love of my life and I have been blessed with four amazing kids. My life is kinda crazy some days and I feel frazzled often. But, Jesus brings me JOY each and everyday in the little things. I love everything home decor, DIY, and crafts!!
Read More…

Categories

Archives

Copyright

I share to inspire!! Please feel free to use and share my ideas!! I simply ask that you give credit back to my site and add a link back to my blog if you reference one of my projects, or photos. Thank you so much!!

Recent Posts

  • Empty Nesting, My Thoughts
  • Kitchen Cabinet Facelift
  • Just Popping In To Say “HI”
  • Knock, Knock….Anyone There?
  • Easter Tablescape 2022
  • CONTACT ME
  • DISCLOSURES

Footer

Hubby and I took a little trip to Colorado Springs Hubby and I took a little trip to Colorado Springs and had the best time! ❤️ We took off as the sun was rising in OKC and landed in the mountains! 🥰 It was so good to get away together! We hit all the high points (pun intended haha) - Royal Gorge, Pikes Peak, Garden of the Gods, and Seven Bridges. We hiked everyday! Can’t wait for our next adventure!! 🥰
.
#emptynestingrocks #travel #marriage #emptynesterlife❤️
31 years with my favorite! So thankful for you! ❤️ 31 years with my favorite! So thankful for you! ❤️❤️ #marriage #anniversary #growingoldtogether
Our baby graduated from college last night!! From Our baby graduated from college last night!! From our alma mater! 🧡🖤 We are feeling beyond blessed and are so loving this stage of parenting! Watching our adult kids live life well is truly remarkable! God has big plans for you Gavin and we can’t wait to watch him work in and through you! Love you!
Happy Resurrection Day!! He is risen!! Happy Resurrection Day!! He is risen!!
Haven’t shared something from my house in months! Haven’t shared something from my house in months! Just refreshed our mantle for spring and I love it! So happy that Oklahoma’s weather has finally chilled out and become more springy! ☀️🌸🌺
.
#homedecor #ourhome #spring #springismyfavorite #springdecor
One month of being Gigi and Pops to this precious One month of being Gigi and Pops to this precious little blessing!! 💕 We love you so much Blair!!
Five more sleeps! ❤️🎄 Nothing better than twinkle Five more sleeps! ❤️🎄 Nothing better than twinkle lights on a Christmas tree ✨☺️ Looking forward to all the family festivities over the next few days. Merry Christmas to you all!! 
.
#christmas #christmastree #christmasdecor #christmaslights #merrychristmas
32 years ago today I made one of the best decision 32 years ago today I made one of the best decisions of my life when I said “yes” to marrying this guy. We celebrated our 30th anniversary back in May! We’ve experienced a lot over the years but there’s no one I would rather be doing life with! @vangreenwood you’re my favorite!! ❤️❤️
.
#marriage #proposalanniversary #youremyfavorite
I really enjoyed decorating my new kitchen shelves I really enjoyed decorating my new kitchen shelves for Christmas! What’s your favorite spot to decorate? I really like to spread out Christmas décor throughout the house! 🎄❤️
.
#homedecor #christmasdecor #christmas #itsbeginningtolookalotlikechristmas #favoritetimeofyear
Follow on Instagram

Copyright © 2025 · Captivating Theme on Genesis Framework · WordPress · Log in